If this is your first visit, be sure to
check out the FAQ by clicking the
link above. You may have to register
before you can post: click the register link above to proceed. To start viewing messages,
select the forum that you want to visit from the selection below.
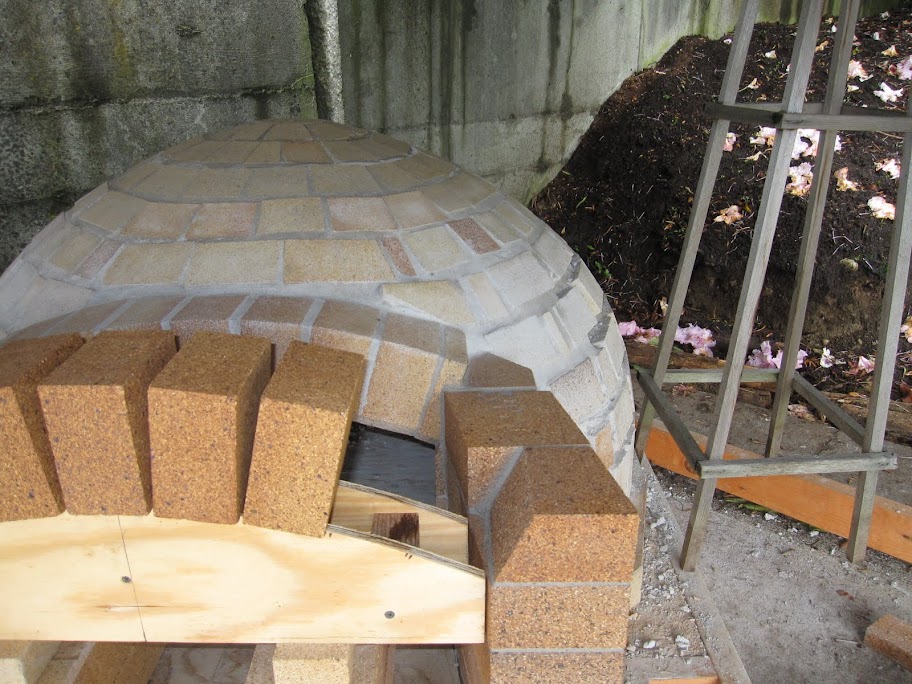
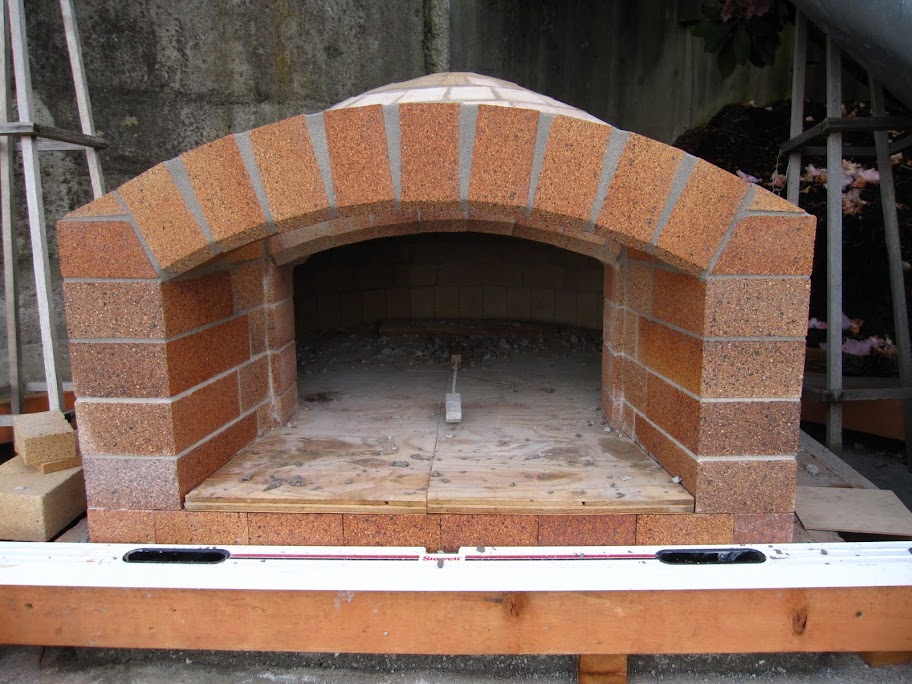
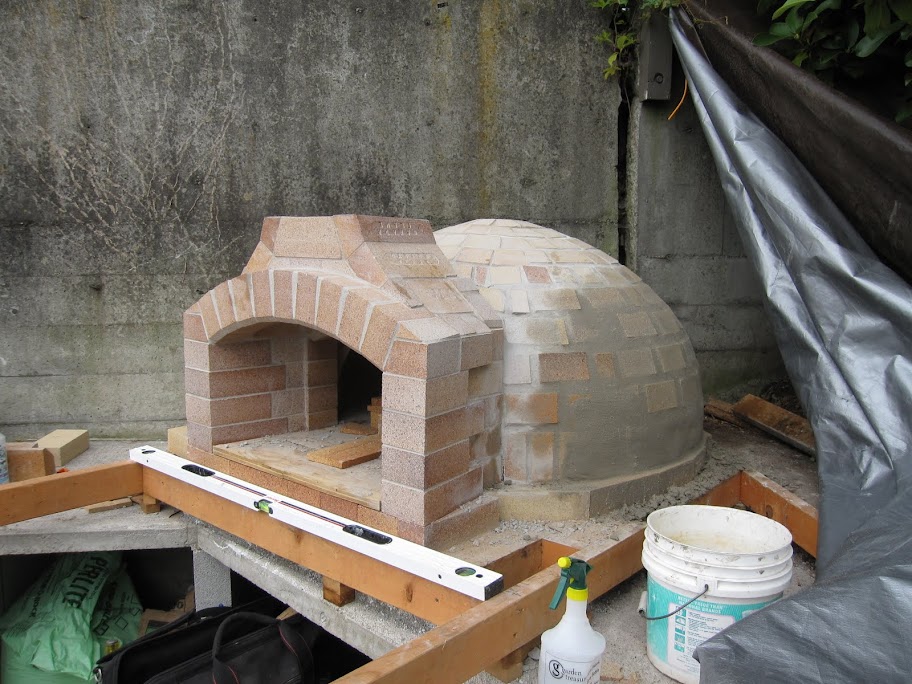
Built up the sides of the landing this weekend, and then got the front arch setup yesterday.
After thinking about a number of different ways to join the arch to the angle of the sides, I decided to keep it simple and just cut off a brick on top of the sides.
Ideally the width of the opening would have been 1/2" smaller (22 1/2" vs. 23") to keep the gaps between bricks down a bit, but figured I didn't want to try to start cutting bricks to fit. Ended up using 9 full width bricks across the arch.
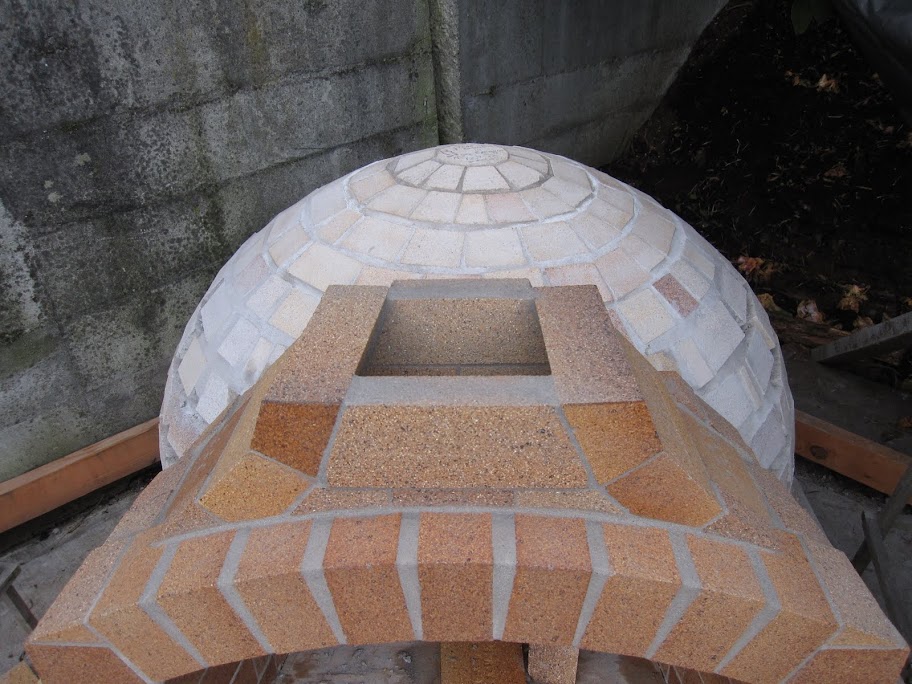
Now onto the flue and finishing. If anyone has any chimney tips please pass them along - I'll be sorting through pics and plans again now
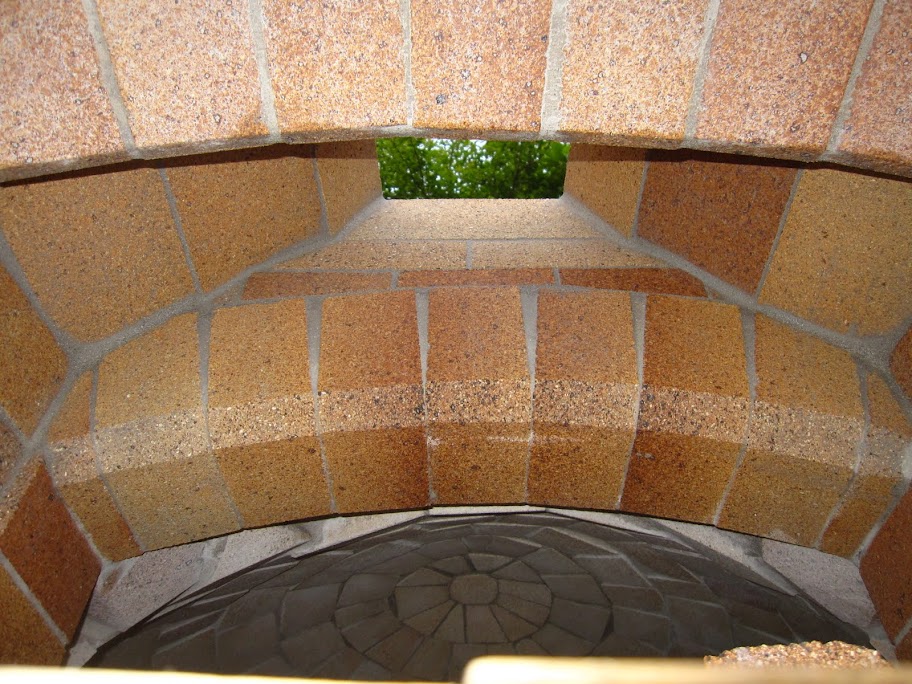
Spent some time last weekend looking at various flue pics - glad to have so many builds and pics to get ideas from! Started off thinking I would build a front and back on top of the arches, and then angle bricks between them. Was concerned that the bricks between the front and back would not have anything to hold themselves up, so ended up cutting the bricks so that they overlapped the front and back arch.
Planning on topping this with a 6" DuraVent flue and then some insulation, wire mesh, and SBC over the top of the dome to keep it weather tight (I hope).
I ended up using ~180 firebricks and just shy of 3 bags of HeatStop 50.
That's a great flue transition. It's surprisingly difficult to get that center arch brick centered, and it looks like you nailed it not once but twice. Good job.
Guys - thanks a bunch for the feedback - I certainly appreciate it! It has been a LOT of fun and don't think I ever could have done it without the Forno Bravo forums and everyone on here.
@woodchuckdad - I think at the end of the day both our ovens will cook pizza. Especially when you consider that you won't even see 90% of our work after they are enclosed (that's why I didn't bother fully mortaring my lower brick courses). Looking forward to seeing more of your progress - you should be closing the dome soon.
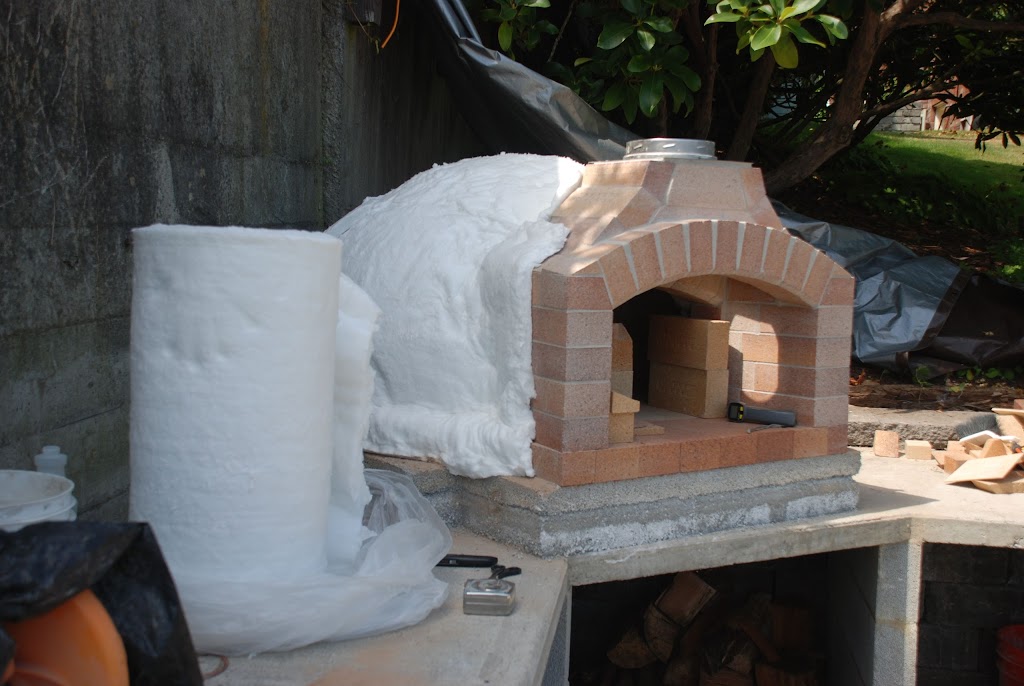
On to the insulation and igloo - anyone have any opinions on 2" vs. 3" of insulation? Or maybe 3-4" on the top and 2" around the sides?
Tfasz,
Very nice brick work on the vent/flue transition. If I were you I wouldn't want to cover it up, but thats the rub- if you don't cover it up you don't eat pizza. Great work!!
I used 3" of FB blanket and it insulates like a champ. The dome inside can be 1000 degrees and the outside top of the dome is 10 degrees above ambient.
Enjoy,
Eric
@eprante and @stevep - Thanks for the comments. Yeah - bummer to cover up the bricks but looking forward to cooking some pizza!
No real progress for me the past 3 weeks. Was out of town for a couple of weekends and then catching up on other house/yard projects last weekend. Getting back in the swing of things this week - ordered my DuraVent chimney components and got my insulating blanket today. Now I just need to get the rest of my igloo stucco supplies in place.
I'm starting to cut it close with my plan to be cooking pizza in early August. Going to keep moving forward and cross my fingers.
Totally awesome vent transition tfasz. One of the cleanest, most symmetrical I've seen. But more so, really well angled-transitioned. I love the bevel across the front edge of both arches.
I went with 3" FB blanket on top and 2 around the sides but I needed (wanted) extra left over to wrap the lower vent/transition area and stuff some between my metal bits. I think you are doing igloo style? Should look great.
Thanks for posting, I think when folks on this forum post these pics, especially what we think is difficult or hard to "wrap-your-head-around", like vent transitions, it makes it so much easier for the next builder.
Cheers, Dino
"Life is a banquet and most poor sons-of-bitches are starving to death." -Auntie Mame
Dino - I struggled a bit with different approaches but I like the how the bricks span between the front and inner arch - don't think I'll have to worry about those falling into the oven when it starts getting hot in there.
I got 2x50 sq. ft. rolls of superwool for the insulation. Hoping that gives me enough for 2-3" on the sides and 4" on top. That will be the project for next weekend. Then yes, I'm planning on stucco over the top of that for an igloo.
I'll also be back to ask some questions on forming a concrete counter top in front like you did. Have to figure out how to tie that into the existing base platform.
Per some feedback in this thread (http://www.fornobravo.com/forum/f28/...e-i-13418.html), went ahead and made some home brew mortar and filled in the gaps in my lower courses. Once I found hydrated lime the home brew mortar was pretty simple to mix and fill. Definitely cures a bit differently than the HeatStop 50 (seems a lot harder after 12 hours) and not quite as easy to work with.
Haven't posted in a while, but have been making progress on getting a working pizza oven. The weather has been fantastic in Seattle and I managed to get the insulation on the oven last weekend. Then I worked a bit on the finishing touches around the front of the oven for attaching the wire lath and doing some perlite/cement combo around the front entry way.
Also managed to pick up some firewood from someone in the area who had some old firewood they wanted to get rid of.
Still hoping to have things in order and ready for our summer party in a couple of weeks.
Insulation goes on easily.
Having a strap makes attaching the lath a lot easier. Combination of zip ties and some copper wire twisted between joints.
And I stared the curing this weekend. 24 hours with a work lamp inside brought it from ~65 degrees up to 120. Then had a day of some newspaper fires and started with some small wood fires today bringing it up to 250 degrees. Might try some lump wood charcoal tomorrow to see if I can keep a little longer consistent fire.
Having the bricks in the opening is a great way to control the intensity of the fire. I can just move a brick over the opening and fire dies down almost instantly if it is getting out of hand.
Looking forward to some hot pizza in the near future.
 Tweet
Tweet


Comment