Announcement

Collapse
No announcement yet.

Another UK oven started

Collapse
X
 
  • Filter
  • Time
  • Show
Clear All
new posts

  • Carl
    replied
    Re: Another UK oven started

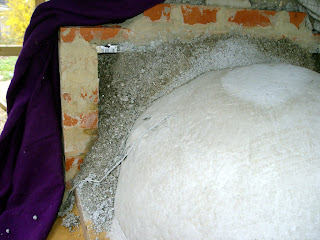
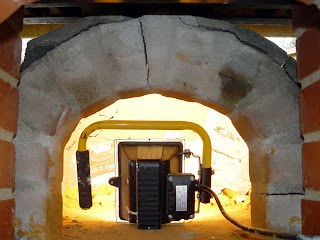
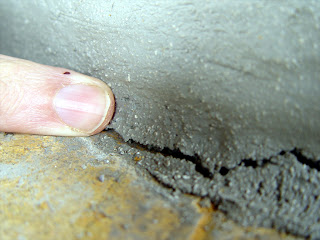
    Well, it's just had another 3 weeks with 500W halogen to dry, thanks to not getting time to work on it... No more cracks, so good news.

    I filled the gap between the back of the chimney and the dome with vermiculite concrete - notice that the centre of the oven dome has got pretty hot with the halogen light and has gone very pale (no cracks, but far too hot to touch!).


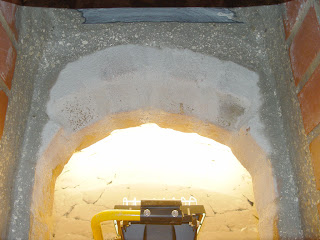
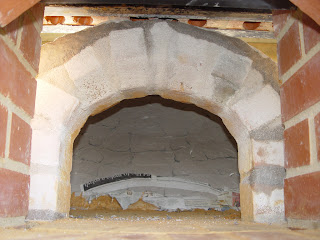
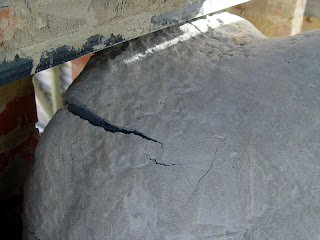
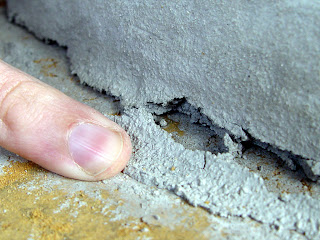
    I then filled all of the gaps round the oven entry arch with an insulating mix (my own recipe: 5 parts vermiculite, 2 parts fireclay, 1/2 part Portland, 1 part sodium silicate). This was a very sticky mix that set hard within a couple of hours.


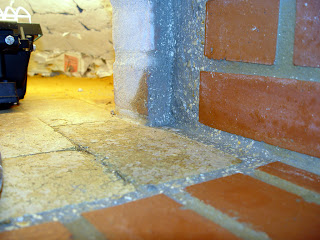
    This mix is the flecked gray stuff you can see in the picture above. This was great stuff for filling all those awkward gaps - just mould a ball of it and shove it in.


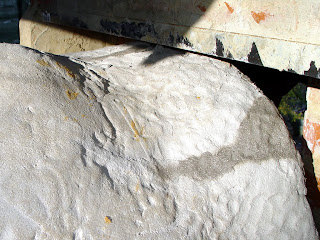
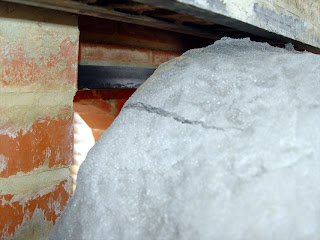
    I also used this mix to smooth off the transition between the rectangular brick chimney and the round chimney flue:


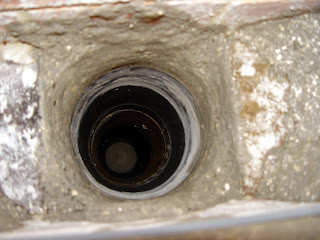
    This gets rid of lots of sharp edges and corners - hopefully the smoke will want to go upwards even more now...

    Leave a comment:


  • gjbingham
    replied
    Re: Another UK oven started

    Written on a block of wood. A man after my own heart. You probably burned that piece already.

    Nice take on the pizza oven Carl. You certainly made it your own.

    Leave a comment:


  • TBM66
    replied
    Re: Another UK oven started

    Being a newbie I hesitate to make any suggestions.....but here it is. I think it may be easier to keep a couple of charcoal brickettes going than wood.

    A tin can with holes around the bottom of outside wall of the can for draught would do the trick. use a bit of metal over the mouth to control tempurature

    Just a thot

    Leave a comment:


  • Carl
    replied
    Re: Another UK oven started

    Hmm, now where did I put those thermocouples. Off the top of my head (typically for me, it's written on a lump of wood next to the oven...) I think I think I've got 6:

    - about 1/2" from the inside of the dome, about half way up on the side
    - 2" into the dome (i.e. in the middle of the clay), about half way up
    - on the outside of the dome , covered with about 1/4" clay to hold it there
    - 1 " from the surface of the centre firebrick in the hearth
    - under the insulating AAC block
    - in the wall of the outer oven, near the door (under the corner of the entry)

    I might have noted it on the blog... You can see the wires coming out of the dome in places.

    The arm test sounds good enough - I shall just try and keep a really small fire going for a day to start. But not yet! :-)

    Leave a comment:


  • james
    replied
    Re: Another UK oven started

    Carl,

    Where are your thermocouples? If they are set back in the dome and floor, the inside of your oven will reach 350?F on the inside, and the outer reaches of the oven will still be room temperature. Alternatively, if your thermocouples are 3" away from the inside of the oven, and they reach 350?F, the inside of your oven will be really hot -- maybe 700?F+.

    You can leave your hand inside a 350?F oven for a pretty long time. Very scientific. :-)
    James

    Leave a comment:


  • Carl
    replied
    Re: Another UK oven started

    Thanks everyone - I'm itching to have a fire in it, but am fighting my urges. It's not easy...

    James - Thanks for the advice - I'll try and use the thermocouples when I'm doing the curing fires to keep the temp below 350F.

    Leave a comment:


  • Frances
    replied
    Re: Another UK oven started

    Very cool oven! I really look forward to hearing how the fires go...

    Leave a comment:


  • james
    replied
    Re: Another UK oven started

    Originally posted by Carl View Post
    Although the dome seems bone dry, I'm now giving it another week with the 500W halogen before playing with fire. Better too dry, than not dry enough...
    Hey Carl,

    Great work. Another week of 500W, then a long, low and slow curing. There is an important transition period where you go hotter than a space warmer, but never let your oven to above 350?F. That will slowly bake the moisture out of your oven without stressing it. With your design, try to shoot for a series of extended days at 300?F-350?F. It's harder to do than it sounds. You have to build a successful, but low fire -- without letting it die out, or get too hot. :-)

    Way to go.
    James

    Leave a comment:


  • Inishta
    replied
    Re: Another UK oven started

    It's looking really good Carl. The whole project is a credit to your determination to build an affordable oven. The blog is well worth a look for those who would like to catch up with the build.

    Leave a comment:


  • Carl
    replied
    Re: Another UK oven started


    I was very pleased with this - there's not a single crack in the main dome, which has stayed intact and contracted as a single piece. I think the gritty grog probably helped - I'm imagining it's like the jagged bits of aggregate in concrete that binds the mix together.

    The cracks were easily repaired using the clay I had spare from the build, which I'd kept wet and bagged up.


    You can see from the view into the dome how I used brick sized lumps of clay when I built it - it's impossible to get the inside face perfectly smooth. I quite like the look through the arch - I had thought it would look messier on the inside than this. The mix has dried to a nice near white colour - not that far off a colour from the newspaper still stuck to the inside. It'll burn out.

    Although the dome seems bone dry, I'm now giving it another week with the 500W halogen before playing with fire. Better too dry, than not dry enough...

    Leave a comment:


  • Carl
    replied
    Re: Another UK oven started

    Well, it's more or less dried now, and I've only cracked up a little...

    I took the sand former out after 24h, and I think this helped a lot as it could contract freely as it dried, and slide freely over the firebrick hearth.

    After 5 days drying I only had cracks around the brick arch...


    ... and around the base of the dome, between the dome and the firebrick ...


    That was after drying with a 100W light bulb inside the dome for 5 days, with outside temperature being about 5-8C ish. I then switched to the 500W halogen work light, and after another 5 days of this the whole dome was toasty and warm, and seems very dry. It rings like a teracotta plant pot when I knock it with my knuckle.

    The only cracks it sustained were on the outside near the entrance arch...


    .. around the base (about 1/2" movement inwards overall) ...


    ... and where the arch had been stressed as the dome shrank as it dried

    Leave a comment:


  • asudavew
    replied
    Re: Another UK oven started

    Originally posted by Carl View Post
    Well, it's still standing! I took all the sand and bricks out of it today, and it's still the same shape and hasn't sagged anywhere. That's a relief.

    It's still very soft, so I've left my 100W light bulb on a flex in the middle of the oven void, and will leave it to dry out. I don't know when to start firing it - but certainly not yet! The clay/grog mix goes a very pale gray when it's dry, so I'll leave for at least a couple of weeks and see how it goes. I don't want to fire too soon and crack it. I'll need to fill the gap between the dome and the chimney too, so I need some patience now.

    Love the idea of this being a firebrick oven, just made of really small firebricks. Made me smile

    When I was doing pottery... some coil pots would take 2 weeks or more to completely dry and they were only about 1/2 inch thick. Any moisture left in clay during firing will cause cracks. But some potters would fire pots at really low temps... say 200f for many hours before cranking up the heat. That eliminated most cracks and explosions.


    So maybe a few weeks of drying. And a less aggressive curing fire regimen than the typical brick oven. Maybe a couple long days of stoking a really, really small fire.

    Do you think you will eventually have to fire it up to a really high temperature to get the clay to vitrify?

    I'm really curious to see how this all works out.

    Good luck and keep the pics coming.
    Quite an enjoyable thread.


    Dave

    Leave a comment:


  • Faz
    replied
    Re: Another UK oven started

    this is looking good! and for someone like me with limited brickie skills it's something I am going to keep an eye on.

    You've got to admit too, that Freecycle is pretty good for general stuff.

    Leave a comment:


  • Carl
    replied
    Re: Another UK oven started

    Well, it's still standing! I took all the sand and bricks out of it today, and it's still the same shape and hasn't sagged anywhere. That's a relief.

    It's still very soft, so I've left my 100W light bulb on a flex in the middle of the oven void, and will leave it to dry out. I don't know when to start firing it - but certainly not yet! The clay/grog mix goes a very pale gray when it's dry, so I'll leave for at least a couple of weeks and see how it goes. I don't want to fire too soon and crack it. I'll need to fill the gap between the dome and the chimney too, so I need some patience now.

    Love the idea of this being a firebrick oven, just made of really small firebricks. Made me smile

    Leave a comment:


  • gjbingham
    replied
    Re: Another UK oven started

    Wow, another interesting variation. Great work Carl. Give that dome a bunch of time to cure.

    Leave a comment:

Working...
X