


-
I don't think you can go wrong with a roof. Even if you could totally waterproof your oven and stand, firing the oven or cooking while standing in the rain does not sound like much fun. We get lots of rain/drizzle here in the Pacific Northwest so the roof was a must for me. -
The design goal is to have my brick dome covered with a natural stone dome. Igloo-style. Originally I was going to leave it exposed to the weather, but I'm leaning towards a roof.
Without a roof I was worried about the top slab saturating and moisture wicking up into the board insulation from underneath. So, possibly for better, and possibly for worse, I used some leftover RedGard to waterproof the top of the slab where the insulation will sit. That'll act as a moisture barrier between the slab and the board insulation.
Got the 4" of board insulation cut and installed, as well as the floor bricks. The dome floor is herringbone pattern, the landing is a running bond pattern.
I dry set the first course of half brick to start the dome. My first two courses will be half-bricks, untapered, and set flat. On the third course I'll start tapering the sides of the brick and tilting them in to start the dome shape.
Got the dome arch template fabricated and installed. The opening is 20" wide and 12-5/8" high. Essentially a 10" radius half-circle raised vertically 2-5/8".
I hope to mix mortar tomorrow. Homebrew, 3:1:1:1.
Tried uploading photos but no luck. Website keeps freezing.Leave a comment:
-
And...I'm back!
It's been a while, my son started a business so a good chunk of my disposable time over the past year went to assisting him.
If weather permits, I'll be starting on the brick dome tomorrow.Leave a comment:
-
Re: Mongo's 42" CT Build
We simul-posted. Thanks.
Laid out the oven footprint on top of the slab and then used a bit of thinset to fill in the low spots, feathering it out as I went.
Does not have to be pristine as the 4" of board insulation will take up most of the minor irregularities.
Leave a comment:
-
Re: Mongo's 42" CT Build
I doubt that you will have any curling on that thick of slab, on that short of distance. But, I would throw that tarp over it as soon as possible, to help keep it evenly hydrated for the cure. It will also help keep it from freezing.
This time of year, I like to space out some wooden slats over a pour. That allows for just a little air space between the tarp and the surface of the concrete.
Great! form work .
Last edited by Gulf; 11-15-2014, 10:39 AM.
.
Last edited by Gulf; 11-15-2014, 10:39 AM.Leave a comment:
-
Re: Mongo's 42" CT Build
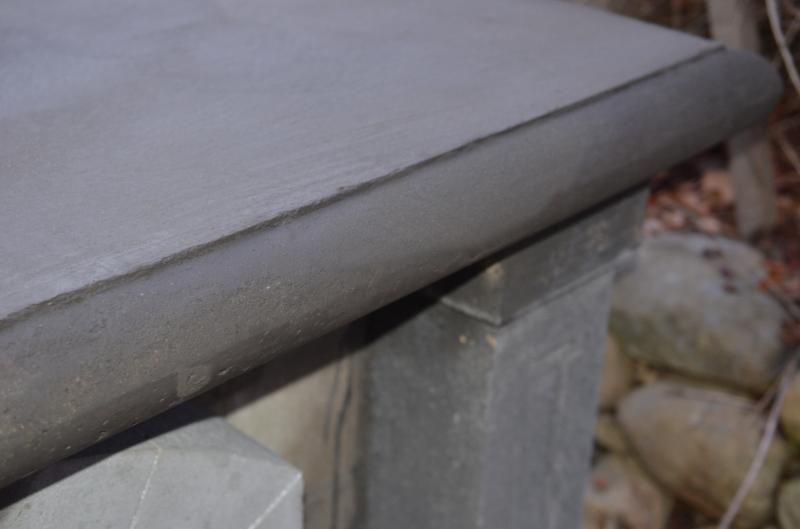
Checked it this morning. The patch looks good.
I still have the support structure in place underneath the slab. I'm figuring I'll leave that in place for a well-hydrated cure. Under the slab is poly sheeting, plywood, then the vertical 2x4 support legs.
I was going to tarp it tomorrow.Last edited by mongota; 03-15-2017, 07:02 PM.Leave a comment:
-
Re: Mongo's 42" CT Build
Nice fix Mongo. I think if you didn't know it was there originally, you would never notice it.Leave a comment:
-
Re: Mongo's 42" CT Build
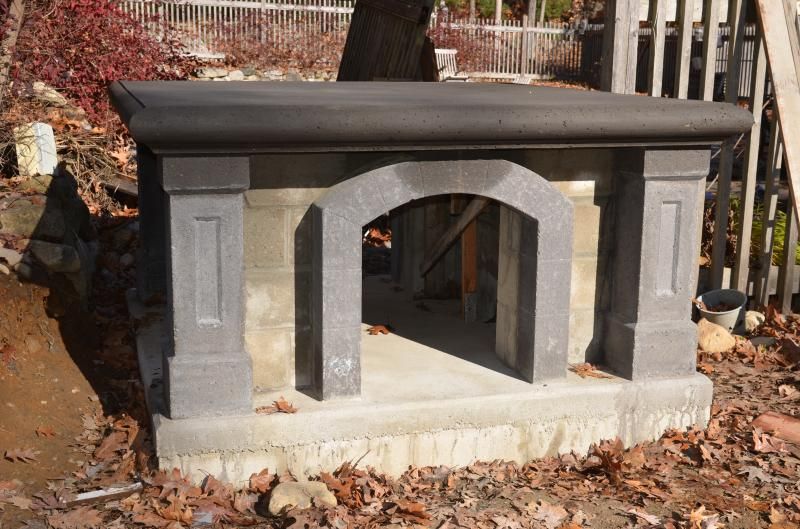
Thanks. I am happy with the overall look.
The patch came out fine.
Any aggregate in the mix would have wreaked havok with feathering out the repair, so I mixed up a little mortar mix and tinted it with pigment. Texturally it may look a little different, but no worries on my end.
I cut a roughly 18" long piece of the 4" PVC off of the form, feathered the sharp edges smooth, and used that as a screed to roughly shape the half-round repair. With the repair fairly well formed, I added another thin veneer of mortar over the shaped patch, then covered the patch with a small piece of plastic, then set the PVC screed back over it, tapped it a bunch of times with a hammer, and braced the PVC in place to act as a bit of a form to prevent the mortar patch from slumping.
While that was setting, I worked my way around the perimeter and did a little void-filling. Eventually worked my way back to the patch, pulled off the PVC form and the plastic, and it looked surprisingly good.
First the void:
Then the patch. It was dusk when I took this shot so the camera had a little trouble focusing, so it looks a little weird, even with the flash:
 Last edited by mongota; 03-15-2017, 07:00 PM.
Leave a comment:
-
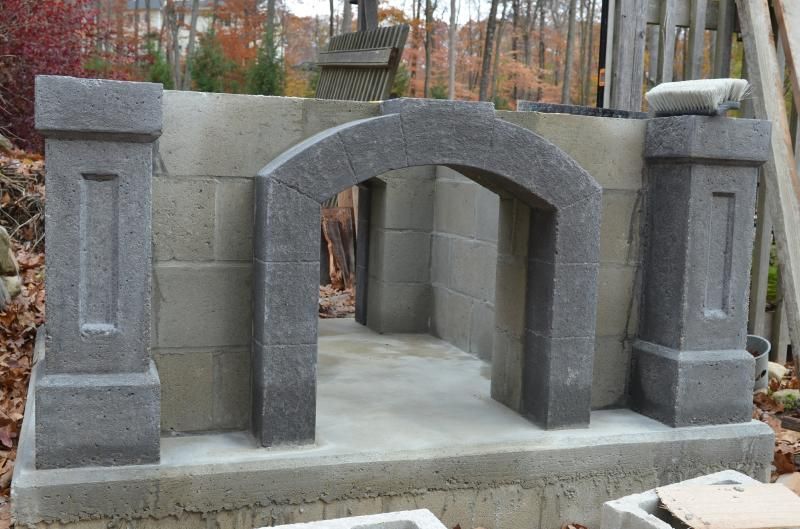
Re: Mongo's 42" CT Build
Overall I would say it came out great. I really like the edge profile you did, and the corner pillars are awesome. As anyone that works with concrete on a regular basis knows, It happens. I have on several occasions thought to my self "Man that pour went great" only to pull the forms and go "WHAT the HECK" . Can't wait to see what you do next.
P.S. This early winter weather is the Pits, I still need a good 4-5 days of no freezing night time temps to finish mine.Leave a comment:
-
Re: Mongo's 42" CT Build
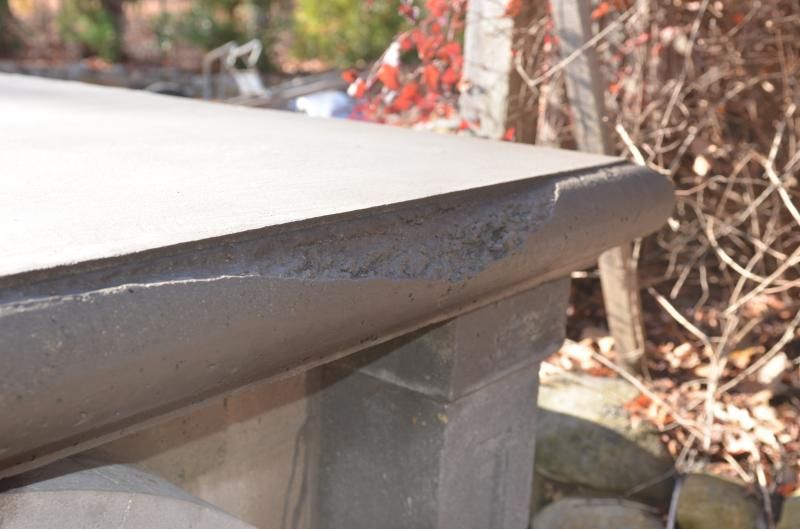
I'll have to title this post "The Good, the Bad, and The Ugly".
The Good? The idea of using the Schedule 40 PVC to make the ogee edge of the hearth cap slab. Worked out well. Easy to fabricate, easy to assemble.
The Bad? Planning the pour. I wanted to get the pour done before a cold snap was scheduled to hit town. I finished the form late in the day and didn't start mixing concrete until just before sunset. The slab plus filling the CMU cores was about a 39 bag pour, and I was mixing by hand. I finished a couple of hours after sunset using some halogen lights to light up the work site.
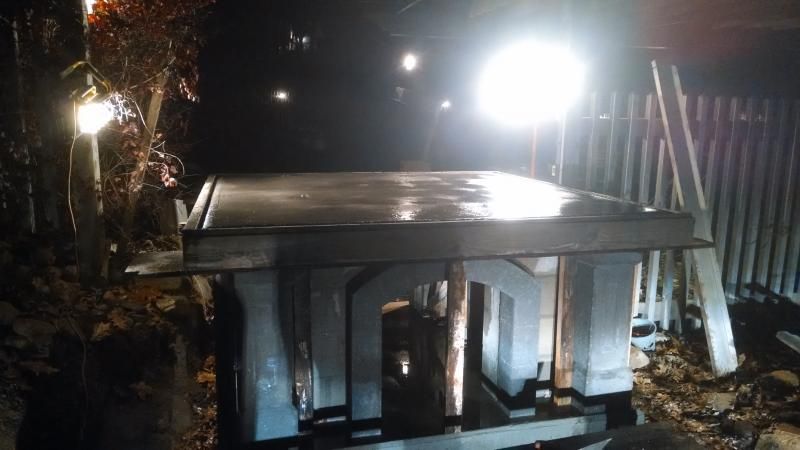
Overall the pour went well. The form held up fine. No form blowouts, no real negative issues. I think I worked at a pretty good pace. The slab as a whole? Here you go, first an overall shot:
A close up of the bullnose corner:
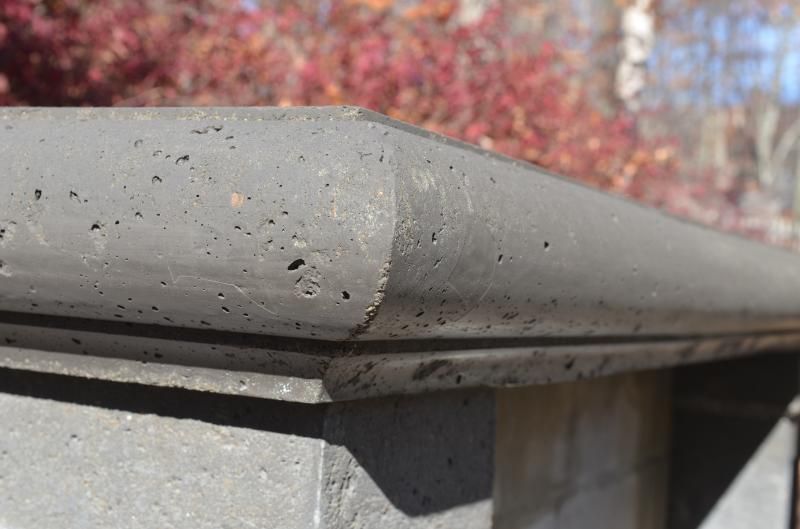
Overall not too bad. Some voids, which I wanted. I'll slurry fill them later on. Ah...but what about The Ugly? Well, here you go:
The Ugly?: The strange part is that this happened right where I finished the pour for the entire slab. The mix had great workability. As I was finishing up I was thinking it was almost too loose. When I was placing it, I'd use my margin trowel to work the mix into the PVC ogee. But apparently not here. The weird thing is that when I vibrated the form by banging the outside with a 2-lb hammer, it didn't "collapse" in this section to fill the PVC.
Grrrr.
To add insult to self-induced injury, this is the FRONT edge of my slab!
Overall I'm happy. But geez.
Oh well. I'm gonna go out and mix up a small batch of pigmented mortar and do a little fill work.Leave a comment:
-
Re: Mongo's 42" CT Build
Thanks Tony.
The pour went well. The slab is 5-1/2" thick and about 80" square, and I wanted to color the concrete, so to save on pigment I was running two batches of mix; pigmented for the edges of the slab and unpigmented for the core of the slab.
I ended up using PVC to make the covered bullnose edge. Took a length of 2" PVC schedule 40 pipe and ran it through the table saw to rip it into quarter-circles. Took a length of 4" PVC and ripped it in half. The forms went together okay, and the mitered corners seemed good and tight.
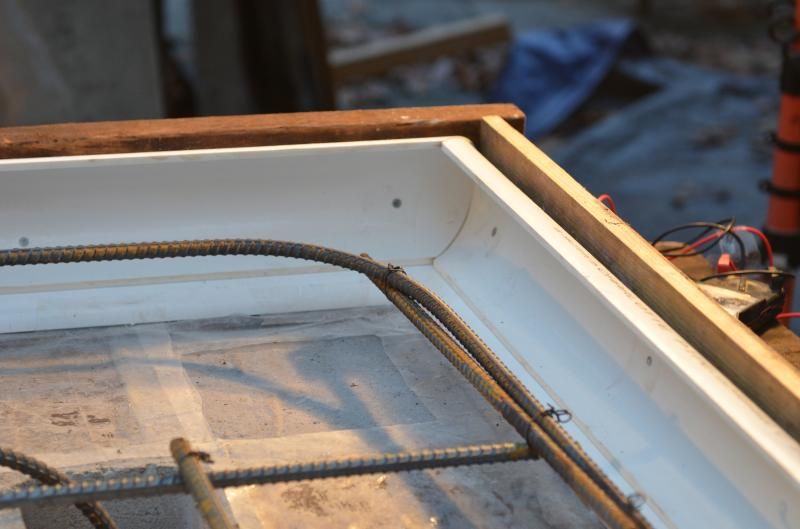
I didn't get started mixing until just before sunset, so I had the work lights set up outside and finished up in the dark. It was a little chilly out last night, it took about 4 or 5 hours before enough water had bled off enough to hit it with a trowel. I think I did the final troweling sometime between 11pm and midnight!
The ringing of the metal trowel on concrete coupled with the howls of the coyotes made for some interesting night music.Last edited by mongota; 08-03-2018, 08:05 PM.Leave a comment:
-
Re: Mongo's 42" CT Build
Welcome back! Looking really awesome. Wish you the best on getting all that concrete mixed for the hearth slab, that and a small pile of ibuprofen..Leave a comment:
-
Re: Mongo's 42" CT Build
Been away for a bit, I'm back in the oven construction business for a few days.
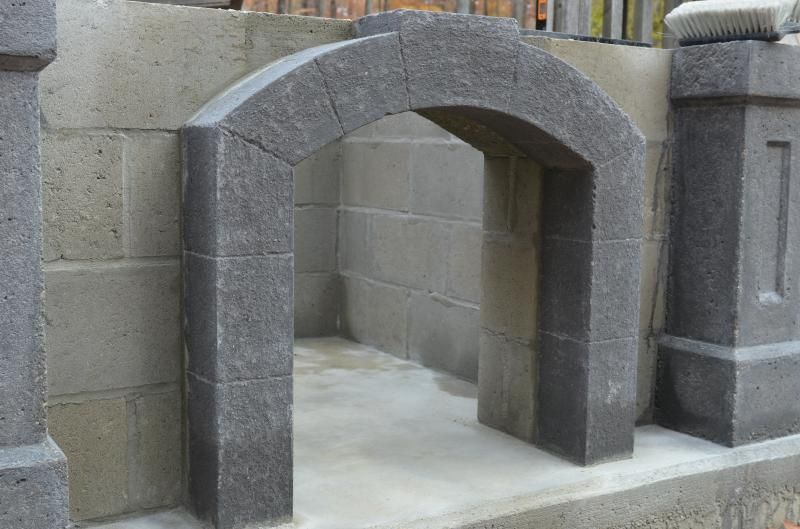
After casting the arches, I let them cure for a few weeks. A couple of days ago I cast the lintels over the hearth doorways. It was raining when I did it, so no photos.
Yesterday I stood the arches up and mortared them in place.
Today is supposed to be fairly warm before more rain and cold arrive, so I'm going to try to form up and cast my hearth slab today. This pallet should be empty when I'm done. I calculated about 40 bags for the slab.
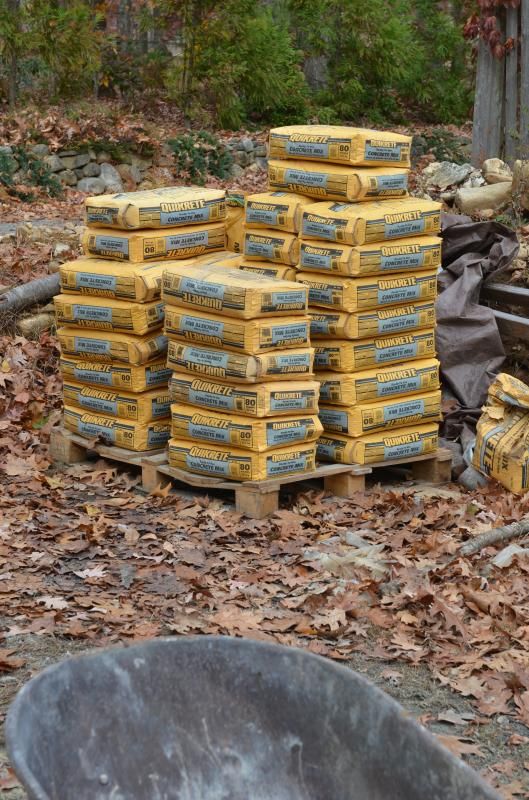
Gonna be a bit of a day with the wheelbarrow and mason's hoe.Last edited by mongota; 03-15-2017, 06:56 PM.Leave a comment:
-
Re: Mongo's 42" CT Build
This will be my last post for a while. I'll be on the road for a bit, plus I need the arches to cure before I move them.
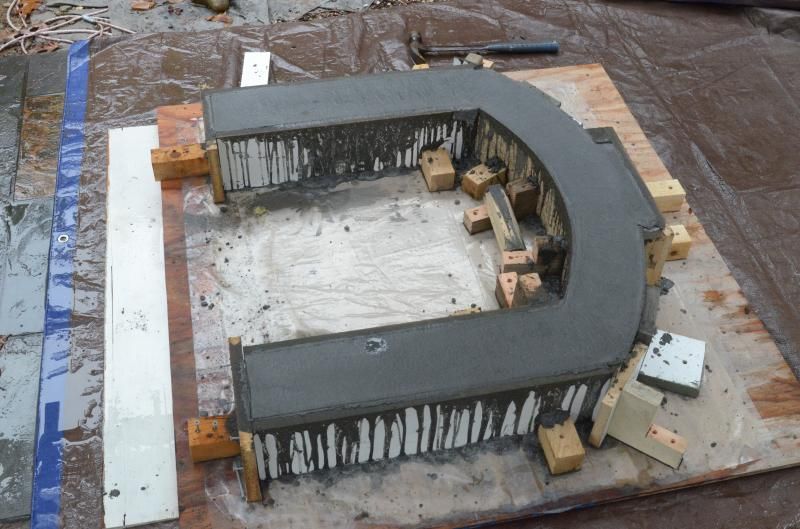
Arch in the form:
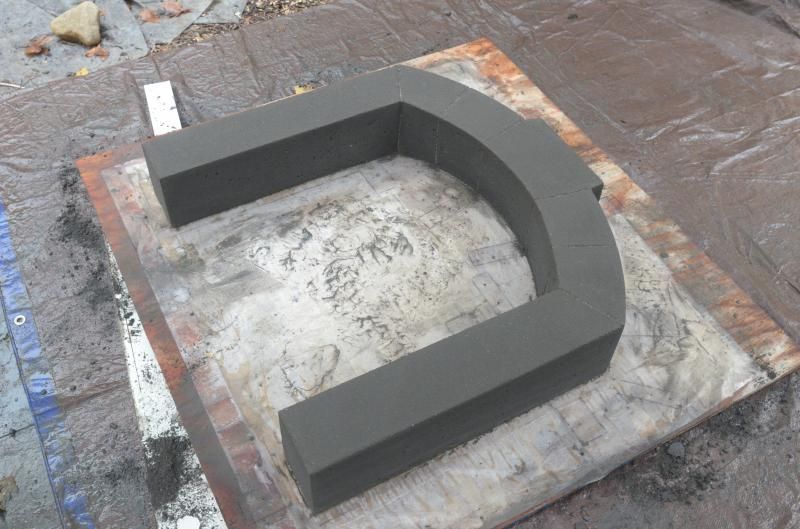
Arch out of the form:
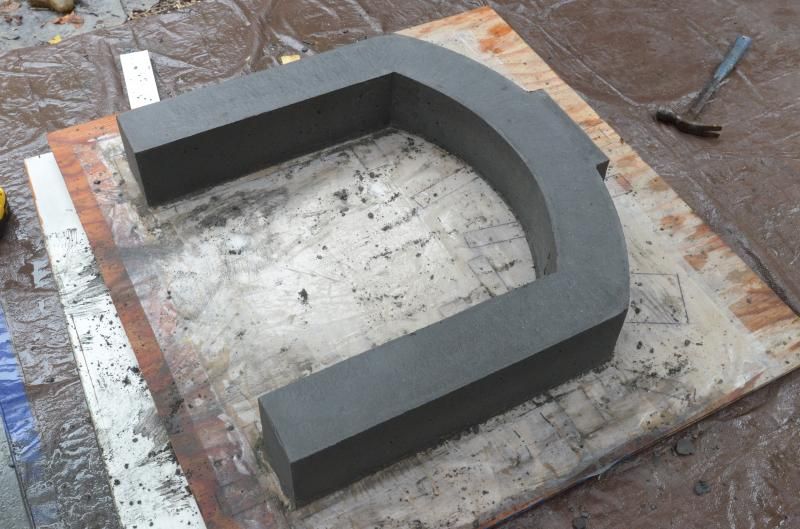
These were pretty hard to wire brush. Couldn't take off as much cream as I could with the pillars. But they are what they are.
 Last edited by mongota; 03-15-2017, 06:54 PM.
Leave a comment:
-
Re: Mongo's 42" CT Build
Kind of an "oh crap!" moment today.
I built the form for casting the arches that will surround my hearth doors. Got distracted by family life in the middle of it all. Then realized the sun was going down and if I'm going to mix the concrete I'd better get on it pronto.
I'm casting this with the form flat on the my pool patio. I'll strip the form tomorrow and let it cure/strengthen in place for a few weeks before I stand it up and set it against the hearth.
It was a 3-bag mix of Quikrete with one bottle of concrete colorant. All went well with the pour. I just finished cleaning up my tools and started to walk off when I saw my two 10-foot lengths of rebar laying on the ground.
Egads.
I don't think I've ever bent 1/2" rebar this quickly. Shaped the first while holding it over the form. Cut the excess length away. Then used the first piece as a pattern for the second.
I set the first piece on the still slightly loose mix and used my hammer and a piece of wood to pound it about 4" deep into the 6" thick mix. I then moved the concrete around with my trowel and pushed the second rebar about 2" deep into the mix. "Massaged" the concrete again, troweled it again, then walked away.
It all looked okay in the end, but things were hectic for about 10 minutes.
Just came in from giving it a hard once-over with my trowel. Looks good, at least what I can see. Fingers crossed tomorrow when I take the form apart. I think the rebar stayed pretty much centered in the form.Last edited by mongota; 10-16-2014, 06:18 AM.Leave a comment:
Leave a comment: