Originally posted by mongota
View Post


-
Re: Mongo's 42" CT Build
Essex is a nice town, how are the leaves this year? Good idea to fill those holes, It'd be a shame to have the columns get ruined from freeze thaw. -
Re: Mongo's 42" CT Build
Mongo,Originally posted by mongota View Post
Thanks for the compliments. I actually have two doors for the inner arch. One is insulated and the other is just a single sheet of carbon steel. I have an unisulated blast door with a thermometer that can be used both inside the entry and outside. I do have what I call a storm door, also. But, it is only for closing the oven up from the weather.
The damper was fun to build. And I do use it some times, along with the blast door, to help regulate the temperature of the vent area. My thoughts were that, it would help me with that, and also for smoking meats. For the most part though, the damper stays wide open. I'm glad that I took the time to include the damper. I will keep playing with it, as it does help make the oven a little more versatile. But, I can't say that I would recommend for someone else to include one in theirs. In my yard alone, there are too many other smokers and grills for me too tie up the oven with that for very long .
.
PS: Some great progress going on there! I am a fairly patient man. Lets see if you are .
Last edited by Gulf; 10-12-2014, 05:58 PM.
.
Last edited by Gulf; 10-12-2014, 05:58 PM.Leave a comment:
-
Re: Mongo's 42" CT Build
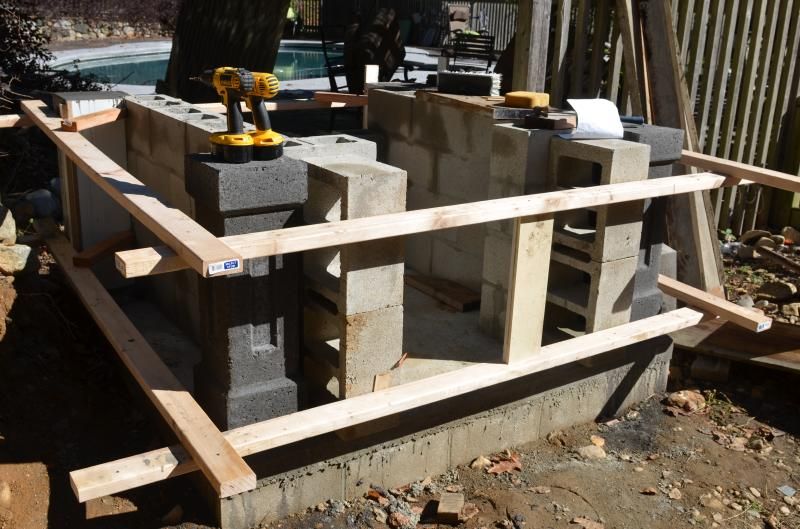
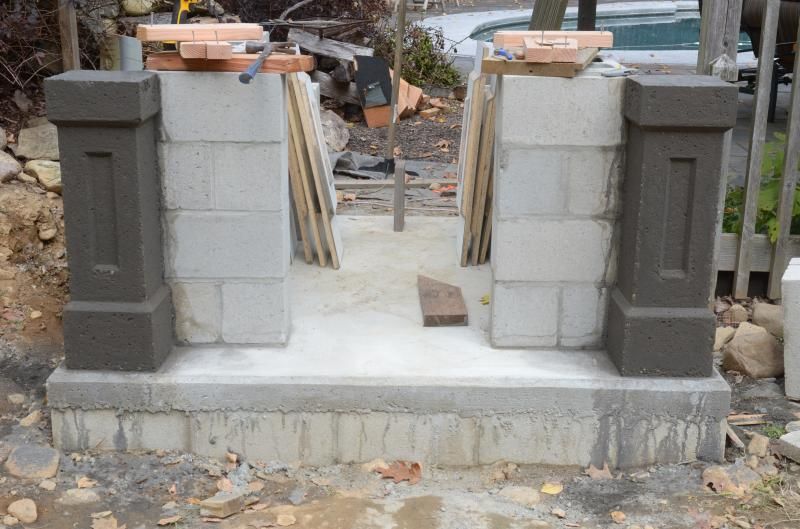
Well, I sort of cheated my own schedule the other day, which made the previous day a bit more productive than I thought it'd be.
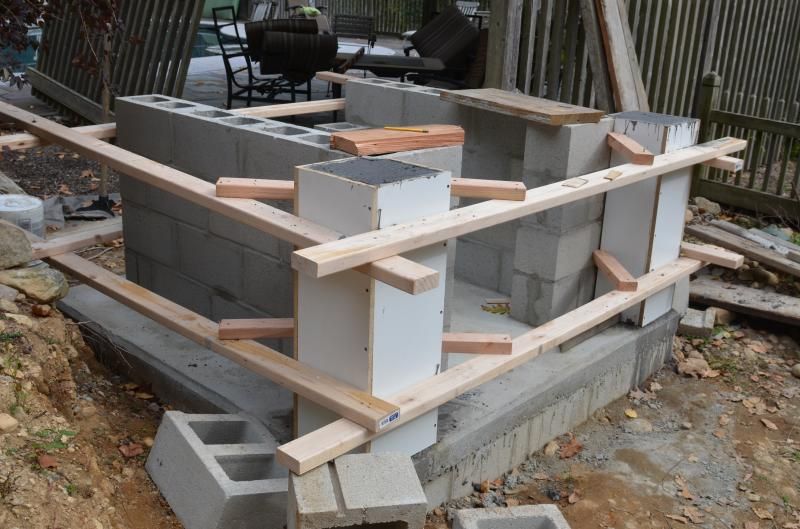
Because the bracing for my corner pillar forms wraps around my entire hearth, I figured after I took the forms off of my first two corner pillars I'd have to wait a few days for them to cure before I used the pillars themselves as support for the forms for casting the third and fourth pillars.
While I was cleaning up after that first pour I realized I had four 12" CMUs that, when stacked next to the just unformed pillars, would act as standoffs for the form bracing. So I cleaned up my pillar forms, screwed them back together, and cast the other two pillars.
 Last edited by mongota; 10-12-2014, 12:59 PM.
Leave a comment:
-
Re: Mongo's 42" CT Build
Well, you're going to have to be a patient man! I'm doing the hearth this fall but I don't plan on doing the brick dome and stone igloo enclosure until spring.Originally posted by Gulf View Post
I just went through your Picasa album. "Wow". "WOW!" The level of planning and detail, the skill of execution? I'm thoroughly impressed. I really like what you did with the cast concrete work and with the insets, etc. Very, very nice. Your finish materials, everything coordinates so well. I really like the wrapping of the scissor trusses. It's layer upon layer nicely executed detail.Originally posted by Gulf View Post
I like how you isolated the dome from the vent area, that's the same idea I'm planning on using.
A question...you have a chimney damper (nice work!) and I see you have both an inner door for the dome arch as well as an outer door for the outer arch. Do you close the damper and use the outer door to cook (the sausage photo) in the arch transition area too?
Best, MongoLeave a comment:
-
Re: Mongo's 42" CT Build
Mongo,
Great looking work! I'm looking forward to the finale.
I did something a little similar on some corbels and a decorative keystone. I did not fill the voids. I did like the weatherd look, but I did not like the final color. I thinned some liquid charcaol cement color and brushed it in to add a little more color. I wiped it back down with a wet cloth to clean the aggregate. Later, I sealed it all with a flat acrylic masonry sealer.
Last edited by Gulf; 10-12-2014, 09:44 AM.Leave a comment:
-
Re: Mongo's 42" CT Build
Matt, I'm in Essex.
The voids will be filled with a slurry sometime down the road, I want to do the treatment at the same time to maintain a fairly even shade of charcoal across all treated surfaces. I'll just wait for all four posts and my two arches to be up and cured to their final color. Should end up around a medium gray/charcoal color.
I really can't describe what exact steps I'll do, I'll just do whatever needs to be done to get to where I want it to be.
It's all a big experiment!Last edited by mongota; 08-03-2018, 08:00 PM.Leave a comment:
-
Re: Mongo's 42" CT Build
Nice build! What part of CT are you in?
The pillars look cool, but you should fill those voids or you're going to see spalling after a few winters.Leave a comment:
-
Re: Mongo's 42" CT Build
Those look fantastic if you putting that effort of craftsmanship in this early stage I bet your oven will turn out great! Looking forward to see how they dry keep the pics coming.Leave a comment:
-
Re: Mongo's 42" CT Build
Thank guys.
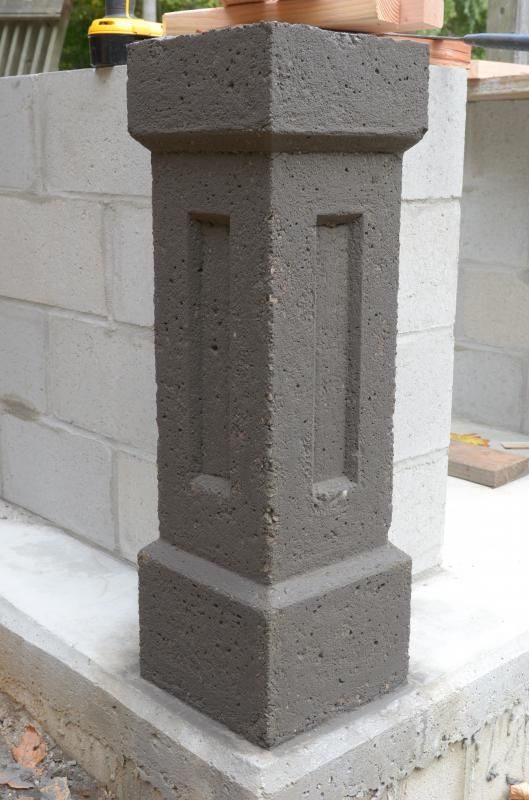
The mailman came by and yelled "It looks like you made them out of lava!". I had a good laugh at that.
Originally I was only going to wire brush the "recessed panel" and leave the rest smooth. My wife came out, liked the effect, and said I should wire brush the whole thing.
She spoke. I complied.
Maybe that's why I have a happy marriage! lolLast edited by mongota; 10-10-2014, 06:43 PM.Leave a comment:
-
Re: Mongo's 42" CT Build
Wooo those look really nice Mongo. I like the wire brushed texture as well.Leave a comment:
-
Re: Mongo's 42" CT Build
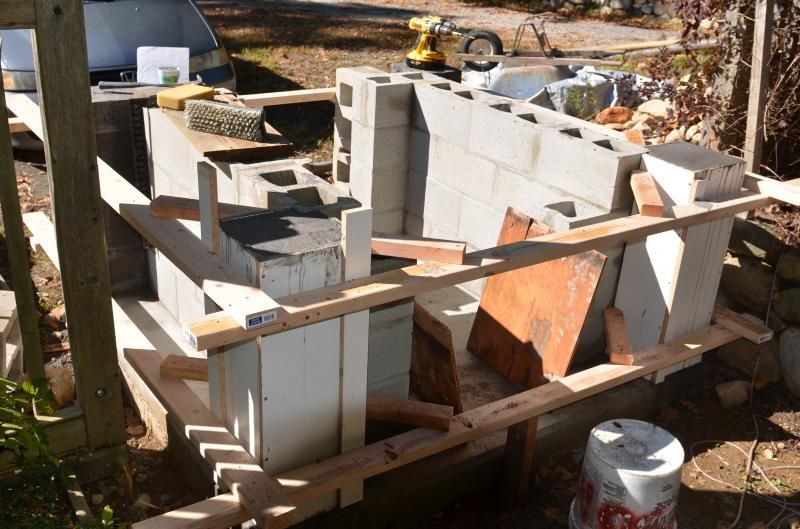
Day Six was a bit of a surprise. I had anticipated not working on the hearth for a few days because of work and weather, but with a couple of free hours and dry skies, I decided to form up a couple of the corner posts and have at it.
I had some leftover 3/4" melamine board that was already ripped into 12" by 8' sections, I had used them 5 or 6 years ago as concrete forms for raised planting beds. I dug those out of the basement and used them to build two corner forms.
With the posts being pigmented/colored, I wanted to mix all the concrete in one batch. Worked out to three 80-lb bags for each post. Thankfully my somewhat old and thoroughly abused wheelbarrow didn't collapse and dump the load while I was mixing with a masons hoe. I kid you not, that was a concern!
I vibrated the forms a bit, but not too much. I wanted some surface voids for a somewhat rustic look, and figured that I might fill the voids with a slightly contrasting color for visual texture.
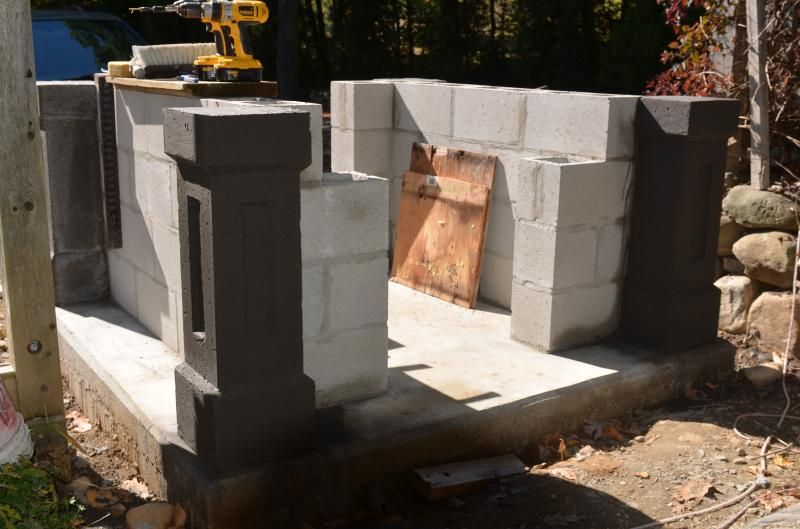
When I took off the forms, I shifted gears. I ended up lightly wire brushing the concrete, enough to knock off the cream, for an exposed aggregate look. The left side is wire brushed, the right is not:
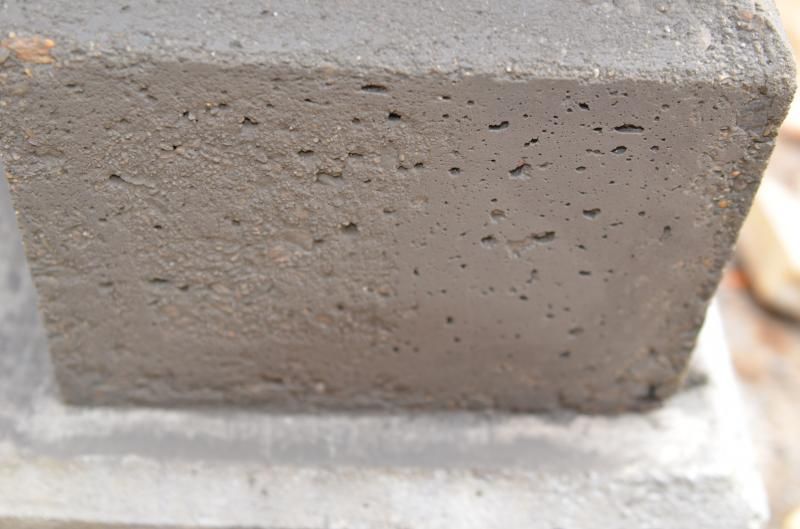
I think I like the look, but we'll see once it cures and the color lightens. If not I have a few ideas.
I'll let these cure for a few days before I form up the other two posts, as the form bracing and supports will actually wrap around these two posts.Leave a comment:
-
Re: Mongo's 42" CT Build
I poured my support slab in two pours. Maybe you could do the same:
1. Bottom 2/3 of perimeter
2. Top 1/3 of perimeter in color
3. CenterLeave a comment:
-
Re: Mongo's 42" CT Build
I did an intergrated arch lintel shown in my Picassa albumLeave a comment:
 "Awesome"
Leave a comment: