I remain amazed! It is looking great.
Drake


-
Errors
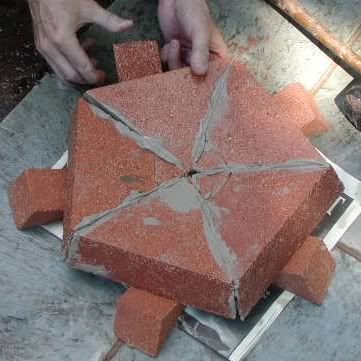
After the polygon is assembled, the heat-stop is pushed into the joints on the top (inside) and sides.
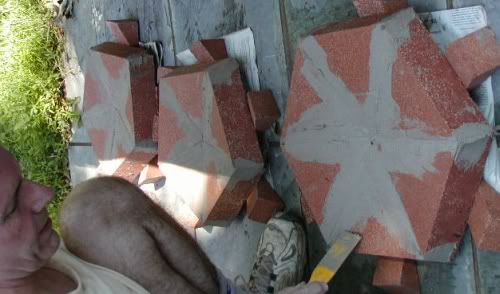
In 3 or 4 hours, I sponge off the excess mortar, and the next morning I turn over the polygon and put the mortar into any visible cracks in the convex side.
As an observation, the six and a half degree angle seemed right on the hexagons, but left 3/16 gaps on the back of the pentagons. I'm not sure it's worth having a separate setup for cutting the sides of the "5" triangles, since it seems to be well within the mortaring abilities of the heat-stop. They both meet on the inside, where it's visible, and the heat is intense.Leave a comment:
-
more assembling polygons
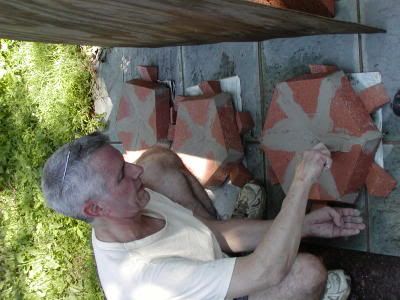
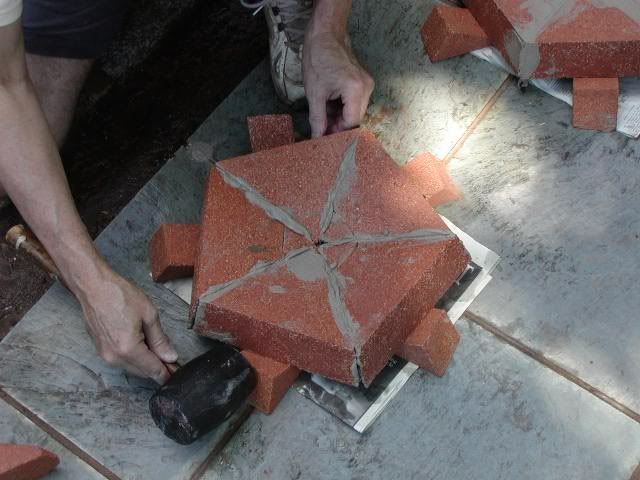
Finally the triangles are tapped into place. The rubber mallet taps the wedges into the center, until the edges are alligned. Then the wedges are tapped and wiggled to get the polygon flat. THIS IS IMPORTANT.
I didn't realize that if everything lined up the polygon could still be off flat. The last one I did, i kept making height adjustments until it was near flat, but this meant putting my head flat to the patio.

This is almost all the polygons assembled.Leave a comment:
-
more assembling polygons
more triangles:

and more:
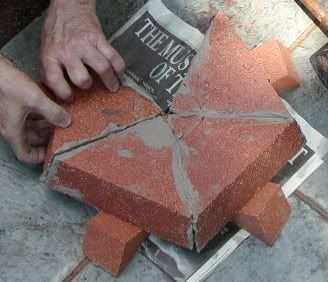
The pentagon complete:
Leave a comment:
-
assembling polygons
Now to the assembly of the polygons. The Heat-Stop 50 is mixed in really small quantities. I used a big coffee mug to ladle it out, and mixed one at a time.
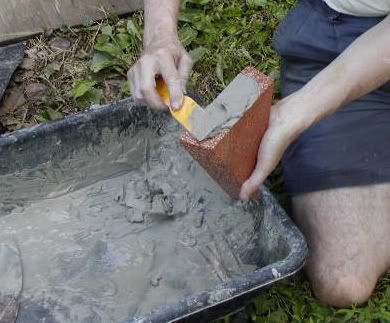
Here i'm using a putty knife to butter the edge of the triangle. The seam tells me which sides to butter.
Buttering the opposite side:
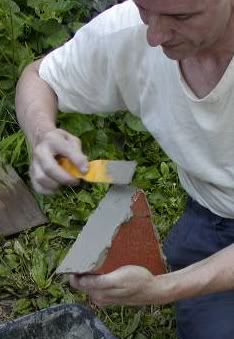
Setting the triangle up with a wedge:
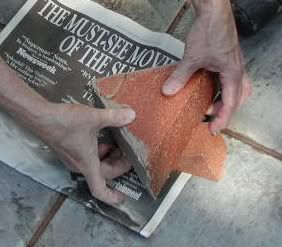
Newspaper doesn't do to keep mortar off the patio. Happily, even dried HS scrubs off the flagstones with a brick. (that trick doesn't work with the portland on the asphalt, though)Last edited by dmun; 07-20-2006, 07:22 PM.Leave a comment:
-
Fire brick - entry partials
Back to fire bricks. As you may recall, the geodesic dome is made of firebricks cut into triangles, which are assembled into pentagons and hexagons. The door entry is made by ditching a pentagon, but that alone would give a door big enough to bake a cupcake. So, some of the surrounding hexagons are cut away too. Here is a plan of the partial bricks:
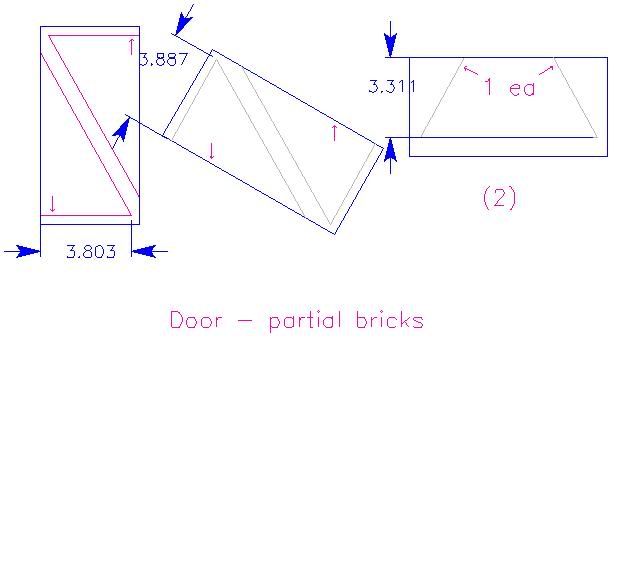
The arrows indicate the direction of the "base" of the triangle, the side that forms the edge of the hexagon. The door edge surfaces are square, instead of cut on the 6.5 degree angle, so these are laid out so that edge is on the side of the brick.
Here's how the cut partials look:
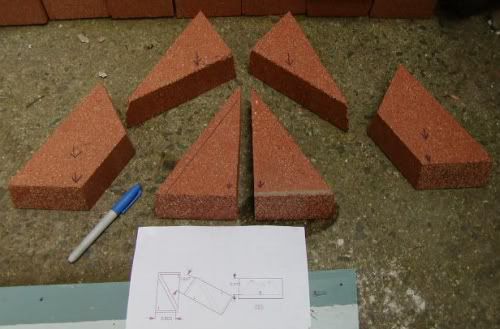
If you look at the left hand part of the drawing, and the center pair of bricks in the photo, you'll see something very interesting. That's right: It's a way to make the oven triangles with almost no waste. By seaming the triangles down the center instead of across the top, you can cut on brick on a diagonal angle, flip one side, and assemble the two halves on the factory edge with Heat_stop, and have only the bottom angle cut to mark and make.
On another item, I'm making choices for the exterior trim. Here's a piece of striped slate from Pennsylvania, that I can get in some quantity:
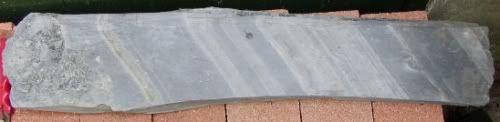
I'm leaning toward slate decorative arches, and corner trim, with patterned brick inbetween.Leave a comment:
-
more footing stuff
When I was as smooth as I wanted to be, I hammered in the other three rebar verticals. Since the slab is so thick, there was no problem keeping them upright.
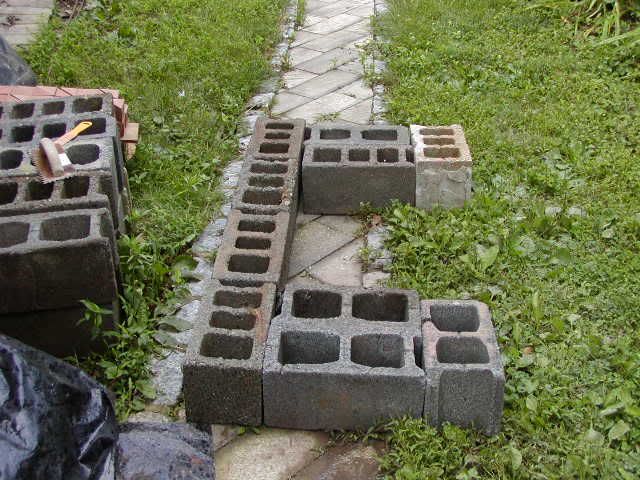
This was an array of blocks which i laid out to judge the position of the rebar uprights. This base has to be stronger than usual for pompeii ovens, since i'm supporting a two story masonry chimney.
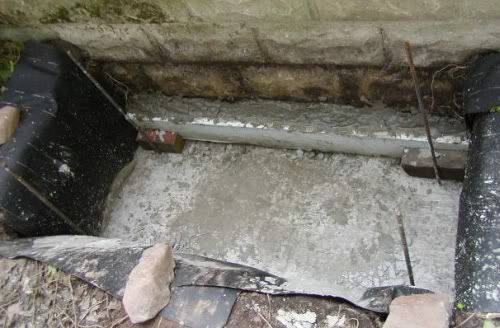
The next morning (really early, before the rental mixer was due back) I poured more concrete below the wall, in the cavity that was revealed once I trimmed away the excess builders felt. I shoved in three thin concrete blocks which I had prepared by filling the holes with mortar mix, set up a wooden form, and shoveled in more concrete, in an effort to provide some support to the existing wall, as part of the weight of the hearth slab will be supported by this. This is not the most elegant bit of masonry ever seen, but it should be strong enough to do the job.
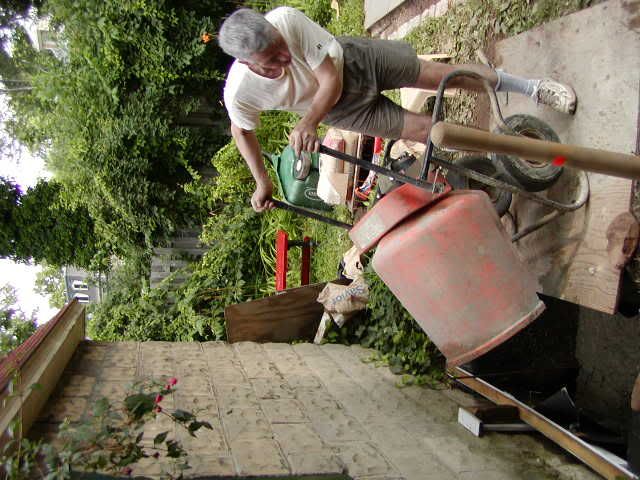
This cannot be stressed too much. Making concrete on this scale is REALLY hard work. There is a lot of heavy stuff to lug. I thought about the ready-mix route, but there is a minimum delivery of one yard (I just poured less than 2/3), and they won't go on a driveway, and they only give you 20 minutes to unload the truck. It just isn't practical unless you have a crew, and multiple wheelbarrows.Leave a comment:
-
rebar
Here is a look at the rebar rectangle i buried halfway down in the 12 inch thick footings.
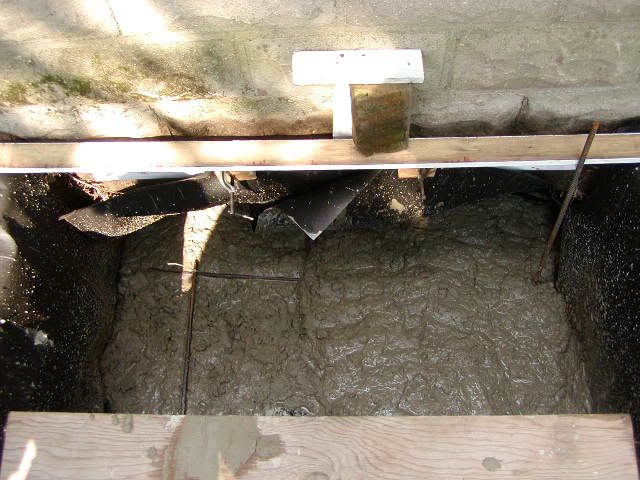
I tried to bend the rebar into "u" shapes to tie the verticals to the horizontals. Rebar doesn't bend at all well. I bent one joint, the other three were "score and break". I tied the grid together with wire ties, and didn't trim the ends, which gave me something to hold as I adjusted the position of the grid.

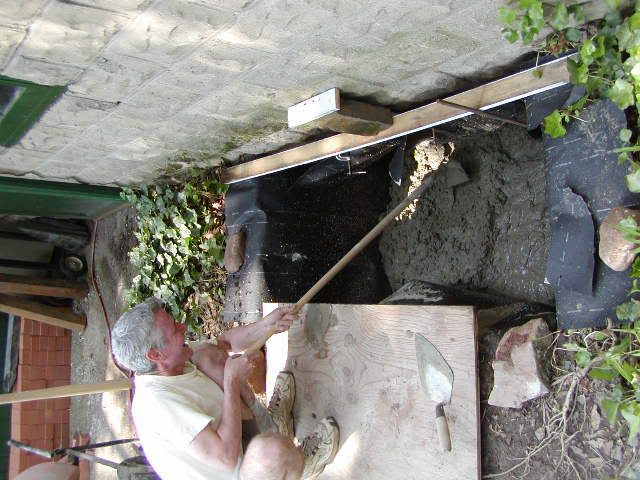
After I was close to my 12 inches, i used a board and a level to see if I was approximately level from left to right. I then got the concrete pretty smooth with the board.
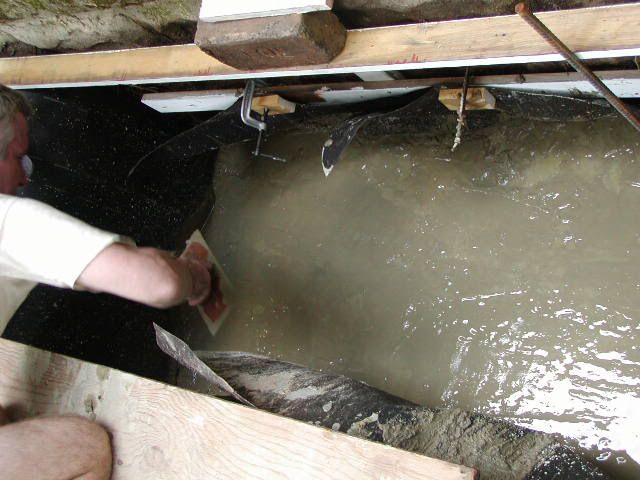
I then did a bit of floating so smooth out the surface. It was a little too wet to do a good job, but it's ok, and no one will ever see it.Leave a comment:
-
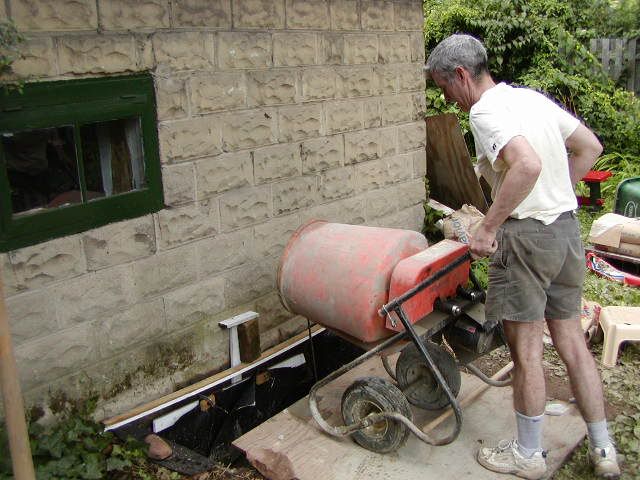
Footings
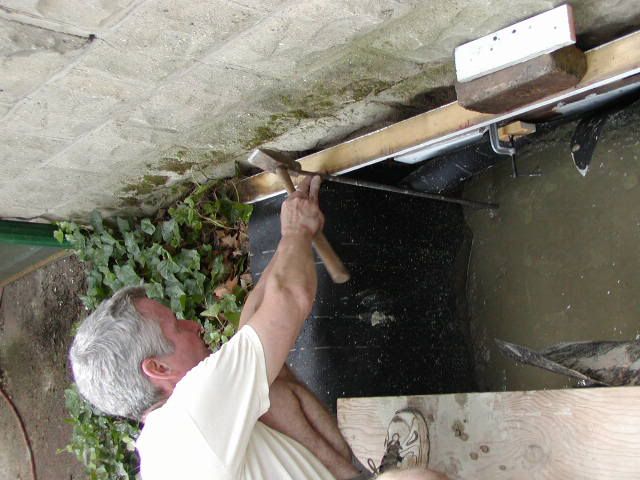
All right, progress to date: We had some good weather this weekend, and I expanded the footing hole under the wall of the old 1920's garage. I dug deep enough to be just under the inside concrete block line. I bought sand, gravel (1/2 yard each), and four bags of portland cement for the footings. I've never used a concrete mixer before, and will cover that experience in another thread. Here I'm dumping mixed concrete into the hole:
Notice the scrap of three quarters ply on the edge of the hole, this keeps the edge of the hole from caving in (I didn't use forms for my footings).
I then used a hoe to move the concrete around in the bottom of the three foot deep hole.
Notice that I've lined the hole with 15 pound roofing felt. The point was to provide a vapor barier, and to keep loose dirt from the edge of the hole from falling into the wet concrete. It was a big pain. You will see that curious device holding the tarpaper in the back: The brick supports the frame that holds the rear edge of the paper, so I can lower it down as the area under the wall bulges back with the weight of the concrete. Building felt wasn't the best choice here, but I got a huge amount free on craigslist, and it seemed like a good way to use some.Leave a comment:
-
Oven coating
David,
If you look at the Forno Bravo Artigiano oven, it has a thin refractory mortar coating that helps give the dome a little more structural integrity. We've shipped the Artigiano all over the world, and have never had any damage to the dome (touch wood). As you say, you can jump up and down on it.
I don't think that the extra 1/4"-1/2" of mass will slow heat up discernably, and it will help "set" the dome. Heck, the Artigiano oven has four handles and you pick it up and set it in place. You could use a more traditional refractory mortar (Refrax or Heat Stop II), or make a refractory mortar from calcium aluminate, sand, lime and fireclay, for that layer.
Also, how much of a mortar joint did you allocate in the cad drawing? 1/16? I am guessing that joint will add up over time.
I definitely think this oven should end up in Architectural Digest.
JamesLeave a comment:
-
welcome armac
I looked at Ligno's page. A hundred bucks is nothing in the CAD world, particularly for one that offers DXF (design exchange format - the autoCAD translation format) and 3d modeling. The real cost of CAD is the time it takes to learn how to use it.Leave a comment:
-
Cool Software
Hi,
A first post from a wannabe oven builder.
I came across some interesting software aimed at woodworkers that looks as if it might be the thing for designing geodesic ovens. Here's the link: www.ligno3d.com
I downloaded the trial version, haven't spent much time with it yet, but it appears that it may be very useful to design an oven structure to meet size and volume requirements. At about $100 US, it's not a trivial cost, but if it allows the creation of a specific geometry for a specific purpose, it might be worth it.
Looks like Dmun has opened a really interesting door.Leave a comment:
-
Brick triangles
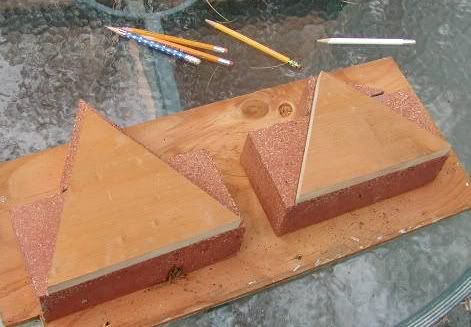
Here are the cut triangles:
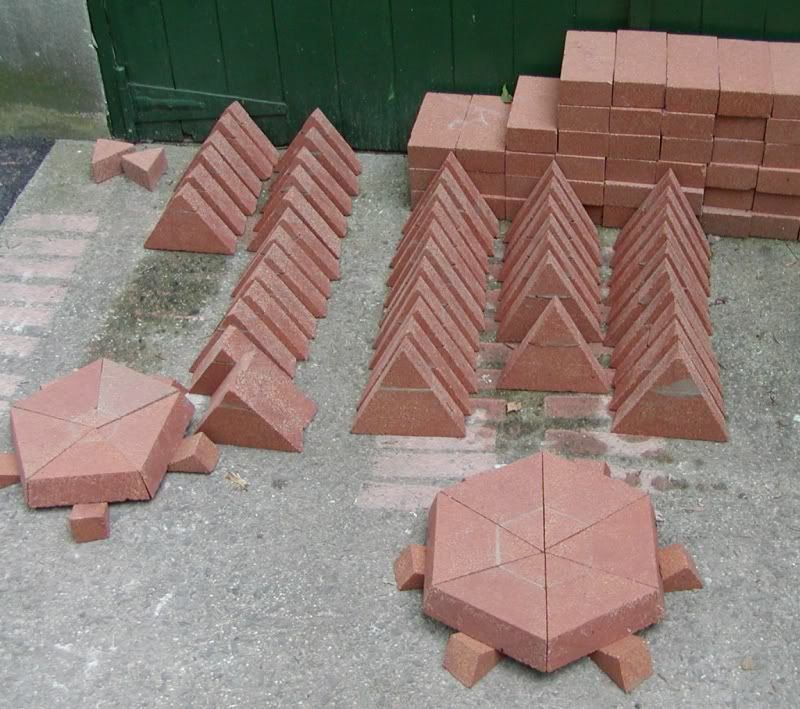
On the left are the "5" triangles, and on the right, the "6" triangles. You will notice how I'm using some brick triangle scraps to prop up the triangles into their correct allignment.
Here's a close-up view of the pentagon:
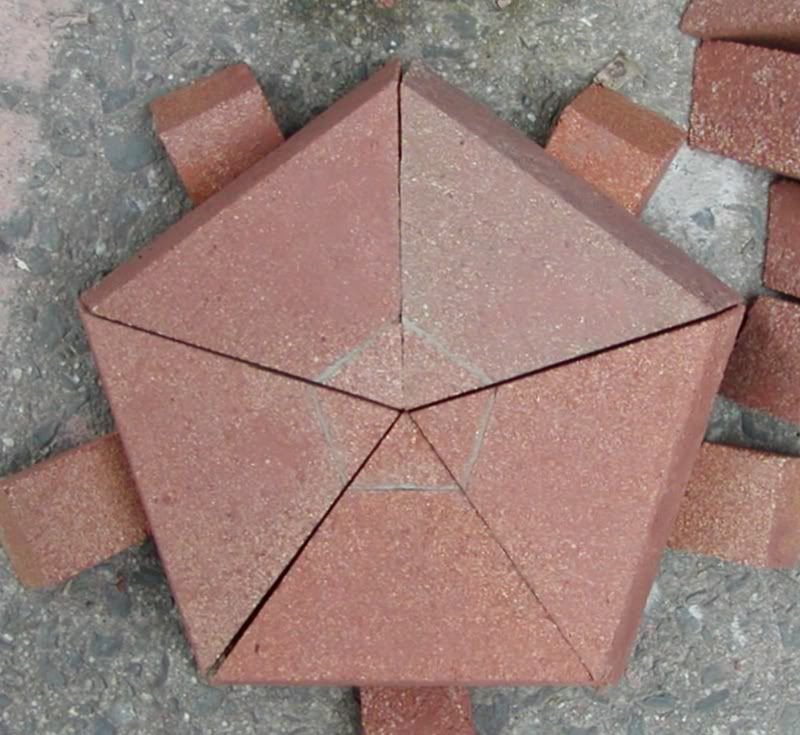
and the hexagon:

Note how the add-on triangles form a minature form of the polygon in the center. As the engineers say, it's not a fault, it's a feature.
I can, without strain, pick up six of the big triangles. This has given me the idea of pre-assembling the shapes, leaving fewer joints to clean up inside the oven, and perhaps reducing the need for internal supports.Leave a comment:
-
4th of July
Today I cut the brick triangles that make up my geodesic dome. First:
These are the wooden jigs for marking the shapes of the triangles.
Here is another modification to the saw:
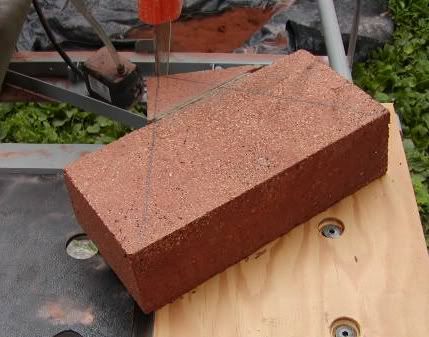
You will notice that I've screwed a piece of plywood on top of my angle jigs. Why? The bricks overlap the cut line, and the angle wouldn't be right if they hit the table on the other side of the cut line.
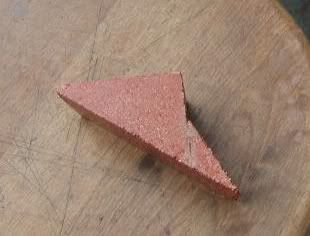
My concern was that the refractory cement wouldn't be strong enough to stand up to sawing. Not a problem. One day after gluing on the triangles, they were strong enough to saw, and even held the two parts of the shard together:
Leave a comment:
-
Innovation
Somebody, a poet no doubt, said "necessity is the mother of invention." In this case, though, it's innovation is the motherload of invention. This is very fine work, very new stuff and done with artistry and artisanship. Well done, dmun, keep it up, patent it and retire rich and respected. The poet, by the way, was Alexander Pope. Shelley wrote a sarcastic poem about monuments that includes the line "look on my works, ye mighty, and despair." Here, the reverse is true.
JimLeave a comment:
Leave a comment: