


-
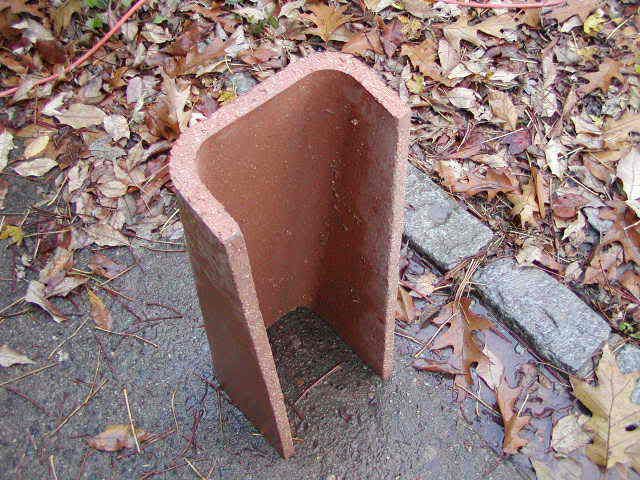
That is a nice solution. Be careful as an uninsulated flue like that will certainly crack if not insulated. Instead of applying a layer on the inside it would be better to apply a layer on the outside. If it were mine I’d be using a 7:1 vermicrete mix an inch or more thick (you can adjust this as you wish in the knowledge that the most vulnerable part is that closest to the fire). Then when it is pretty dry you can render over it with a standard cement render mix and fashion some sort of weather cap.Leave a comment:
-
Re: dmun's 36" geodesic oven
Very interesting photos! I like your covering with stone.
I will eventually get to mine - as mentioned I will be making it much thicker. My first attempt was to mix two different types of cement in the mold at one time - the inside refractory layer then the outside would be more of an insulating layer. I would have seams completely through the dome then. Your idea gets rid of that, I like it.
More to come when time permits!Leave a comment:
-
Re: dmun's 36" geodesic oven
I have built a geodesic dome oven out of castable refractory here in japan. I have fired my oven to over 500 centigrade multiple times over and have not experienced any cracking of the triangular bricks that I made. You mention above that your design was too thin. My tiles are a single inch 25mm in thickness with bevelled edges and NO mortar in between. I plastered many inches of mortar on the outside to hold everything together.Originally posted by dmun View Post
One problem is that the refractory cement is becoming brittle (chalky) on the surface. If you rub your finger over the surface it rubs of like dust.
Therefore, I too may be in for a rebuild at some time in the not too far away future.
Anyway, if anyone is interested in seeing some of the build photo's they are at the link below.
Wood Fired Oven PlansLeave a comment:
-
Re: dmun's 36" geodesic oven
Doesn't look like edschmidt has visited the forum in awhile...
I'm a newbie looking to build my first WFO and am really interested in this design too.Leave a comment:
-
Re: dmun's 36" geodesic oven
edschmidt,
Do you have the 2 form deminsions?Leave a comment:
-
Re: dmun's 36" geodesic oven
edschmidt,
I read where you built your oven in april of 2007. Have you had any problems with your design? I am going to start my oven project and it looks to me like you have the best design. There are a couple of question about the construction that I am unclear on. I would like to make mine in the igloo style, no enclosure.Was the slip layer a piece of paper that was put down on the dome than concrete was appied over the paper? Next the 4" of concrete was it regular portland type with wire mesh for reinforcement? Im worried about leaving it concrete on the outside. I like the rustic look but I think I will have a moisture problem with it being outside in the elements. it does not freeze here. Did the concrete get hot when firing? if not then maybe a coat of paint would do for waterproofing.Leave a comment:
-
Re: dmun's 36" geodesic oven
That sounds really cool!
Any pics??Leave a comment:
-
Re: dmun's 36" geodesic oven
I cast mine from 2 triangle molds. If your using a castable refractory there wouldnt be shrinkage to compensate for. If you are making it from clay obviously there would be shrinkage from the clay drying. The reason I used the triangles to make the pentagons and hexagons was I thought the smaller pieces would be less likely to experience a heat differential within the piece. Also I tapered mine so that I could build without mortar to further isolate each piece from heat differential and cracking. I also did make some newer molds from silicone with the domed interior which you are talking about and it does make for a beautiful finish inside.Leave a comment:
-
Re: dmun's 36" geodesic oven
This thread is fantastic.
I am a dome guy and a WFO enthusiast... goes great together!
I m thinking if you make the dome (freq 3, as you have) out of just hexagons and pentagons, you could potentially make an entire dome from only 4 molds. Make it 20% larger - for shrinkage, and if the shrinkage varies so what? All parts will shrink the same!
Anothe feature would to create a spherical surface on the inside of the polygons. Then when built, the dome would have a specific focus and not a series of planes like a dome.Leave a comment:
-
Re: dmun's 36" geodesic oven
Your point is well taken. It happens that the points on the ends of the triangles have not deteriorated at all: all the cracking was between the preassembled polygons.The only thing that would be of concern to me would be the fine points of the cuts.In firework we never have any cuts to small or fine to a sharp point as they can be very suseptable to thermal shock and crumbling or breaking off.
The key fault with my design was it's thinness. If you could make a geodesic oven with the standard 4 1/2 inch thickness, I'm sure it would be much more stable.Leave a comment:
-
Re: dmun's 36" geodesic oven
Bricks, it was built back in 2006, if there had of been a problem Im sure we would have heard about it by now..Originally posted by bricks View Post") Last edited by brickie in oz; 03-12-2011, 10:47 PM.
Last edited by brickie in oz; 03-12-2011, 10:47 PM.Leave a comment:


Leave a comment: