Re: Twist and Tilt
Paul,
Nice work.
I'd be interested in seeing the spread sheet for this if possible.
daniel


-
Re: Twist and Tilt
Paul,,
Thanks Ken, but perhaps we should hold off on nominations until it?s finished, as I?m starting to run out of Les? little pills!
That's funny! I found a pretty good substitute, it comes in a can. The only problem is that it takes 6 or 7 to kick in
Les...Leave a comment:
-
Re: Twist and Tilt
Paul!! Wonderful work and great Jig. Wish you were here when I was cutting all my bricks!!!!
ChristoLeave a comment:
-
Re: Twist and Tilt
Thanks all for your feedback and kind comments. They?re much appreciated. A few responses below:
I?m limited to a maximum of 2mm mortar thickness (theoretically) so haven?t really planned for any mortar gaps. The mortar manufacturer even recommends that the bricks be rubbed or tapped together to achieve as much brick to brick contact as possible when laying them!Originally posted by waitingtocook View Post
But I can?t see that mortar thickness would influence things a great deal ? after all, the bricks will still be sitting at the same angle (more or less) in the dome. I can only suggest that you view it as a guide, and experiment. Even after cutting the bricks, I usually have a bit of minor trimming to do as the bricks are laid, to achieve an accurate fit.
The wood shim is there to position the brick (and wedge) in the saw so as to achieve the correct twist or rotation to eliminate the upper Vee ? see first photo and Step3 above.Originally posted by waitingtocook View Post
Thanks - I?ve attempted to replicate the brick?s position in the saw with its position in the dome, as far as tilt goes.Originally posted by dmun View Post
My saw diameter is around 14?, but even now, I?m having a bit of difficulty holding the brick steady on the left side of the blade, as the Vee-belt guard is fouling my holding hand! I hope to get another one or two more courses using this setup, but I?ve found that it?s been a useful method for all courses to date.Originally posted by dmun View Post
Thanks Ken, but perhaps we should hold off on nominations until it?s finished, as I?m starting to run out of Les? little pills!Originally posted by Ken524 View Post
I like that idea, but somehow I think that most punters will be more interested in what comes out of the oven that what went into it! Except for other builders perhaps ?.Originally posted by waynebergman View Post
Cheers, Paul.Leave a comment:
-
Re: Twist and Tilt
Paul - Awesome work!! I ditto what Ken said, I don't believe it can get any closer then that unless it's casted.
Continued success....
Les...Leave a comment:
-
Re: Twist and Tilt
great idea....inside of oven looks very nice. You will have a lot to talk about while cooking pizza's. Might be a good idea to have a photo album out by the oven for all pizza eaters to look at so they can appretiate all the work that has gone in to this oven. ......wayneLeave a comment:
-
Re: Twist and Tilt
Wow, that's clever, raising the whole back of the brick to get the angle you need rather than tilting the side. The only observation is that when you get a few more layers up your 10 inch blade isn't going to be deep enough to cut a brick on it's edge.
By the way, wood works perfectly well for making your shims.Leave a comment:
-
Re: Twist and Tilt
Hendo,
excellent system mate and thanks for going to the time to show exactly how its done with step by step pics and all. A couple of (probably amateur) questions, though. Does your system allow for the thickness of mortar? And the pic showing the peice of metal for right angel shows a small wedge of wood? in the corner? Is this important and serve a purpose?Leave a comment:
-
Re: Twist and Tilt
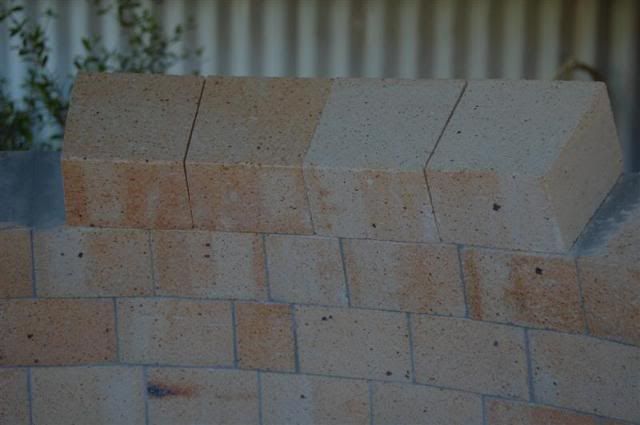
I usually go gingerly for the first few bricks, dry laying them and making any fine adjustments necessary to ensure a good fit. It?s a bit nerve wracking, as it?s only at this stage that you know if you?ve got the first lot of cuts right. These first four bricks don?t look too bad! Compare it to the first photo, which shows two uncut bricks on the same course ? you can appreciate just how much brick has been cut off.
All bricks cut and ready for laying. The whole process, including setup time & wedge construction, took a little over two hours.

Hope this isn?t too long-winded (what, me long-winded?!) and takes some of the guesswork out of the process.
Cheers, Paul.Leave a comment:
-
Re: Twist and Tilt
Step 4. Position brick & carefully make the cut, ensuring that the brick doesn?t move during the process.
Sometimes the distance between brick guide and blade will need adjustment. Ideally the cut should coincide exactly with the bottom outer corner ? there should neither be any brick material removed, nor any uncut brick left at this point. When all appears to be OK, cut the remaining bricks for that course.
Then swap the ?jig? over to the other side of the blade:
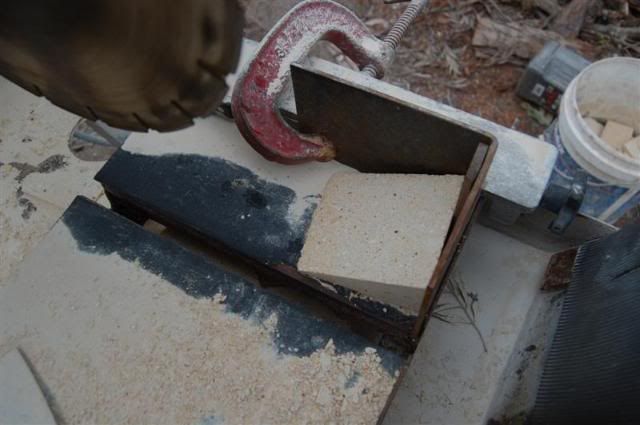
and repeat the process for the opposite brick faces.

Leave a comment:
-
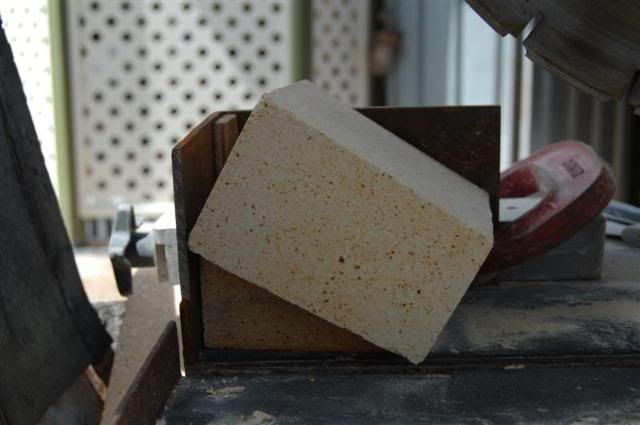
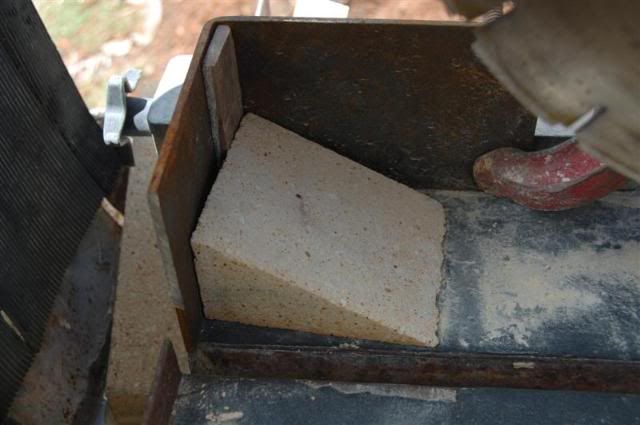
Re: Twist and Tilt
Step 3. Place wedge in brick saw at the appropriate angle of rotation for the radial taper. This can be determined in many ways ? perhaps the simplest is via Ken?s ?String Alignment System?, or by sighting along a small piece of timber placed on top of a brick edge to the centre of the dome floor, and marking the bricks accordingly. My taper has been around 10mm on each side (a bit over ⅜?) for each course to date. Again, I?ve got this on a spreadsheet, so have a means of checking things.
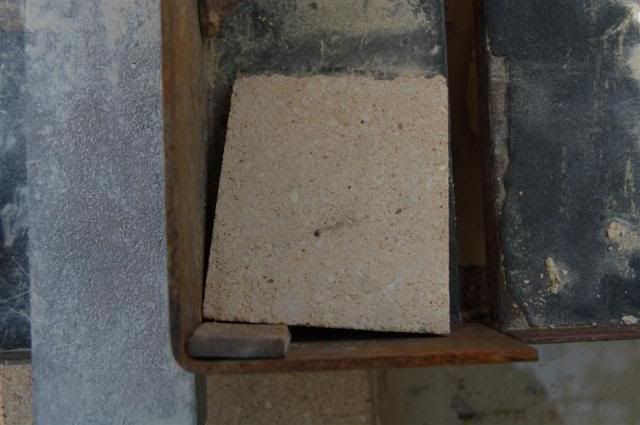
I had a piece of mild steel bent into a right angle for cuts for the higher courses, as the bricks were elevated above the leading edge of the saw table from about the third or fourth course. It?s fixed to the cutting guide by means of a G-clamp and provides a positive means of positioning each brick.
Leave a comment:
-
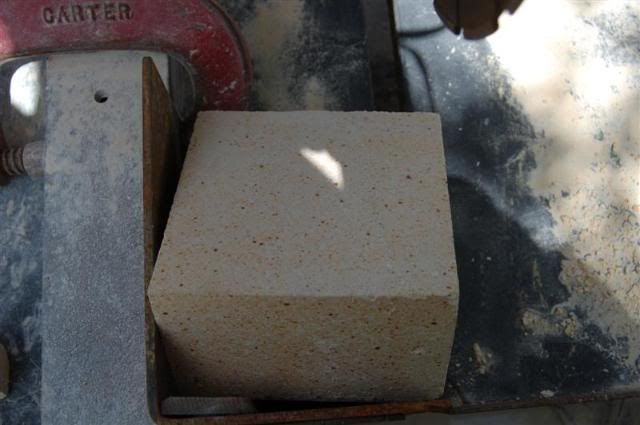
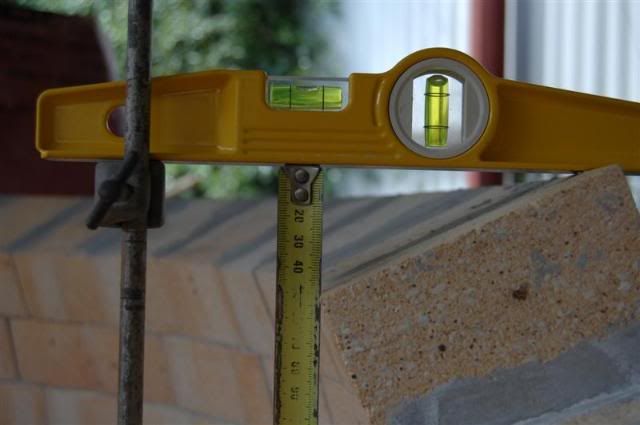
Re: Twist and Tilt
Step 1. Measure the amount of tilt, preferably using a tape measure with legible graduations! This is my fifth course above the oven floor, and the outside face will require lifting around 51mm (2?) to achieve vertical butt faces and eliminate inverted ?Vees? between bricks. I?ve set up a spreadsheet to calculate this height, course by course, but it?s always good to check on the oven.
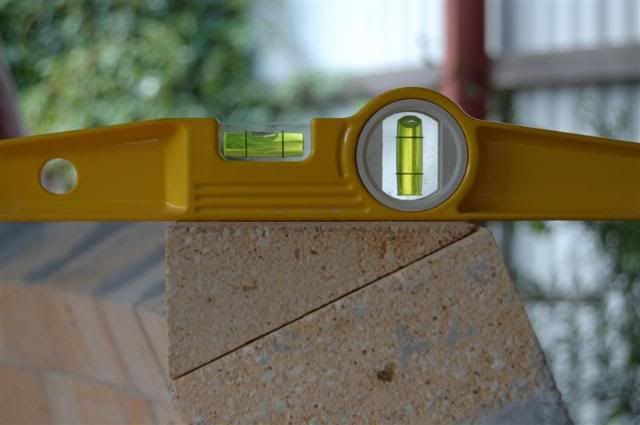
Step 2. Cut wedge to suit:

and check it?s OK.
Leave a comment:
-
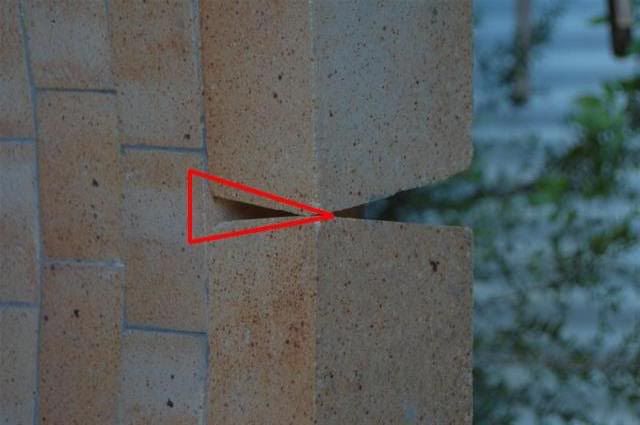
Twist and Tilt
There has been some discussion again about tapering bricks, so I thought I?d show you how I?m cutting bricks to incorporate a radial taper ? ie on the brick face which when extended, forms the radius of the oven dome.
Rotating the bricks in the saw to create a taper eliminates the ?Vee? between the inside and outside faces:
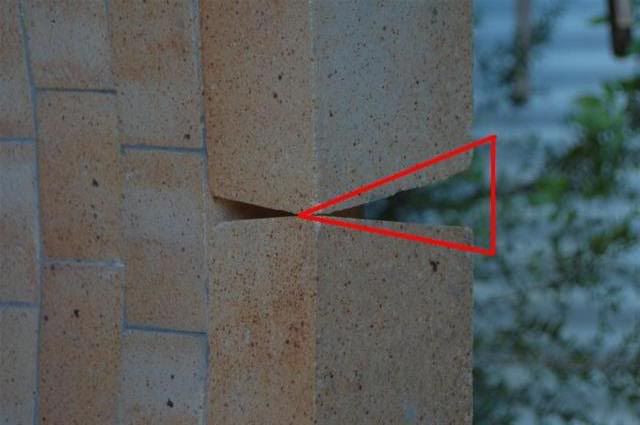
while lifting the bricks eliminates the inverted ?Vee? between adjacent bricks, which otherwise becomes quite pronounced as the dome gets higher.
My bricks were purchased tapered, height-wise ? 75mm (3?) high on the outside face, and 63mm (2??) high on the inside. This degree of taper forms an 1100mm (43?) arch almost exactly. If you decide to go down the fully tapered route and have purchased standard bricks, these tapers should be cut first.
Leave a comment: