Announcement

Collapse
No announcement yet.

Indoor Casa 2G90 build. LOTS of pics!

Collapse
X
 
  • Filter
  • Time
  • Show
Clear All
new posts

  • Indoor Casa 2G90 build. LOTS of pics!

    My Mother put a magnificent Le Panyol wood fired oven in her kitchen about 10 years ago and I have lusted after my own ever since.

    I finally felt it was time for me to have my own indoor wood fired oven and figured I better move on it since I'm not getting any younger!

    After a ton of research I felt that a Forno Bravo Casa 2G90 was by far the best bang for the buck.


    The following thread will document my journey of putting a wood fired oven inside my house.


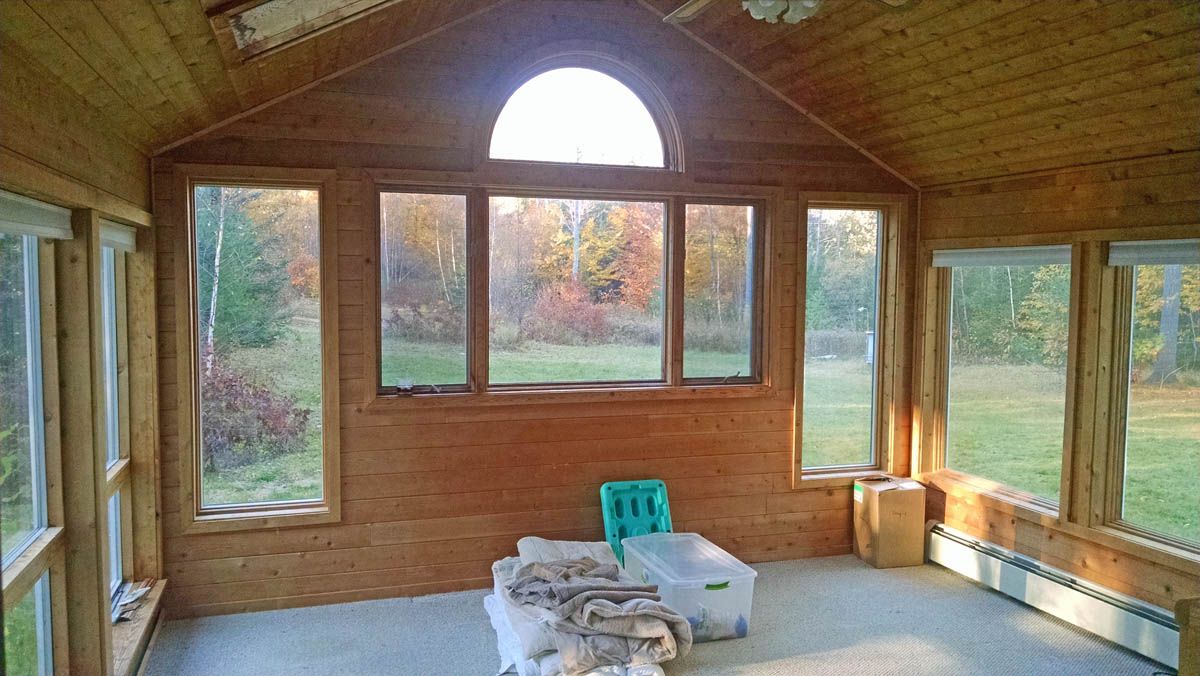
    Several years back my wife and I bought our house in large part due to this sunroom. Sadly we very rarely used it and it became a catchall for everything we didn't know where else to put. Earlier this year I decided I was going to put a patio out back and put a wood fired oven outside. I was on the fence about it since I live in an area that can get a lot of snow and very cold, but hey, at least I could have wood fired pizza. Then suddenly I had an epiphany, forget the outdoor oven, let's put that sunroom to good use and turn it into a kind of pseudo Italian kitchen!! So here is my start.


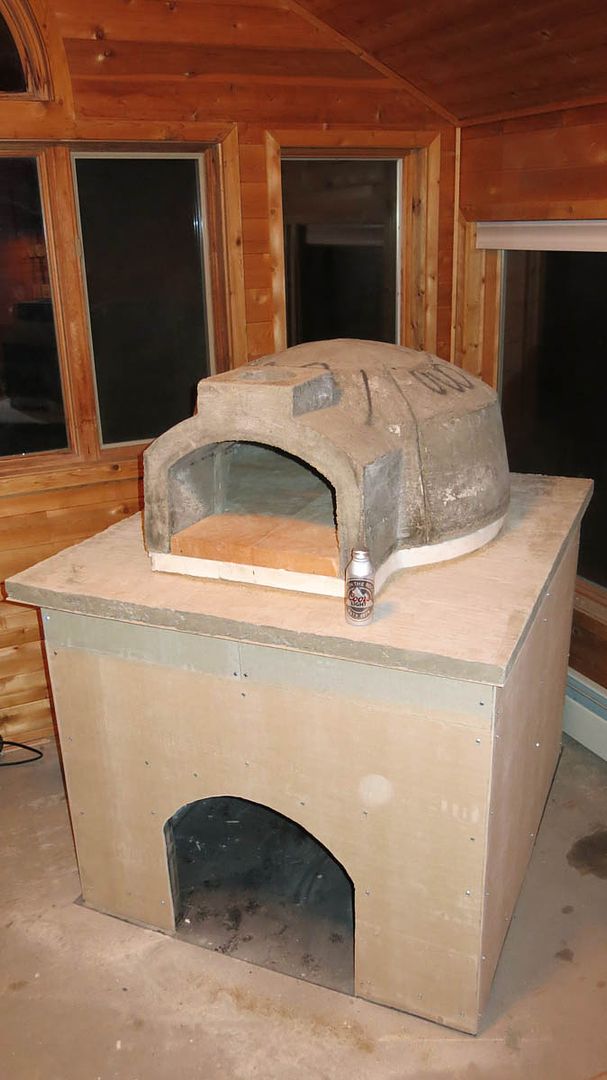
    Not long after I made my decision to use this room to make some killer breads and pizzas a freight truck showed up in my driveway and unloaded this, a Casa 2G90!!! This was a really, really, BIG day for me. I now had my own wood fired oven.


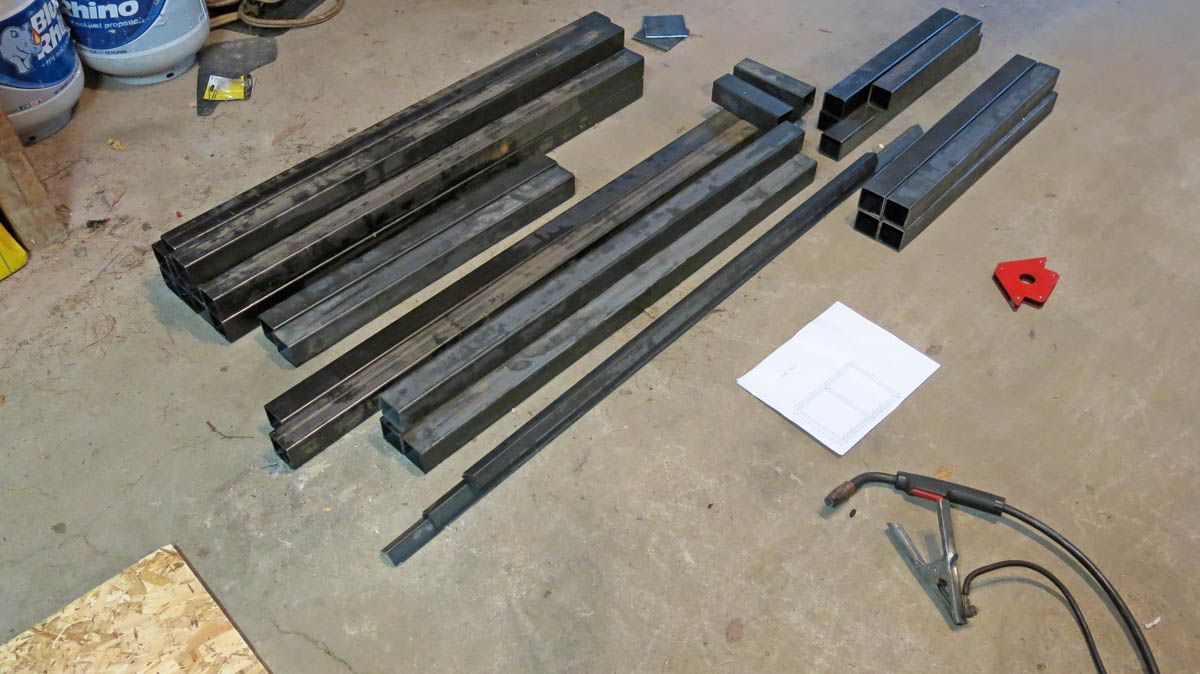
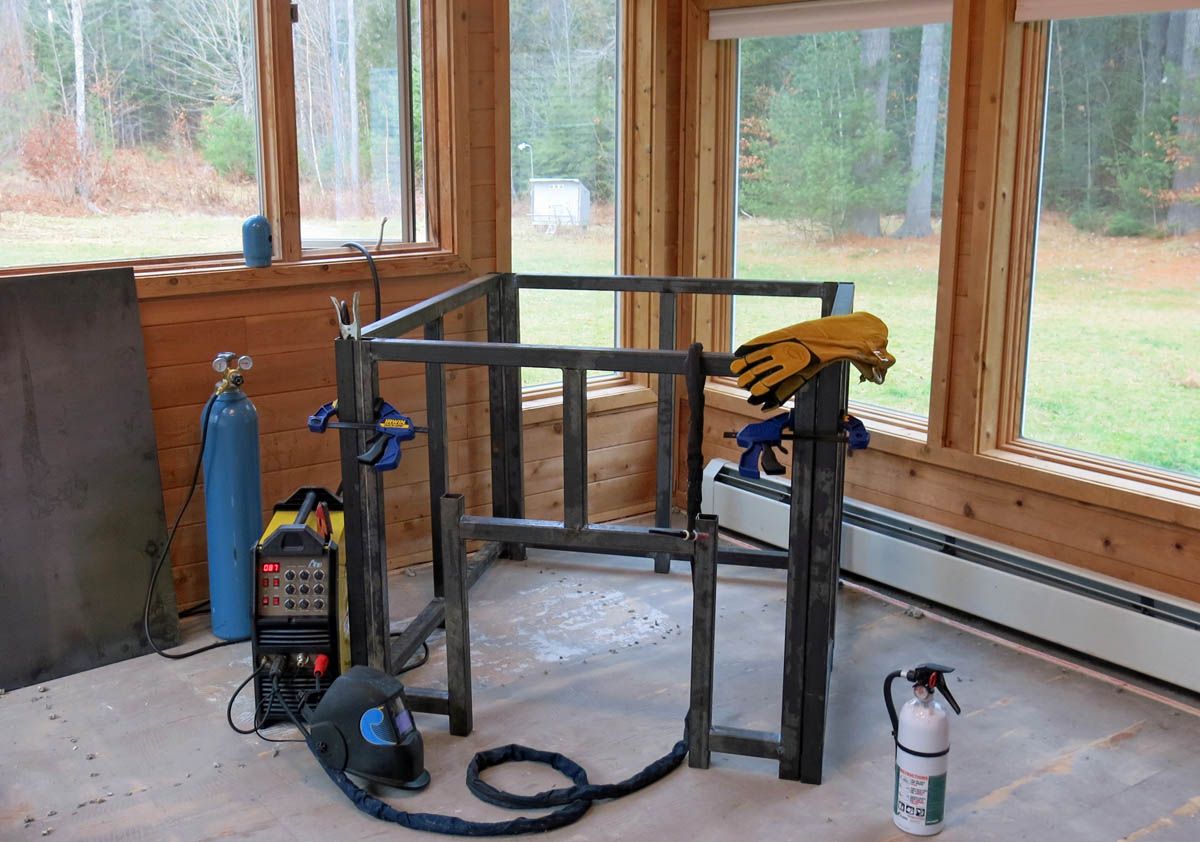
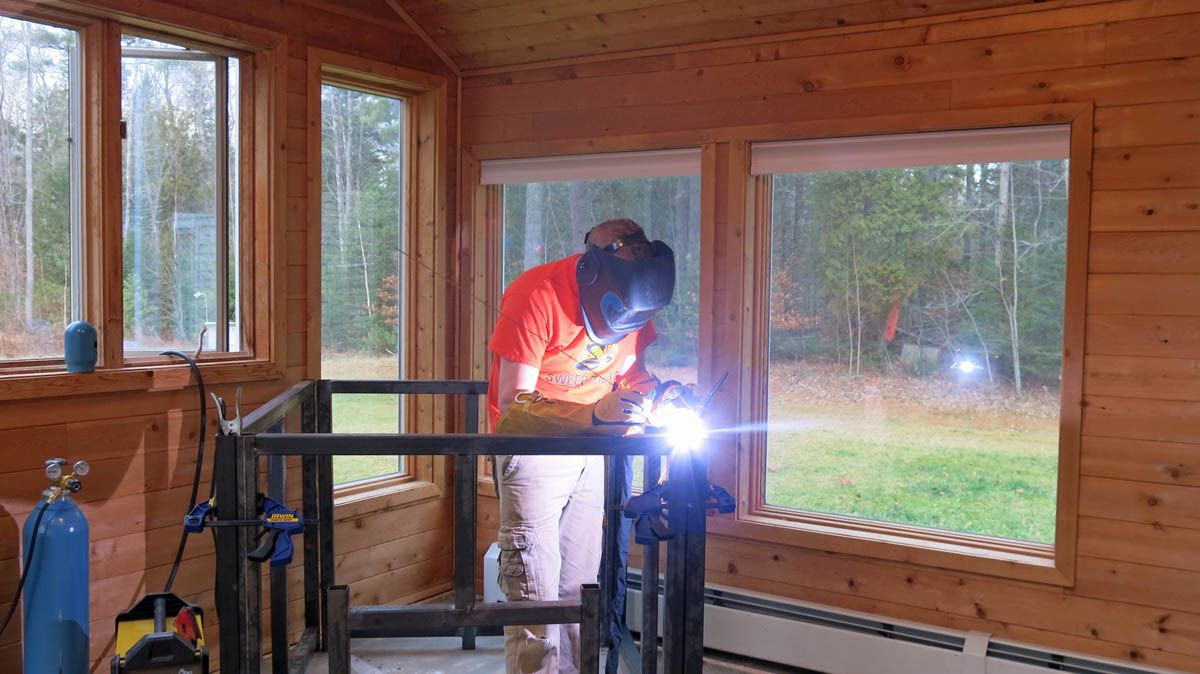
    After taking a load of measurements I drew up a design for a metal oven stand. Then I called a local steel shop and ordered up this mess of 2"X2" box tubing. Using my plans I tacked everything together in my garage with my MIG welder.


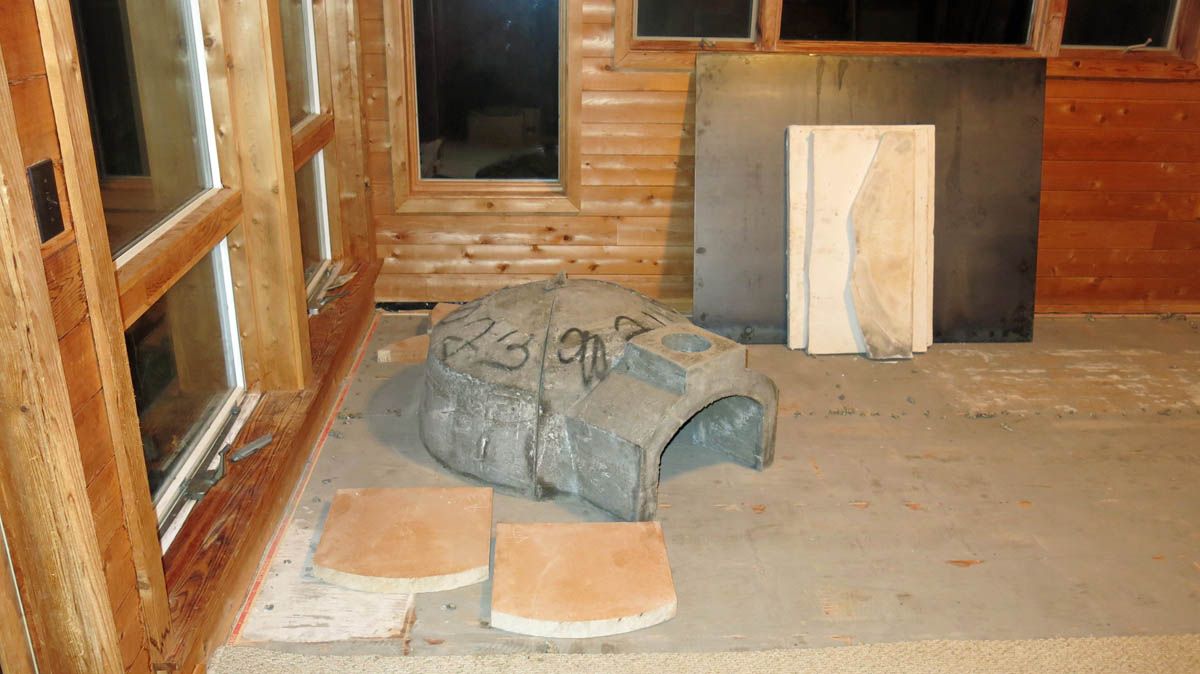
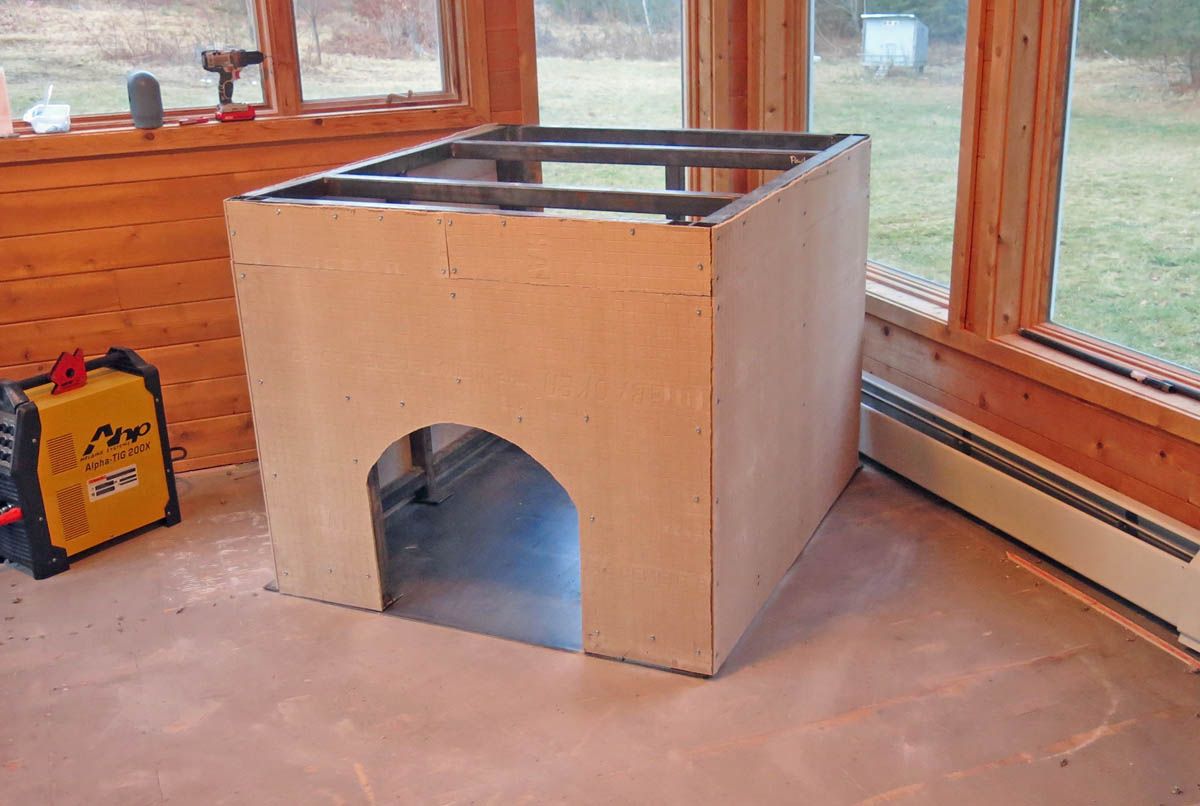
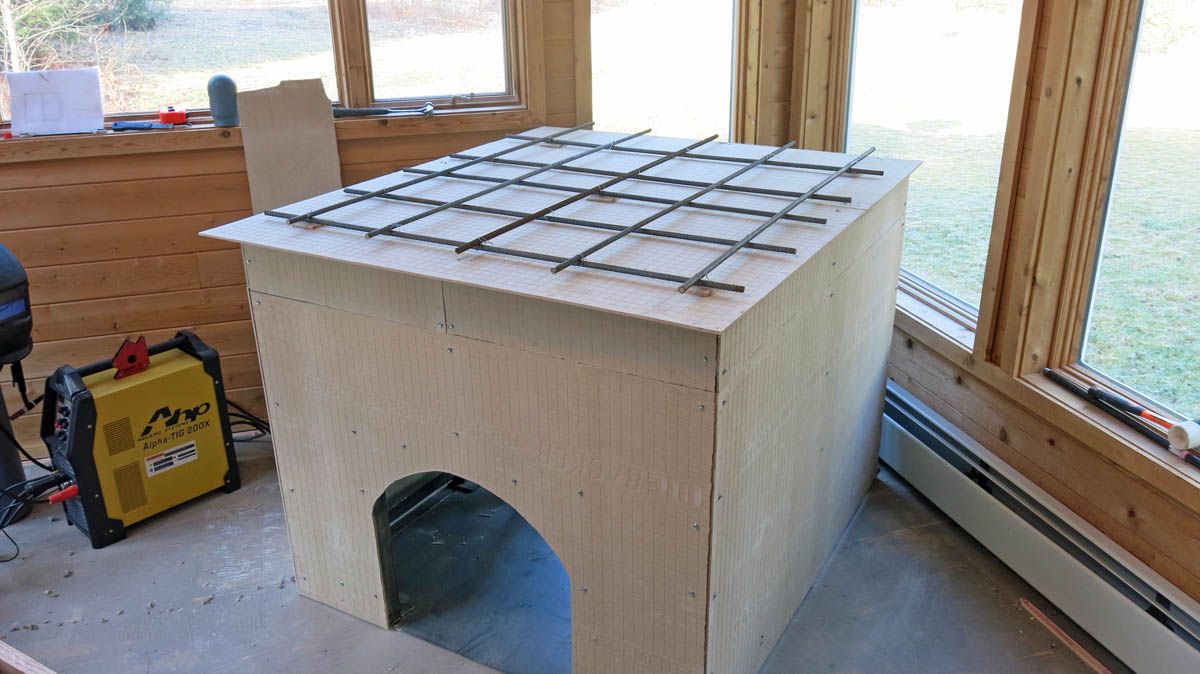
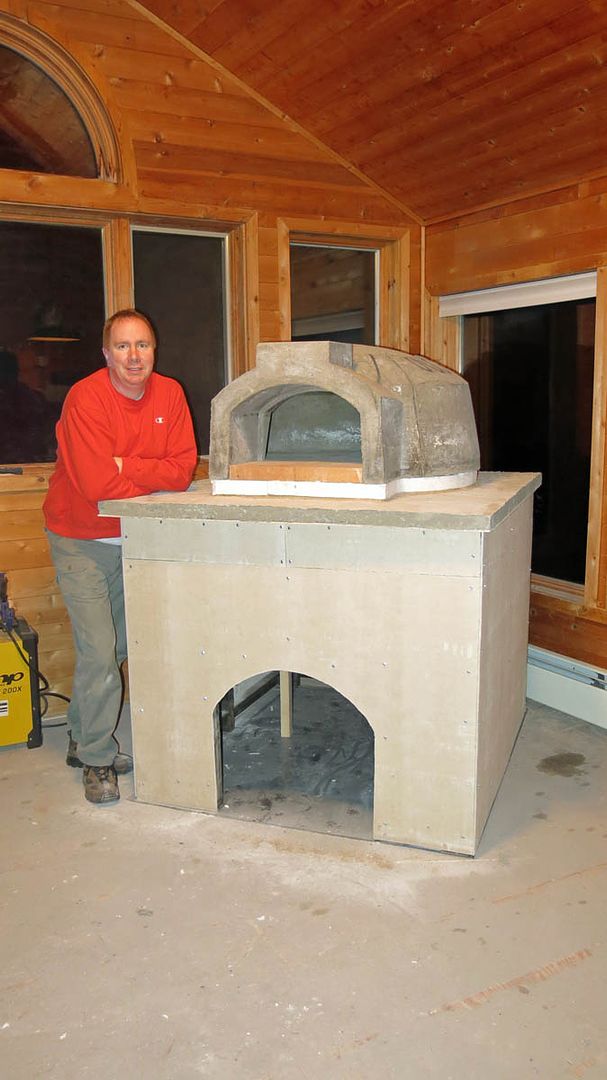
    Then with some help I moved the oven and it associated parts from my garage out to the sunroom. Of interest in this pic is the giant steel plate that my oven stand will sit on to help spread the massive weight of the whole thing across the floor, it is leaning against the far wall behind the hearth insulation. That thing is HEAVY!


  • #2
    PJF,

    Wow! It looks like you have a great place for a year round oven! Is that an oven landing in front of the insulation?
    Joe Watson " A year from now, you will wish that you had started today" My Build Album / My Build

    Comment


    • #3
      This is gonna be a fabulous party room. I'm really looking forward to watching this all come together. Some things to consider...

      1) Make sure that you have some sort of external (high) vent for the room as there will be some smoke during the curing process & starting fires. I would suggest maybe a bathroom type fan installed in the front corner wall/ceiling. Along with that note that the oven is going to draw a significant amount of air from the room during any firing. You might consider a low vent from the outside for incoming (required) draft air. Definitely the draft vent will need to be screened and with a closure to keep the cold/heat out when not using the oven.

      2) Give yourself plenty of room to get behind the oven to clean the windows. If you give yourself a little foundation space, you'd probably be able to use that to stand on when doing the top of the back window(s). The final exterior coating (stucco or tiling) will need to be accessed during the build and it's amazing how big a space can appear until you take a bucket of water or mortar up onto the stand

      3) Think about the path you are going to need & use from the wood pile into the room and the pizza party wood storage.

      4) I don't know where you plan to set the oven, but be aware that you can either take the chimney up through the roof or do a squirrel-tail flue that goes up and then back straight over the oven dome to go through a side wall (at an angle) to the outside. Several builds on this site have used this method when straight-up isn't an option.

      5) Plan lots of counter space in your Italian kitchen design.

      Again, this is going to be a lot of fun in the making and using...just take your time and think about the long term uses that the room & oven will need to function properly.
      Last edited by SableSprings; 12-29-2015, 01:22 PM.
      Mike Stansbury - The Traveling Loafer
      Roseburg, Oregon

      FB Forum: The Dragonfly Den build thread
      Available only if you're logged in = FB Photo Albums-Select media tab on profile
      Blog: http://thetravelingloafer.blogspot.com/

      Comment


      • #4
        Thank you guys for the responses you have provided!

        I spent about an hour and half writing this post last night and when I posted it said I couldn't post more than 4 pics at a time, and I have another 15 to go in this thread! When I went to redo it the site timed out about four times in a row so I gave up. When I came back tonight I see that the first part of the post was here! So now here is the rest:

        Back to the story!

        I built this $150 extension cord so I could bring my TIG welder out to the sunroom.


        Then I brought the four tacked up sides from the garage out to the sunroom and clamped them together.


        My wife snapped an action shot of me with the TIG in action doing the finish welding.


        When it was all said and done I placed on it on the 1/4" plate in the corner.


        Comment


        • #5
          From there I put Hardibacker on the stand and cut that nice little arch into it.


          Then I put the Hardibacker on the top and did my rebar up.


          Then I built a form around it. I only poured a 2 inch thick pad as the stand is so robust I felt the 3.5 inch hearth was way overkill.


          The next day my wife snapped a shot of me mixing up some concrete while in the middle of the pour.


          Comment


          • #6
            Here I am shoveling in the last of the concrete.


            At the end of a long afternoon of mixing and shoveling concrete I had this.


            A couple of days later the concrete had cured up nicely and I had a pretty good looking pad.


            And then last week this!!! The oven got set up on the stand!!!! Holy crap those oven sections are heavy when lifting them this high. I poured a layer of sand under the insulation and then a layer under the firebrick as well. That cooking floor is LEVEL!

            Comment


            • #7
              Yours truly standing by my newly placed oven. I look pretty proud and feel that look is justified, it is coming out great. Notice you can see a 2X4 inside the stand. I had to build some support structure for the seam of the Hardibacker and that is part of what you are seeing here. When I knocked the vertical supports out I was horrified at the thought of whole thing crashing down around me, but nope, it didn't budge an inch!


              Then it was on to the refractory mortar. I don't know if it was necessary but I sealed mine tight right down to the hearth. There won't be any heat escaping through the seams on this beast.


              And then last weekend I did the tile work on the stand. I think it came out really nice to be honest. It still requires grout but it is looking pretty good in my opinion. I have some awesome multi colored LED strip lighting that will mount under the hearth lip. The blue painters tape is holding it up in place in this picture because I just had to see what it was going to look like, and it looks awesome.


              More coming soon! I am really close to lighting this thing off. LOTS more pictures on the way!

              Comment


              • #8
                PJF,

                It all looks great! But, I cant help but wonder if that thick metal plate at the bottom was to help spread the weight over a "crawl space construction". If so, have you/or will you be shoring up from underneath?
                Last edited by Gulf; 12-29-2015, 06:48 PM.
                Joe Watson " A year from now, you will wish that you had started today" My Build Album / My Build

                Comment


                • #9
                  Hi Gulf, thanks for the compliment!

                  Yes the room itself is built on sauna tubes and housed a large hot tub originally. I crawled underneath and put four 8"X8" concrete supports that hold 4"X4" posts directly under the oven. It probably is overkill? I don't know. The room itself was designed to carry the weight of a hot tub which has got to be significant.

                  I have been checking the pad with a level on a regular basis and it hasn't changed at all, I hope it doesn't!

                  TIme will tell!

                  Comment


                  • #10
                    Wow that is looking great. How long did it take you to get that far? I was at it hard for my out door build and I will bet it took 2 months to get that far with all the concrete work and such.

                    Randy

                    Comment


                    • #11
                      Thanks RandyJ, I appreciate the praise!

                      I am at about 6 weeks work myself. The oven arrived at my house on November 9 of this year and I immediately started taking measurements for the stand I wanted to design and build. The most recent work on the tiling was completed Saturday the 26th of December. I sadly haven't been back to work on it again. But this weekend I am hopeful to get the insulation, stucco, and chimney done! Then I will pour a landing in front of the dome, then start my seasoning fires. So I am getting pretty close.

                      Comment


                      • #12
                        Thanks RandyJ, I appreciate the praise!

                        I am at about 6 weeks work myself. The oven arrived at my house on November 9 of this year and I immediately started taking measurements for the stand I wanted to design and build. The most recent work on the tiling was completed Saturday the 26th of December. I sadly haven't been back to work on it again. But this weekend I am hopeful to get the insulation, stucco, and chimney done! Then I will pour a landing in front of the dome, then start my seasoning fires. So I am getting pretty close.

                        Comment


                        • #13
                          Yes it does sound like you are getting close. It is looking very nice. I wanted to put one inside too, but I just don't have a space that works for it. I also know what you mean when you have to stop for a week or two here and there. At least you don't have to worry about the weather slowing you down. Are you going to have some kind of power vent to get rid of the little bit of smoke that makes it past the vent? Keep up the good work.

                          Randy

                          Comment


                          • #14
                            Hey Randy-

                            Thanks again for the compliments. I am not overly worried about the smoke to be honest. My mother's Le Panyol that is indoors doesn't put so much as a whiff of smoke into the kitchen so I am hopeful the FB oven acts the same way. If need be I can open the skylight and vent the room that way, but with any luck it won't be needed.


                            I was able to get a lot done this weekend, not as much as I had planned but still quite a bit.

                            Here I am laying the very first piece of insulation on the oven! I went for the full Tyvek suit because I found I am VERY allergic to this ceramic insulation!! Any place I came in contact with it caused me to break out really badly. So an 8 dollar suit seemed like money well spent.


                            Not long after I had the vast majority of the oven covered. I used every single bit of insulation that came with my kit. I figured if a little insulation is good then more must be better! I watched the really good video that Forno Bravo has on YouTube about insulating the oven. It helped a lot.


                            Then it was on to the dome shaping. I used stucco lath and chicken wire.


                            And then finally we get to tonight. Stucco is going on and looking GREAT! I am a bit hesitant to post this since there are so many incredible builds on here and mine looks decidedly amateur, bot not really that bad I think. In fact I think a lot of that charm of these builds is the kind of rough hand built look they have. But maybe that is just me!


                            Tomorrow will bring the final coat of stucco, then I can paint it and put my chimney in. Then seasoning fires, woohoo!

                            Comment


                            • #15
                              Enjoy the oven, pizzas, roast, breads do not know or care what the oven looks like, You have the bragging rights to say I built this myself.
                              Russell
                              Google Photo Album [https://photos.google.com/share/AF1Q...JneXVXc3hVNHd3/]

                              Comment

                              Working...
                              X