Announcement

Collapse
No announcement yet.

Is this ridge beam a mistake?

Collapse
X
 
  • Filter
  • Time
  • Show
Clear All
new posts

  • Is this ridge beam a mistake?

    #88

    (M) I'm in the process of setting up the ridge beam and roof joists for my oven enclosure. I want to have some hangover but don't want any more "Campari", so I thought I'd use the chimney liner for support of the ridge beam. I notched it as you can see on the 3 images that follow. The beam stabilizes the last clay liner and the liner supports the beam; kind of a symbiotic relationship. I figure that the sheet metal may get warm but won't burn. Am I missing something? Is this "simpler than possible" ?


    ____ I will need to fill the slot with refractory mortar as the slot is too roomy.


    (M) I have no close up of the tab to secure the joist to the ridge beam. Rather than extend a tab to the side I chose to cut a tab to rest on the top of the ridge beam. Is that a mistake? ____


    (M) Thanks for your input.

    Ciao,

    Marcel
    "Everything should be made as simple as possible, ...
    but no simpler!" (Albert Einstein)

  • #2
    yes, a mistake, in my opinion

    First, that boring kill joy, building code:

    http://rumford.com/code/IRC03.html

    R1001.5 Additional load. Chimneys shall not support loads other than their own weight unless they are designed and constructed to support the additional load. Masonry chimneys shall be permitted to be constructed as part of the masonry walls or reinforced concrete walls of the building.

    In general, code frowns on one thing having a double use, for example, using a plumbing vent as a wire conduit, and things like that.

    Second consideration is that sheet metal is extremely weakened by exposure to even fairly low heat. A hot fire could turn your ridge beam into bubble gum. The third is that metal conducts heat, and could endanger combustables in contact with your framing.

    Those flue tiles are designed as liners. They are made to go into a masonry enclosures. Code doesn't even want you to support your structure with the exterior chimney unless it is re-enforced. Not to mention that you are putting the weight of your roof covering (which is heavy) on the weakest part of your oven, the door arch, where other builders have had problems with cracking supporting only their own weight.

    As I say, it's just my opinion, but i'd re-think this.

    David
    Last edited by dmun; 12-12-2005, 07:56 AM.
    My geodesic oven project: part 1, part 2

    Comment


    • #3
      David's right on...

      Sorry Marcel but that's not a good choice. Aside from the code violation, it's inherantly dangerous. Just box around the flue with the metal studs letting the outer perimeter carry the load down to the corners. With all the fine work you've done, the last thing you want is to have to tear it apart to replace the ridge post, repair fire damage or have a collapse.
      ~David

      Comment


      • #4
        I have to agree with David.
        James
        Pizza Ovens
        Outdoor Fireplaces

        Comment


        • #5
          I will take your advice. Help on bird's mouth cuts.

          #89

          (M) Thanks to both David (s) and James for your help. I am taking your cautions as necesssary. I have started to work around the "chimney". I will remove the offending piece of ridge beam that goes through the clay liner after the roof joists are in place. For the time being, the chimney support helps with the stability of the ridge beam while I work.

          As an aside, I don't think many would apply building codes to a non live in structure. I will have nothing flamable in the structure. Just using the light metal studs for exterior framing walls is itself a "violation" however your point about the possible weakening of the metal from heat urged me to be prudent.

          ================================================== ===

          I could use some pointers in the procedure of measuring and cutting the roof joists, saving the tabs, and extending the roof beyond the chimney. Working in metal is vastly different than in wood!

          1- Is the depth of the birdmouth critical; in other words, does it matter whether the cut is 1/3 or 1/2 the depth of the joist? _____

          2- I thought it would be easiest to cut the bird's mouth notch 1st, and then, by leaning the joist against the ridge beam, use a triangular square to transfer the next cut line. Even then, there would be a slight difference in angle since the joist would not yet be seated at the top. A tape measure can be used to measure the distance, but not the angle. What do you suggest? ____

          3- Jim's photos show a tab bent in at the bird's mouth which is later screwed to the wall's top plate. I don't see how he made that V notch cut without losing the tab.

          4- I want to extend the roof about 14" beyond the chimney. How do I support that extension? ___

          Ciao,

          Marcel
          "Everything should be made as simple as possible, ...
          but no simpler!" (Albert Einstein)

          Comment


          • #6
            Oven Enclosure

            Marcel,

            I encountered a similiar situation when building my enclosure. I built the ridge beam as one piece, the added some supports ( black line in photo) to support the front of the gable end, then after everything was secure removed the ridge piece that was inline with the flue ( illustrated by the red line) This method gave me an almost perfect alignment and support, while keeping the metal framework away from the flue. I eventually finished with a steel roof around the flue.

            Stanley

            Comment


            • #7
              Hi Stan,

              Your granite hearth is nice. Where did you find it? Is it custom cut -- and if yes, was it reasonably priced.

              The colors work well. Nice.
              James
              Pizza Ovens
              Outdoor Fireplaces

              Comment


              • #8
                Hi James,

                I drew out a template on cardboard, and brought it to a local counter top Company. I was really picky about the curve, and the supplier nailed it perfectly. It is "Uba Tuba" from italy. He charged me $185, which when you figure for material waste ( starting with a rectangle slab before finishing) is about $65/sq ft - the going rate at Home Depot and other suppliers. It does look really nice.

                Ciao,

                Stanley

                Comment


                • #9
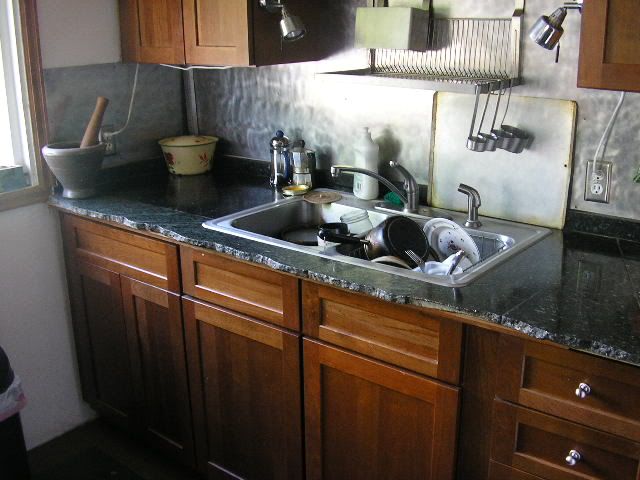
                  i made my kitchen countertops out of granite for free...if you look around, you can usually find "scraps" at granite/marble suppliers which are big enough, especially for a landing that small. i used a tile saw and cut my pieces to 1/8 inch mortar gaps. i'll probably use the same material for my landing whenever i get around to it. for a curved edge like that, the cutting is not that hard, and a jewlery polishing attachment for a dremel will polish up the outside edge nicely.


                  in my case, i intentionally left the rough edge, and polished it until it was dark enough to match the tops.
                  Last edited by paulages; 12-13-2005, 05:55 PM.
                  -Paul
                  overdo it or don't do it at all!

                  My 2005 pompeii build

                  Comment


                  • #10
                    Originally posted by Pizza Stan
                    Marcel,

                    I encountered a similiar situation when building my enclosure. I built the ridge beam as one piece, the added some supports ( black line in photo) to support the front of the gable end, then after everything was secure removed the ridge piece that was inline with the flue ( illustrated by the red line) This method gave me an almost perfect alignment and support, while keeping the metal framework away from the flue. I eventually finished with a steel roof around the flue.

                    Stanley
                    (M) Hey, Stan,

                    Your photo was very helpful and reassuring. The red and black arrows clarified it perfectly but the photo was not super high resolution, so I'd like to know:

                    1- Did you simply omit the birdsmouths notch where the joist touches the wall's top plate? ___

                    2- Did you use something like a small "Strongtie" to secure the joist's bottom edge to the wall's top plate? ___

                    (M) I'll post some pictures next that show the offending piece of ridge beam still in place, the "Strongtie" that I'll use to secure the wall end of the joist, and the tab I cut for securing the joist at the ridge beam.


                    Above should be the image of the roof joist tab bent over the ridge beam. The other side of that joist is visible in the 2nd picture, below:


                    (M) I still don't know how I'll extend the roof over the baker with supports but I can, as a last resort, simply cantilever the HardiShingle since they come in sheets.

                    (M) Paul, that is a great kitchen and a neat idea about the jagged, later smoothed edges of the granite!

                    Ciao,

                    m
                    Last edited by Marcel; 12-14-2005, 02:17 PM. Reason: Added one more picture
                    "Everything should be made as simple as possible, ...
                    but no simpler!" (Albert Einstein)

                    Comment


                    • #11
                      Marcel,
                      I did omit the birdsmouth - and did use the simpson strong ties as you did. I did add a stud across the side wall plates - tying the walls together - so that any downward pressure form the roof structure would not 'bow' the walls out - That was suggested to me by someone on this forum last year. The structure is solid - I could rest my weight against it - and it did not budge. I would not build my house this way, but I had to take a step back and realize that this "better than good enough" - and it provided an extremly strong structure ( for the size of this roof)

                      As far as the overhang - that was not so bad, as I ran the ridge 10" past the gable wall, then added the studs, and supports that tied the "ovehang gable end" to the gable end that was flush to the end wall. Then when I installed my roof (hardiplank/steel roof) the whole unit became very stable. I used 80 or so Simpson components and over 600 simpson screws ( hard to beleive - I should have bought stock in Simpson before this project!)

                      Stanley

                      Comment


                      • #12

                        Comment

                        Working...
                        X