Thank you so much mark this is very useful information... I really appreciate it... I plan to use my big cast iron Dutch oven inside the oven... part of my design is that big old antique beast need to fit inside... and I want to do large roast of meat as well...
one thing we do in Hawaii is imu cooking... below ground... Maori have this tradition as well... in fact for thanksgiving we did 4 big square tins underground.... we look at the wfo as an above ground imu that we can cook traditional Hawaiian food in.... I am thinking my original plan of 37 inches is on track... mahalo.


-
For us, it's pretty much perfect. I find it's good for 2-3 large pizzas at one time which is good when we have lots of people round. When it's just us, or a small group of friends, then it is larger than it needs to be as I then seldom cook more than one pizza at a time. Where the size works really well is when doing roasts as I can fit a pretty big dish or a few dishes in the oven at the same time. If I did it again, I'd probably go for the same size. If I was to go smaller, I'd not go smaller than 38".Originally posted by Boogie-D View Post
I have not yet started experimenting with baking bread but that's next on the "to-do" list. I think the larger size will be good for bread baking too.
The one thing that I will absolutely recommend, is to go overboard with insulation. With mine, I have 25mm of furnace blanket and then 150mm of regular fibreglass insulation and then a foil layer, with perforations for steam. Over insulating has meant that the oven holds it heat really, really well. I would have liked to go to 50mm furnace blanket and then the regular insulation but the furnace insulation was very expensive. You really cannot have too much insulation.Leave a comment:
-
Hey mark how do you feel about the size of your oven 42” to big? Not big enough?Leave a comment:
-
Thank you Boogie-D! I think my brickwork could have been much neater. I should have used an ID. As for the chimney setup. I should have made the "throat" (intake) to the flue slightly larger and I should have used better formwork for my door arch which would have allowed me to build a slightly nicer arch. But, it does work very well. With a slightly larger flue intake I feel it would draw better when cold. When hot, it draws very well. Better under-slab drainage would have been good. I had to drill drainage holes afterwards. Most people here advise against a foil layer, but, for me, that as worked well and with our wet winters I feel that any moisture in the outer plaster layer will, at least, stay away from the insulation.Originally posted by Boogie-D View PostLeave a comment:
-
Nice build mark I like your chiming box and vent set up would you do anything different??Leave a comment:
-
Nothing quite so technical. I have an infrared thermometer which will read to 600degC, so I measure the top of the dome and the centre of the floor and then I graph the data using AutoCAD because I could not make Excel graph it the way I wanted to see it!Originally posted by Corsairmo View Post
Almost all my materials are from old nightstore heaters. Other than refractory mortar, cement and concrete, of course. So, for the door I made a stainless steel and galv. steel box of which the one side is screwed to my timber door face. The box is filled with a layer of furnace insulation and some insulating brick. The insulating brick came out of the one nightstore heater. I suspect they had it in there to keep the heat away from the electronics module. I think that, had I not had the insulating brick, that two layers of furnace blanket would have worked just as well.
I've found it valuable to know roughly what temperature the oven is at at given hours after firing as that helps me to plan cooking times and foods to cook at given times. It's a learning experience, of course, but it's fun!
Feel free to check out my food thread too: Saturday night pizza, Sundy night lamb shanks. - Forno Bravo Forum: The Wood-Fired Oven Community
I need to graph it all again. Since I started using olive wood, and since everything has dried out properly, the oven is holding it's heat much better.Last edited by MarkJerling; 12-07-2020, 03:14 AM.Leave a comment:
-
Mark, your heat measurement fascinates me. How are you collecting this data? A thermocouple with a connection to ??? I'm a hobby computer nerd and this sounds like something I've overlooked! Beautiful door by the way, I'm looking to reach out to a fabricator family member to help create mine, but am stumped on what to use for insulation inside. Where did you source your stuff?Leave a comment:
-
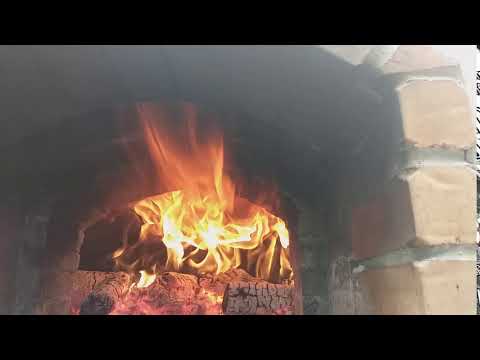
Here's a little video clip showing the flames going up the flue with a nice, hot olive wood fire.
Leave a comment:
-
Happy to report that, 3 whole days after firing the oven, with the door fitted, it's still holding a little heat. Down to 50degC now, 122F.Leave a comment:
-
Thank you David. It's 1mm thick, so a tiny bit thicker than 1/32". It's the stainless steel used for kitchen bench tops.Leave a comment:
-
Good news with regard to the door: The door construction has worked out well. Not only is it working very, very well in keeping the heat in, but the door has not warped. What's also really fun to see is that the outside 32mm ply only heats to around 35degC with the maximum it got to being 38degC / 100degF. The stainless steel interior face has browned somewhat but it's doing the job, so all good!Originally posted by david s View Post
Here's the revised temperature profile showing the difference the door makes. It's still 87degC / 190degF in there, and it's two whole days since we fired it.
Leave a comment:
-
Aha, thanks. Well, that explains it then. The throat is about 90% of the flue size, so it works well! I'll post once I know if the door is working as it should (or not!).Originally posted by david s View PostLeave a comment:
-
Yes the flue diameter and height is what creates the power of the draw and as long as the throat is no less than about 2/3 of the cross sectional area of the flue pipe, it will simply act as a Venturi at the restriction . Observe the smoke at that point and you should see it accelerating there. All good.Originally posted by MarkJerling View PostLast edited by david s; 10-28-2020, 09:52 PM.Leave a comment:
-
Thank you. Only the "cold" side is screwed to the outside ply, so I don't think we should see any heat transfer to the ply. But, will let you know tomorrow when I test it! As to warping, the inner face may bulge but the rest of the box should be stiff enough to hold things relatively straight. But, we'll know tomorrow night. Fingers crossed!Originally posted by david s View PostLeave a comment:
Leave a comment: