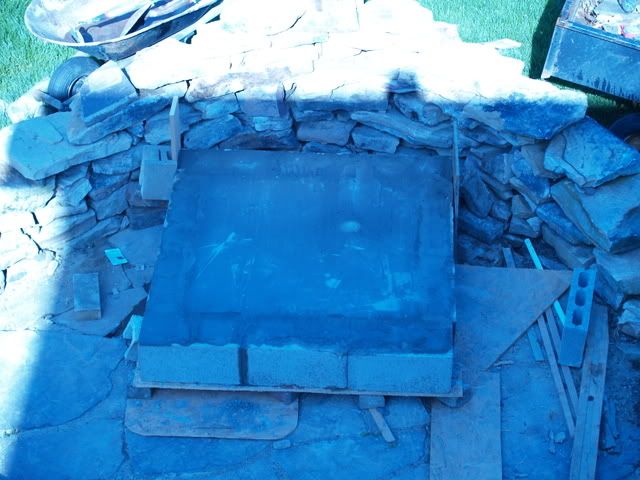
Announcement

Collapse
No announcement yet.

A quick photo history

Collapse
X
 
  • Filter
  • Time
  • Show
Clear All
new posts

  • A quick photo history

    Foundation


    Extended fondation


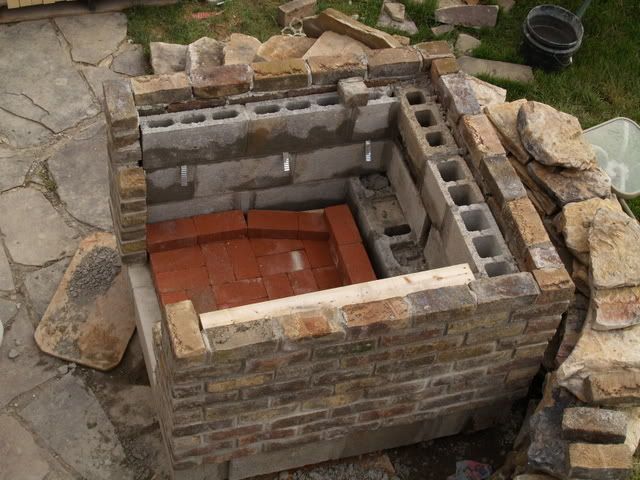
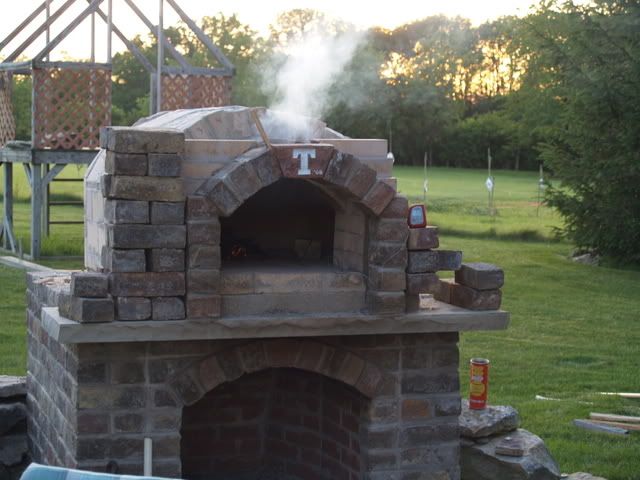
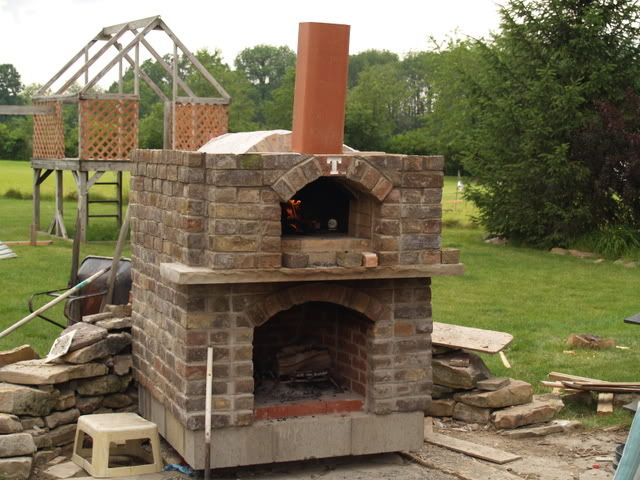
    Fireplace, exterior brick & firebox layout


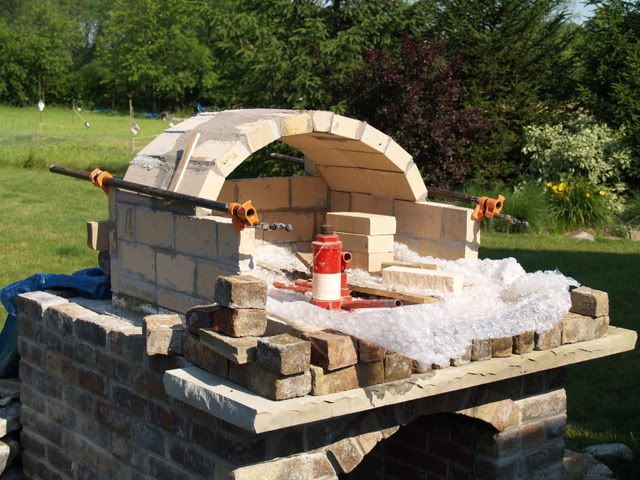
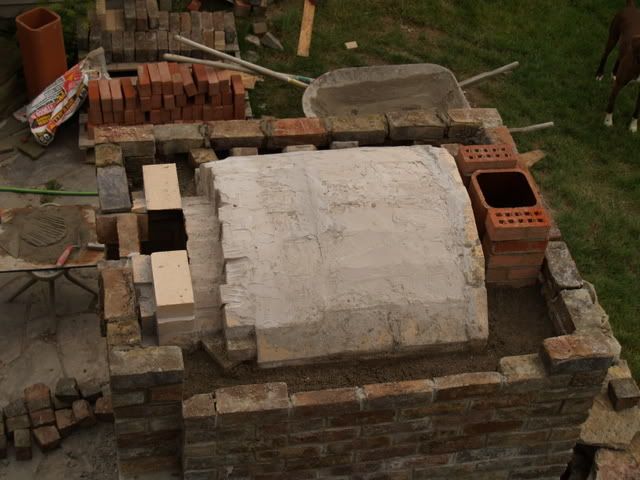
    Hearth poured and barrel started

  • #2
    Re: A quick photo history

    Vault finished


    Entry arch, keystone & fire!


    Tomorrow more brickwork, Saturday, set the chimneys, Sunday insulate and start the roof.

    Comment


    • #3
      Re: A quick photo history

      Well, not as far as I would have liked! Brick casing is done. I need to get another hearth stone for above the "T" arch. I did pour 8+ cubic feet of vermiculite, with a little portland mixed in to entomb the oven walls. I got 5" of insulation on the sides and about 10" in the rear. The mix was about 10:1, vermic to portland. Another fire tonite.


      Comment


      • #4
        Re: A quick photo history

        Hi 70chevelle
        looks great so far.
        My initial thoughts were, why does he have a chinmey at the rear of the oven but then I saw your fireplace below.
        The only problems I see is hitting ones head whilst tending the fireplace from your oven entry shelf or scorching your legs/knees whilst standing admiring and cooking your pizzas.
        Then again, you might not have them both going together as I have found that I get alot of infra red heat from my oven whilst cooking especially when in front of the oven.
        We have very mild weather here in Adelaide, even in winter it is not the extremes as in places in the US.
        You will certainly enjoy it once completed.

        Neill
        Prevention is better than cure, - do it right the first time!

        The more I learn, the more I realise how little I know


        Neill’s Pompeiii #1
        http://www.fornobravo.com/forum/f8/n...-1-a-2005.html
        Neill’s kitchen underway
        http://www.fornobravo.com/forum/f35/...rway-4591.html

        Comment


        • #5
          Re: A quick photo history

          Neill, I'm actually finding that the mantle helps project the heat outward, instead of going straight up. It heat the patio area nicely. I'm sure I'll hit my head on it more than once. Not because of the design, but normally when I'm enjoying a fire in the evening, I may enjoy a cocktail or two! I don't intend to make pizza's while the fireplace is going, but I'm sure it will happen. So far everything is working as it should. Can't wait for that first pizza

          Comment


          • #6
            Re: A quick photo history

            very nice!
            sigpic

            Comment


            • #7
              Re: A quick photo history

              I was considering a fireplace below , love the way it turned out. Was it a lot of addl work to vent out the lower chimney ?
              On a side note... Being from Knoxville , brother has a 68 Chevelle convt , of course its Orange with white racing stripes.

              Good work.

              Comment


              • #8
                Re: A quick photo history

                Weslock - The work wasn't too hard, but the planning and integration was a little taxing. The plans for building an oven are plentiful on this sight and others, and also for building a fireplace. I was heavily dissuaded from building as I did here, but I just didn't have room, budget or materials to do 2 seperate structures, so it was a tradeoff for me. I don't have the flue's totally installed yet, but the venting works pretty well so far for both the oven and fireplace. The fireplace venting drew the majority of the caution. I read up on Rumford style fireplaces, and loosely based mine on what I read about them. The rear wall of my fireplace leans inward to an opening. That opening goes into the smoke chamber and then up to the flue. Once I get a good fire burning, I get very little out the front. Even when I do get some smoke out the front, it's still worlds better than the 4 sides open mental fireplace I had before. When the wind shifted the smoke would be in your face, and all the heat just escaped on all 4 sides. This is much more efficient as far as wood usage goes and for warmth in the evenings.

                Again, though, my problem was that I was kind of building as I went. I had a general idea of how I wanted the exterior to be, but mocking everything up kept me a little off balance. It wasn't until last week, right before I started laying the exterior brick around the oven, that I sat and drew up something that I really liked. So while I'm laying brick, I normally have the drawing handy to reference so I keep my mistakes to a minimum. The actual time to lay the firebox for the fireplace and the oven itself were pretty quick. I spent a lot of time sitting on the patio staring at the unfinished behemoth trying to figure out what my next step was going to be.

                I had anther curing fire last nite. My wife and I were sitting on the patio having a glass of wine, and she asked me "How in the he!! did you figure out how to make that piece of concrete into this?" So, I guess it's a win if I impressed my best girl!

                I love my Chevelle, but I haven't driven her much in the last 2 years due to gas prices. She's going to get a good wash & wax shortly, and I owe a young, 8 yo, friend a ride to the ice cream stand before the end of summer. I put way more of my heart and soul into my Chevelle than this oven. It took me 8 years to restore.

                Comment


                • #9
                  Re: A quick photo history

                  thanks for getting back to me , I guess what I dont understand is, what angle is the chimney for the fireplace ? Is there a mnimum angle that need to be maintained to ensure proper venting .

                  Comment


                  • #10
                    Re: A quick photo history

                    I really like the smaller footprint of you oven.

                    I can't wait to see how it performs.

                    Nice job so far!
                    My thread:
                    http://www.fornobravo.com/forum/f8/d...ress-2476.html
                    My costs:
                    http://spreadsheets.google.com/pub?k...Xr0fvgxuh4s7Hw
                    My pics:
                    http://picasaweb.google.com/dawatsonator

                    Comment


                    • #11
                      Re: A quick photo history

                      There really is no angle. The firebox I built has the 2 sidewalls, then 2 intermediate walls the angle inwards towards the rear. The rear wall then was built angling towards the front at the top. I stopped the rear wall about 8" short of the ceiling. This left an opening that is approximately 8" x 18" at the rear-top of the firebox. I also angled the ceiling of the firebox, up, towards the rear (opening). On the other side of the rear wall of the firebox there is a void between it and the brick/block work which is about 8" deep. That became the smoke chamber. I formed an 8" X 8" square hole in the rear of the oven hearth to acommodate the chimney flue. If you look at the 3rd picture down, you can see the area between the rear of the firebox layout and the rear wall, and the layout of the firebox walls. So everything kind of leads the smoke to the rear of the firebox & once it gets thru the opening, it has no-where to go but up the chimney.

                      Comment


                      • #12
                        Re: A quick photo history

                        I feel like I am stalking you , as I look at your photos quite a bit. It looks like you used regular bricks inside of the fireplace, did you ? Did you extend the fireplace chimney hire as there are no pix , dont know if you are that far yet.

                        Since you are the only one I can find who has done this , if I build a 43" pompeii style my fireplace would have to vent under the hearth and I am concerned it would be too much of an angle.
                        Thanks for your help.

                        Comment


                        • #13
                          Re: A quick photo history

                          It's official, my first internet stalker! 
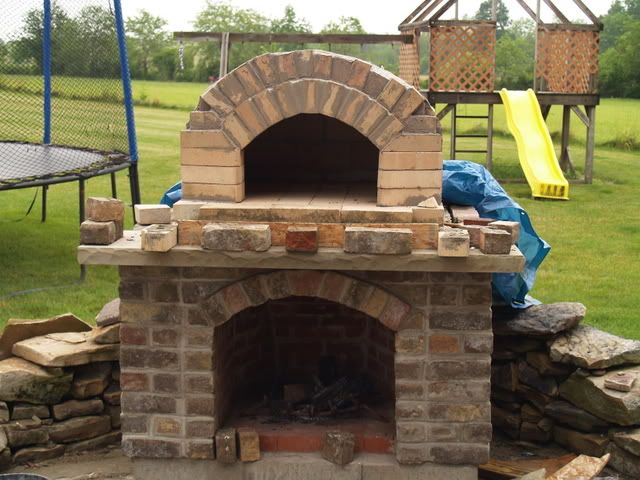
No problem, ask as many q's as you want. I'll be asking a few today myself. I'm finding that fire management may be as taxing as designing and building? Anyway, I do have some pic's of the firebox at home, I'll try to get up soon. My oven is pretty small. The bigger your oven gets, the deeper your firebox for the fireplace gets, which is an issue. If I do a general calculation on your 43" pompeii, your base will need to be 6' deep, give or take a couple inches. You'll need to add a foot to that at the rear for your fireplace flue. That's a pretty deep fireplace, and you may have to have a lot more ingenuity than than I put into mine? Maybe your vent can start in the middle of the top of the fireplace and you can run your flue on a lazy angle to the back and then up? Just some thoughts.

                          Wes, yes, I used solid red bricks with fireclay mortar for my firebox. My rationale was that the temps shouldn't get as high as the oven. It's more open with a bigger flue and less impedance of the heat leaving thru the front or out the chimney, and using the solids I had on hand and fireclay mortar (instead of heatstop) was a lot less costly. I did however use firebrick for the top of the firebox. I believe they were insulating firebrick as they were pretty light as compared to my low duty firebrick I used for the oven. Anyway, I layed up 3 towers of these firebrick. I filled the center hole with fireclay mortar & the 2 outer holes with rebar & fireclay mortar. Then I layed them on the firebox walls for the ceiling. I did this because I didn't want to chance the fire coming in direct contact my hearth concrete and degrading it.
                          Last edited by 70chevelle; 07-16-2008, 06:26 AM.

                          Comment


                          • #14
                            Re: A quick photo history

                            I built a pretty good sized fire last nite and was extremely excited/frustrated with the results. It got going at about 7:45 pm. Just to review, 31" x 31" cooking floor, barrel vault oven, 17.75" dome height, 11.75" entry arch height x 18" wide. I started to get the white dome. I have a spot about 6" in diameter right now. If I have the opportunity, I'm going to burn another hot fire tonite.

                            The exciting results: At about 9:30 pm the fire was blazing, and starting to burn white on the dome. My IR therm was off the chart. It goes over 900*. The floor where the fire was burning was over 700*. The oven therm inside the oven was reading about 500*. (Not sure of it's accuracy?) Anyway, I checked the top of the dome, 3" FB blanket & 1" vermicrete, and it was a cool 68*. The sidewalls, 5" vermicrete, were 77*, which I'm sure they were cooling from the sun beating down on them all day. So my insulation was working. I checked again at 11:00 when I went inside and they were still the same readings.

                            The frustrating results: My wife threw together a quick pizza, since the oven was fired. I scraped the ash to one side, and the flames weren't out, but they were definitely not blazing. My dome temp dropped to about 600*, with no flames touching the dome, and the floor was about 400*, after I wiped the ash with a damp towel. The real problem came when I placed the pizza. I didn't get it in deep enough, and some of the cheese hit the floor when I 'shook' it off the peel. Then when I went to try to turn it, it was stuck. I got most of it out, and it was an ok pizza, my expectations were low as it was made with instant dough & ragu pizza sauce. Then I had to rake the coals over where the pizza was massacred to burn off the cheese & sauce that fell. So, lessons learned: Make sure to place the pizza deep enough in the oven. Make sure that you have enough release agent (corn meal, semolina, etc) on the peel. Most importantly, keep the blaze blazing while cooking pizza's. I did read a lot on the Fire Management section where it says you have to keep the flames high in the dome while cooking pizza's, but I guess the beer got the best of me. I will try again tonite.

                            Oh, and this morning, around 7:00 the floor temps with no door were still 170*.

                            Comment


                            • #15
                              Re: A quick photo history

                              Hang in there, my first attempts at pizza and peel work were disasters. I did not have an oven yet and set off the smoke alarms in the house! I still manage to stick a pizza every so often.

                              I bet your oven gets better as it dries out and cures. Mine took several fires to become consistent and fast on the heat up side. - My floor of my oven had soaked up a lot of water during the build process and the ceramic board needed to fully dry out to get efficiency back.

                              Christo
                              My oven progress -
                              http://www.fornobravo.com/forum/f8/c...cina-1227.html
                              sigpic

                              Comment

                              Working...
                              X