Announcement

Collapse
No announcement yet.

New Oven Builder in the Mix

Collapse
X
 
  • Filter
  • Time
  • Show
Clear All
new posts

  • New Oven Builder in the Mix

    Hi everyone I thought I would introduce myself, I've been lurking for the last few days when I discovered this forum section of Forno's Site. I work for All Oregon Landscaping, one of our installations of a Casa Series oven is featured in Forno's Photo Galleries.

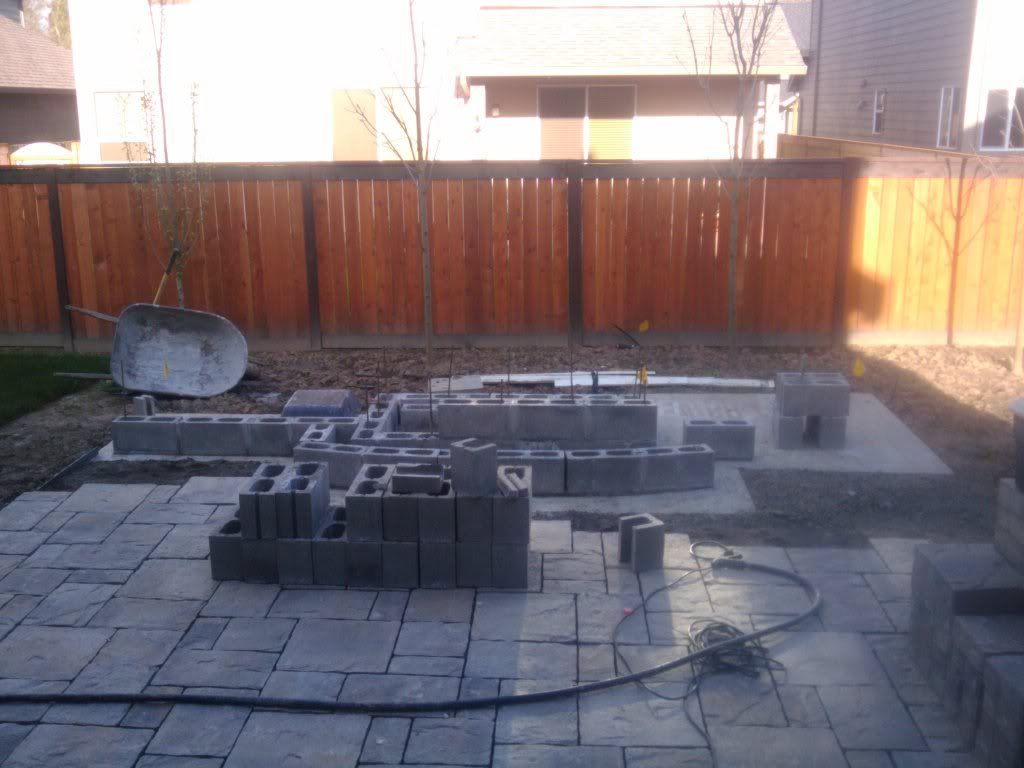
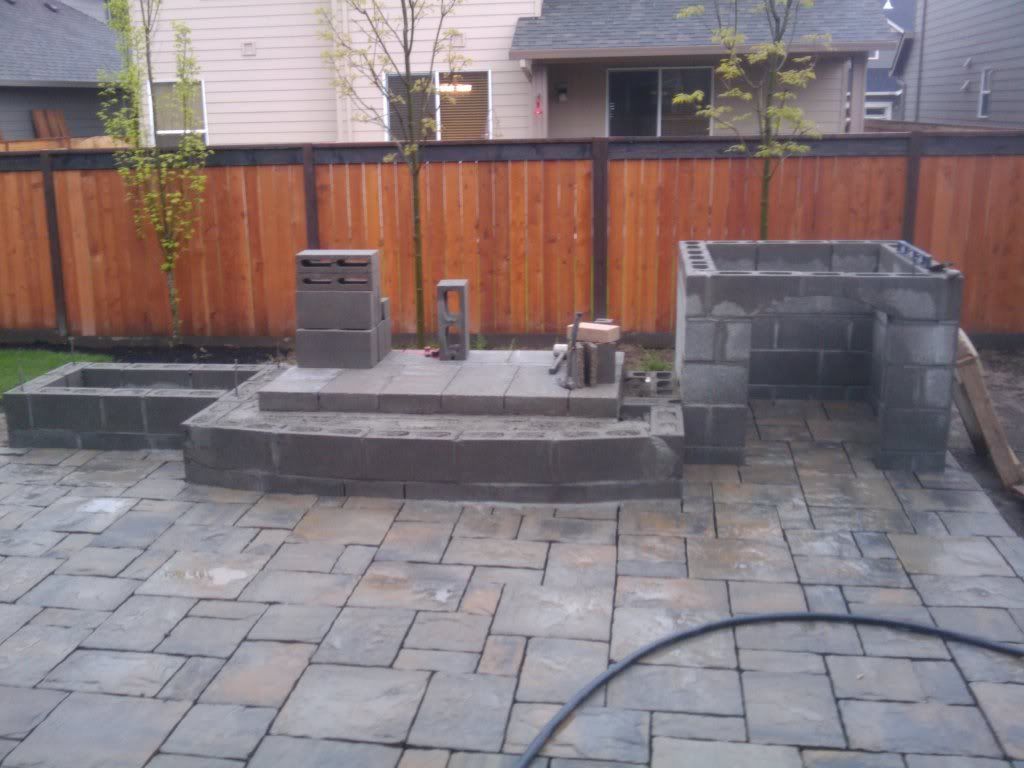
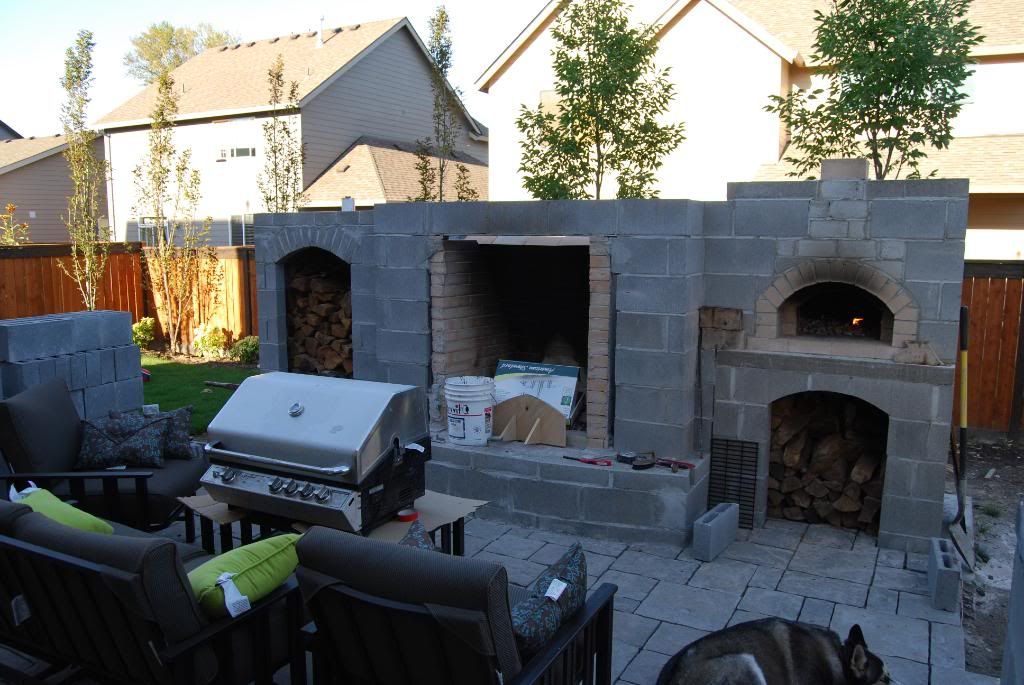
    Anyway since that installation I had been obsessed with the idea of building my own oven. I've been in my new home for a full year now and started this outdoor space last fall, and now that it is finally summer here I have been making some real progress. It's too bad I did not find this forum earlier there have been several things that I think if I had know would have helped this build out quite a bit. The primary one being the overall obsession here with isolating the heating mass. I know this oven performs well without the degree of insulation many builder here use but I know it could perform better with more.

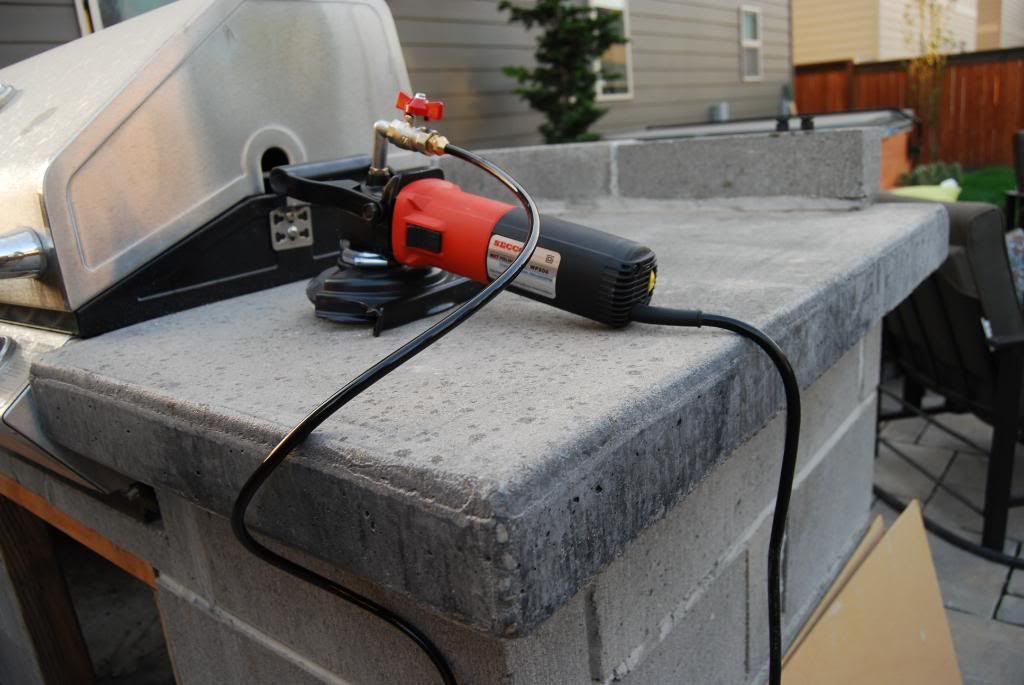
    I haven't been very good about taking pics of my progress, just a couple snap shots with my cell phone as I go. I'll take a couple more with a decent camera tonight of my current progress...
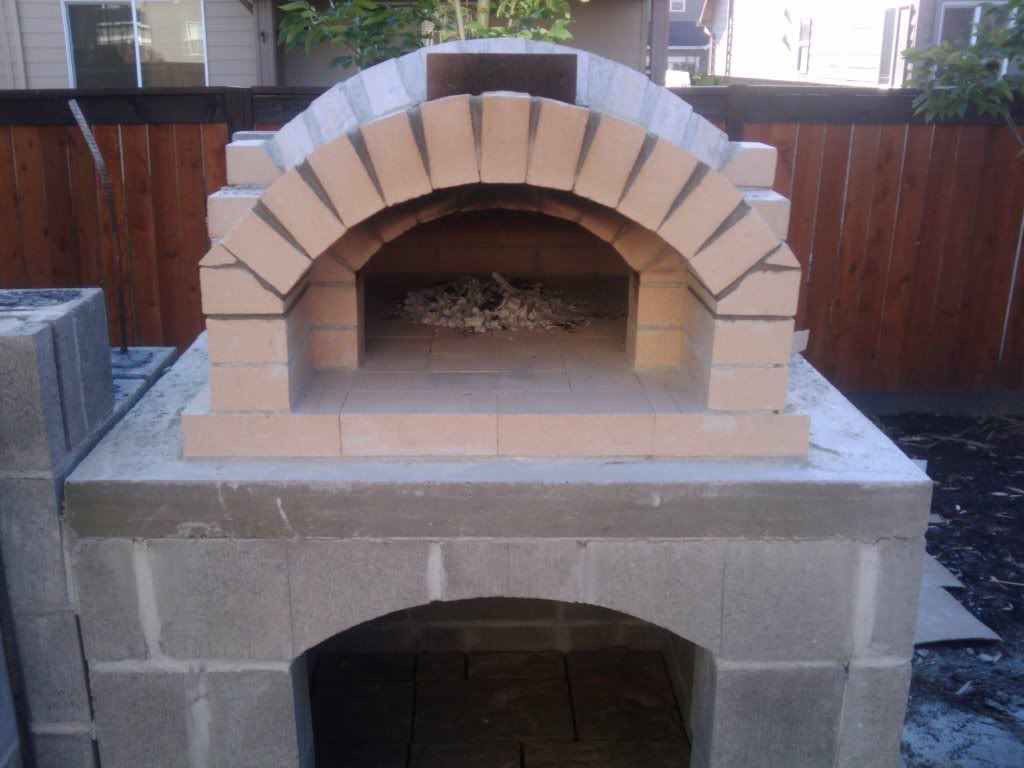
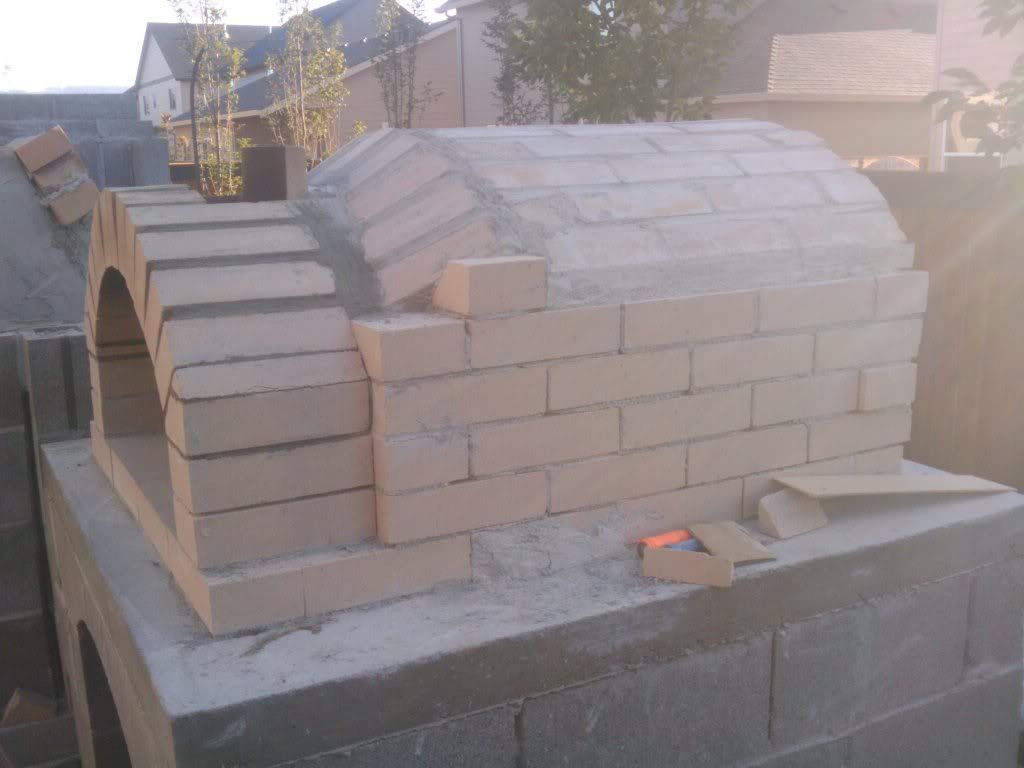


  • #2
    Re: New Oven Builder in the Mix

    nic, looking gooood. I bet you can taste the pizza already! I can hardly refrain from reading this forum is it great or what. There is some very, very talented people here.You included. I have yet to begin my WFO, still working on the wife's OK. Meanwhile doing lots of research. Keep the pictures coming. Gene

    Comment


    • #3
      Re: New Oven Builder in the Mix

      Hey Nic, you mentioned in another thread that you were making cast concrete counters...I would love to see some pictures of that!
      My Oven Thread:
      http://www.fornobravo.com/forum/f8/d...-oven-633.html

      Comment


      • #4
        Re: New Oven Builder in the Mix

        Hi Drake, Here are some pics of the Kitchen Island counter top progress. I'm not as good with concrete as some other aspects of the cement product building world, but I try.

        The process with these counter tops are as follows....

        Stage 1 build forms just like you do for the pizza oven slab. I only go 3.5" on most of this stuff because that is really more than strong enough in my opinion for these applications. Many precast guys I know will go 2.5" thick on this stuff but they put fiberglass in their mixes, unless it is polished. Also something that I use is vinyl trim boards to create the edges of my pour. The smooth plastic makes for a much smoother cast and air doesn't trap against it as bad.

        Stage 2: 12" on center 3/8" rebar cage with ends bent down into cmu block. (I also use 4" CMU for a lot of my construction, filled with concrete)

        Stage 3: fill corners of forms with clear silicone screeded with a 3/4" quarter round forming tool so the bottoms of counters have a nice bevel. Let cure for several days.

        Stage 4: Concrete!! I use a 80lb bags of 5000 psi Concrete mix. I mix in a 5 sac mixer, 4 sacs of 500 PSI and one extra 60lb sac of portland cement. The extra portland smooths the mix out more, adds strength, reduces air bubbles etc. I also add 4 cups of Black dye that I get from Mutual Materials, cant remember the brand. The stuff from Depot is mostly useless, the pigment concentration is too low to really get a good effect. Trowel smooth with a Magnesium float, tool corners with 1/4 round eder, then trowel very smooth with hard steel trowel or steel bullnose pool trowel. Let cure 2 weeks, pull forms after a couple days.

        Stage 5: (Optional) I really wanted to expose some aggregate because I like that look, others do not, so I acid washed the piss out of the surface to expose sand and stone in the mix. If you want a very smooth no aggregate finish, trowel surface more with magnesium float and trowel in color hardener with steel trowel, skip acid all together. (Pictures start at the post acid wash stage of this project)

        Stage 6: Start polishing with progressively finer grades of wet polishing disks on wet concrete polisher. There are specific pads for concrete and stone, make sure you use concrete pads. My polisher kit was $85.00 on Ebay and included concrete disks from 50 to 3000 grit. I went through the full range to get this finish. I also used the polisher on the bricks in the floor of my oven, it created a flawless perfect surface.

        Stage 7: Seal coat, (by now your at least a month into the process, in my case 1 year so the concrete is ready to be sealed. You should always allow a minimum of 1 month before you seal concrete or the sealer will cloud. I used Exposeal by Unitex. It is an Acrylic solvent based sealer for exposed aggregate driveways it holds up very well!! I do 3 thick coats, layed on with a 1/2 inch knap roller, do not over role the surface, just one or two quick passes or you will dimple the surface. This product is probably not very safe for food preparation, which is ok for me because I use 18" x 24" granite slabs for food prep.


        All of these pics are of post acid washing, pre polishing. There is a lot of dust on the counter from block cutting for the rest of the project.


        Comment


        • #5
          Re: New Oven Builder in the Mix

          The Polishing and sealing process.....


          Sealer test in lower left hand corner, I polished that back off before I sealed the entire surface.


          Finished kitchen counter with sink and grill installed. I still need to pour the raised bar section. Maybe it'll happen in the next couple weeks.

          Last edited by Nic The Landscaper; 08-17-2010, 12:43 PM. Reason: Spelling error

          Comment


          • #6
            Re: New Oven Builder in the Mix

            More Finished. You can kind of see in front of the sink I had to pour in a little filler strip because my buddy that helps me now and then miss measured the sink size . Oh well live and learn.


            Comment


            • #7
              Re: New Oven Builder in the Mix

              Some pics of the rest of the project... Which I should have been done with by now according to the Fiance.

              The Tub was free. All the guts, pumps, fiberglass tub and Jets were good. I had to re-plumb all the tubing, new internal frame, and replace the ugly plastic shell with wood.


              The Fireplace had a forward set block and brick arch across the front of it that I wasn't happy with so I took it off and will just do it with thicker stone than the rest of the veneer will be to get the bump out I want. Obviously still lots of work to be done here.


              And an obligatory coals in the oven shot to wrap up the updates.

              Comment


              • #8
                Re: New Oven Builder in the Mix

                nick, put a roof over everything, move out side, and then rent your house out.
                Look great!!! Gene

                Comment


                • #9
                  Re: New Oven Builder in the Mix

                  Thank you Gene! Have you made any progress on convincing the wife to let you build? If you need some pizza oven in action motivation for her we'll have to have you come up and visit us in the Oregon Wine Country!

                  Comment


                  • #10
                    Re: New Oven Builder in the Mix

                    Nice job on the counter tops.

                    "This product is probably not very safe for food preparation,"

                    I used a product called "Enrich n Seal" by Aquamix. This is food safe and heat resistant. It also brings out the colour in the stone because it is a "wetting" agent.

                    Comment


                    • #11
                      Re: New Oven Builder in the Mix

                      Some construction updates. Progress has been slow.

                      Comment

                      Working...
                      X