If this is your first visit, be sure to
check out the FAQ by clicking the
link above. You may have to register
before you can post: click the register link above to proceed. To start viewing messages,
select the forum that you want to visit from the selection below.
I'm always amazed by the range and quality of the used building materials on ebay.co.uk : of course you have a compact geography and a thousand years of built structures to demolish and re-distribute.
This comment of Dmun's fascinates me. I lie awake nights thinking of all the old buildings that must be being knocked down around here, all the beautiful old bricks I could do things with, old tiles, whatever. The difference is, in Switzerland no-one would ever think of putting them on ebay
"Building a Brick oven is the most fun anyone can have by themselves." (Terry Pratchett... slightly amended)
It's been a while since I last posted - but I've been busy! It's been cold here - below freezing most nights, and only around 2-5 degrees C during the day.
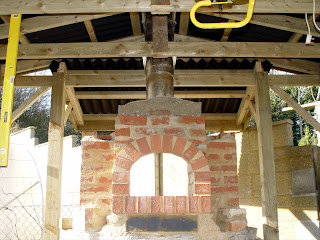
Firstly, I finished off the chimney bricks and flue (a recycled length of twin wall 6" internal stainless chimney, ?30 off ebay):
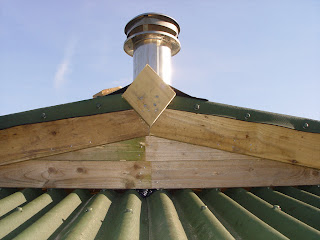
Once this was finished I could finish the roof of the summerhouse off:
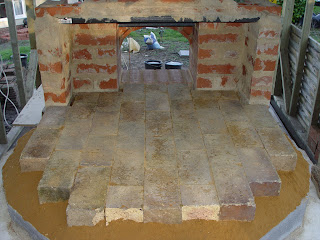
After that came the oven hearth - recycled firebricks (from ebay) laid on their thin sides, on a thin layer (~1inch) of sand on top of my insulating concrete blocks:
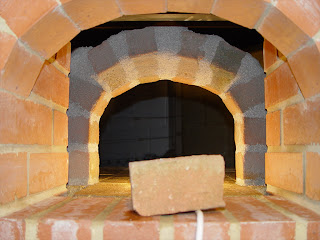
Next I built an inner arch (the oven entry) that will become embedded in clay when I build the dome. The bricks were held together with the same 50% grog, 50% fireclay mix that I'll use for the dome. The top bricks in the arch were my fancy ones with the corners chopped off - these were all from freecycle:
I used a sand dome as a mould for the clay dome - planned for 32" internal diameter, and 15" high:
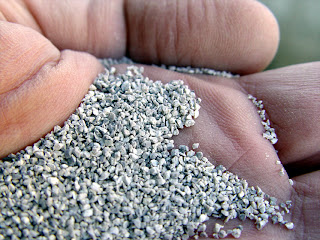
I've used a 50% fireclay, 50% firebrick grog mix for the clay dome. The grog was very coarse - more like fine grit:
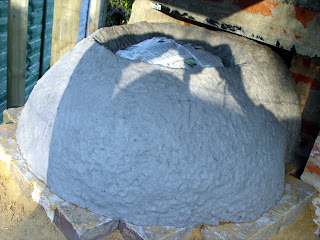
I built the clay dome in about 3-4h - very quick, compared to how long it would have taken me with bricks. Three quarters of the way through it looked like this:
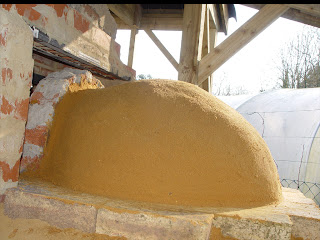
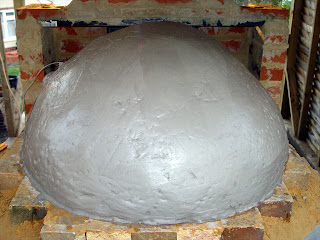
The walls were about 3.5-4" thick all round. When finished off it looked like this:
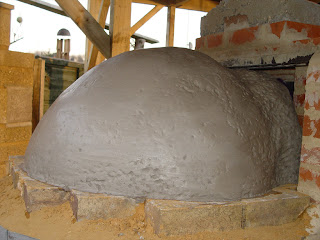
And when you look at it from the back, it looks like this:
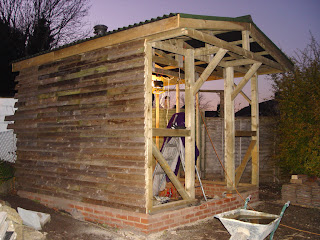
I even had some time to finish off one wall of the summerhouse, using my recycled fence boards:
Building the dome this way was good fun - very fast, and easy to do. Hopefully my idea of building the oven around the chimney will work out OK - I plan to fill the gaps with a vermiculite/fireclay mix once the dome's dried a bit. I'll scrape the sand out of the dome in the next day or so, then leave it to dry. I know I'll get some cracking with such a high clay content, but hopefully I can patch these up once it's dried out.
More pictures on the blog if anyone fancies a look. Hope you're all getting warmer weather than me...
It's an interesting project, and I look forward to seeing what the cracking situation is going to be. In effect, you are doing the same thing that Frances did with the fireclay mortar, except you are using really really tiny firebricks.
Good luck with your dome. Dry it slowly, and keep us posted.
Well, it's still standing! I took all the sand and bricks out of it today, and it's still the same shape and hasn't sagged anywhere. That's a relief.
It's still very soft, so I've left my 100W light bulb on a flex in the middle of the oven void, and will leave it to dry out. I don't know when to start firing it - but certainly not yet! The clay/grog mix goes a very pale gray when it's dry, so I'll leave for at least a couple of weeks and see how it goes. I don't want to fire too soon and crack it. I'll need to fill the gap between the dome and the chimney too, so I need some patience now.
Love the idea of this being a firebrick oven, just made of really small firebricks. Made me smile
Well, it's still standing! I took all the sand and bricks out of it today, and it's still the same shape and hasn't sagged anywhere. That's a relief.
It's still very soft, so I've left my 100W light bulb on a flex in the middle of the oven void, and will leave it to dry out. I don't know when to start firing it - but certainly not yet! The clay/grog mix goes a very pale gray when it's dry, so I'll leave for at least a couple of weeks and see how it goes. I don't want to fire too soon and crack it. I'll need to fill the gap between the dome and the chimney too, so I need some patience now.
Love the idea of this being a firebrick oven, just made of really small firebricks. Made me smile
When I was doing pottery... some coil pots would take 2 weeks or more to completely dry and they were only about 1/2 inch thick. Any moisture left in clay during firing will cause cracks. But some potters would fire pots at really low temps... say 200f for many hours before cranking up the heat. That eliminated most cracks and explosions.
So maybe a few weeks of drying. And a less aggressive curing fire regimen than the typical brick oven. Maybe a couple long days of stoking a really, really small fire.
Do you think you will eventually have to fire it up to a really high temperature to get the clay to vitrify?
I'm really curious to see how this all works out.
Good luck and keep the pics coming.
Quite an enjoyable thread.
Well, it's more or less dried now, and I've only cracked up a little...
I took the sand former out after 24h, and I think this helped a lot as it could contract freely as it dried, and slide freely over the firebrick hearth.
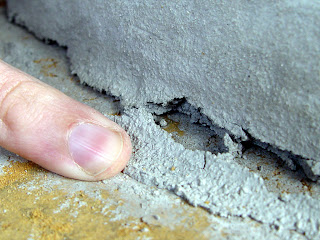
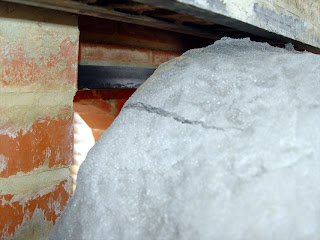
After 5 days drying I only had cracks around the brick arch...
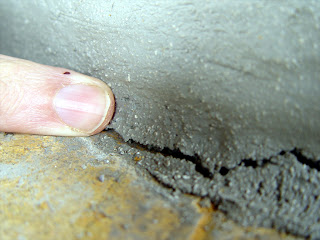
... and around the base of the dome, between the dome and the firebrick ...
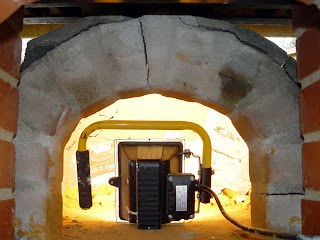
That was after drying with a 100W light bulb inside the dome for 5 days, with outside temperature being about 5-8C ish. I then switched to the 500W halogen work light, and after another 5 days of this the whole dome was toasty and warm, and seems very dry. It rings like a teracotta plant pot when I knock it with my knuckle.
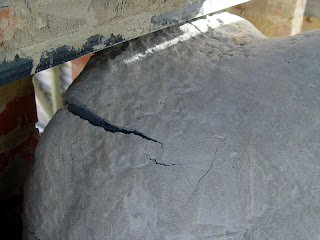
The only cracks it sustained were on the outside near the entrance arch...
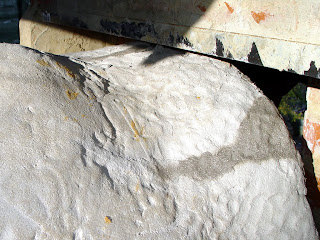
.. around the base (about 1/2" movement inwards overall) ...
... and where the arch had been stressed as the dome shrank as it dried
I was very pleased with this - there's not a single crack in the main dome, which has stayed intact and contracted as a single piece. I think the gritty grog probably helped - I'm imagining it's like the jagged bits of aggregate in concrete that binds the mix together.
The cracks were easily repaired using the clay I had spare from the build, which I'd kept wet and bagged up.
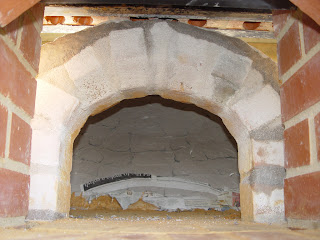
You can see from the view into the dome how I used brick sized lumps of clay when I built it - it's impossible to get the inside face perfectly smooth. I quite like the look through the arch - I had thought it would look messier on the inside than this. The mix has dried to a nice near white colour - not that far off a colour from the newspaper still stuck to the inside. It'll burn out.
Although the dome seems bone dry, I'm now giving it another week with the 500W halogen before playing with fire. Better too dry, than not dry enough...
It's looking really good Carl. The whole project is a credit to your determination to build an affordable oven. The blog is well worth a look for those who would like to catch up with the build.
Comment