


-
After weeks of delays, we finally poured the slab. The only problem we ran into was that my 2x2s bracing the walls of the form were not enough. The sides were the worst and we were able to brace those. The front and back weren't bad. -
That sounds like good advice, david s. Do you get much water coming out of those drain holes?
I already poured my slab so I'll just need to get a concrete bit and drill through. There were some low spots in the center of my slab so that will be a good place for a drain hole.Leave a comment:
-
If you have a bathtub in the centre of the supporting slab a few drain holes near the centre to allow for drainage should water accumulate there is imperative IMO. These can be cast into the slab on pouring rather than having to drill later. My ovens are way smaller than yours but use a similar idea.Originally posted by CharlesPizzaiolo View PostLast edited by david s; 04-23-2019, 11:48 PM.Leave a comment:
-
Finally, I installed the rebar for the hearth slab. You can see my slab is going to be quite thick. I did that because I wanted to have the top of the slab even with the oven floor. So 4" of concrete in the center, plus 2" of insulation, plus 2.5" of brick, plus an extra 0.5" of sand for getting the brick level: that's a 9" slab. Again, if this isn't clear now, I think it will be once you see the finished hearth slab.
You can me temporarily place the center form (the circular thing with all the styrofoam). That will create a void in the center of the hearth slab. That void is where the floor insulation and bricks will go.
You can also see me installing a white paper tube near the back of the oven. That will serve as a smoke passage. I'm going to build a firebox behind the oven and smoke and heat will travel through that hole (and holes in the oven floor and walls) and into the oven chamber. So my oven will (hopefully) double as a smoker. I got this idea from another guys build video.Leave a comment:
-
Next I started building forms around the perimeter of the stand. I need these because My slab is going to overhang the stand by about 6 inches. I chose to have it overhang because I thought it would look good. Not sure if it was really worth the extra effort required to build these forms. At about 6 minutes in, you can see me installing some short vertical pieces of rebar in the center. These will hold up more forms, it will make sense when you see us pour the hearth slab.Leave a comment:
-
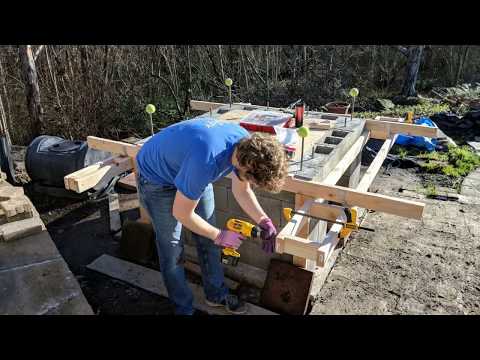
Here I'm building the forms to support the center portion of the hearth slab. I know, I've overbuilt them, but I'm new to this kind of construction and I was paranoid better safe than sorry, right?
Leave a comment:
-
I've gotten behind on posting, I'll try to catch up. Here is us pouring concrete in every other hole to lock the cinderblocks in place, as the FB plans suggest. I used two pieces of angle iron to hold the cinder blocks above the opening. I dropped rebar down the holes and I cut them long so that I could use them to hold up rebar for the hearth slab later.Leave a comment:
-
Hi Cory,
Thanks for the advice and for checking out my thread!
After we poured the concrete we made a double-layered tent out of a canopy and tarps and put an electric space heated in there. That kept the slab plenty warm for a few days. You can see I put plastic over the slab to keep in moisture, but I think I should have waited until the surface set a bit before putting the plastic down. The surface finish is rough and I think its because we immediately put the plastic down.
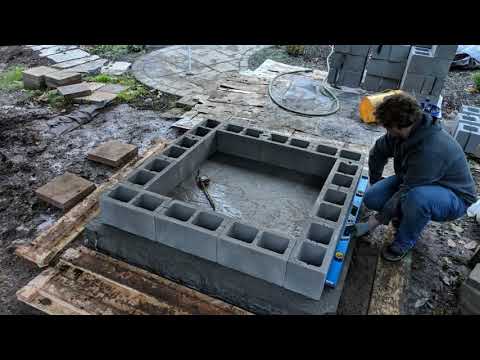
Here's my next video. Its 3 minutes and not alot happens but I'm too lazy to edit right now Eventually I will edit these all together. Its just me uncovering the foundation and dry stacking the cinder blocks. Since the foundation was a bit rough in some parts, I used a little mortar to make a couple of the blocks sit a little better.
Leave a comment:
-
Hi Charles,
I stumbled across your post. Starting a project like this is always a challenge, but January in Oregon adds another dimension. But I understand your impatience.
I'm not an expert on this Forum, but you'll see more traffic on the Pompeii Oven Forum. Check out the link:
https://community.fornobravo.com/for...n-construction
I'm looking forward to following your build.
CoryLeave a comment:
-
Oregon 46" Neapolitan Wood Fired Oven Build
Hello!
This is my first post on the Forno Bravo Forum. I'd like to share my oven build. I started in December 2018 (I know, not a great idea but I was too impatient to wait for warmer weather). There is a link in this post to a time lapse of pouring the foundation. I have almost no experience with concrete and little experience with construction in general so go easy on me


Leave a comment: