Announcement

Collapse
No announcement yet.

Planning a 36" cast oven in Wisconsin

Collapse
X
 
  • Filter
  • Time
  • Show
Clear All
new posts

  • Planning a 36" cast oven in Wisconsin

    Hello,

    I've been lurking on this forum for a while and I am getting ready to start building my first oven. I'm hoping to pour a foundation in the next week or two and I have some cement blocks purchased for the foundation. I'm leaning towards using a homebrew mix and casting a dome similar to cnegrelli's build. I have studied his thread carefully as he has some great pictures and documentation within.
    Last edited by arnesr; 07-17-2019, 12:31 PM.

  • #2
    Hi Arnesr,

    Welcome to the forum. Here is a more direct link to cnegrelli 's build. Longmont,CO new WFO Build - casted over sand. Good luck with the build.
    Joe Watson " A year from now, you will wish that you had started today" My Build Album / My Build

    Comment


    • #3
      Document your build here and I will subscribe and feel free to PM me. Of course, ALL of what I learned, I learned on here from others!

      Comment


      • #4
        To answer you question from another post. I did a quick Google search under "refractory suppliers" and there are several in WI not necessarily your city but in the state. You will not find CaSi board at Menards or HD. An alternative option ( not as effective as CaSi so more thickness needed) is a Perlite or Vermuculite/Portland mix. If of interest you can search the FB blog, lots of threads and info on this
        Russell
        Google Photo Album [https://photos.google.com/share/AF1Q...JneXVXc3hVNHd3/]

        Comment


        • #5
          I made a bit of progress over the last week after many delays getting the project started. I went with a 5 1/2" floating slab measuring 8' x 8', using 67 60lb bags of cement. I'm planning on having extra space on the right side of the oven for a work space/counter. I have two 1 1/2" PVC pipes in the base in case I decide to run a gas line or electrical later on. I cut out a crude cardboard template that is 40" in diameter as a sizing tool for my 36" oven with 2" cast walls. Next step to fill cores and cast a front arch and support base on top of the cement blocks.

          Comment


          • #6
            A few more progress pics to share.

            Comment


            • #7
              Oven build by Richard Arneson, on Flickr
              Last edited by arnesr; 10-29-2019, 12:03 PM.

              Comment


              • #8
                I need to have you tell the members what this link is for or I will have to delete it.
                Russell
                Google Photo Album [https://photos.google.com/share/AF1Q...JneXVXc3hVNHd3/]

                Comment


                • #9
                  Sorry, I was playing with html and trying to embed a photo from my Flickr account. I believe I have it correct now and a public photo should be visible. Please confirm, and I plan on stating a new thread with my build details.

                  Comment


                  • #10
                    Hi Richard,

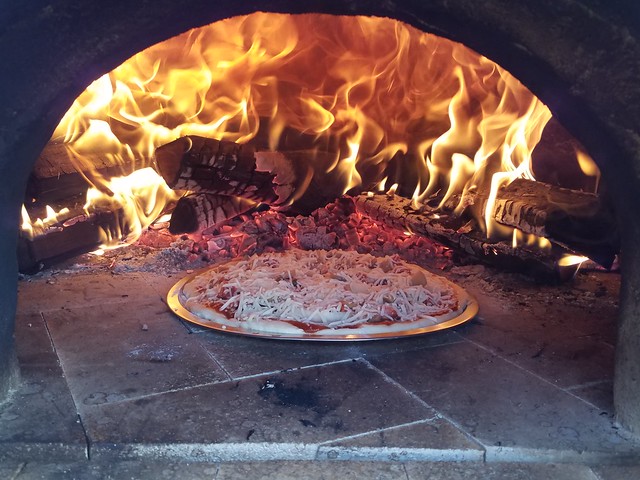
                    The photo does appear in your edit. How did the pie turn out?

                    A word of caution about linking "free" third party hosting sites. Photobucket and even Google have really screwed up many forum links across the internet. I used both to document my build. I wish now that I hadn't. In the case of Photbucket, they decided to start charging for third party hosting of photos. All of a sudden, all forum linked photos began to link to a "pay to play" page. They have relented somewhat, but the links are stamped and not of the same quality.

                    Google had a fantastic "free" program called "Picasa". It is no longer supported. We are now forced to link to a Google Photos album that can't be organized to salvage some of our work.

                    Some other "free sites", have started linking advertising to their old "free" photo links. As forums are now having to increase security, that may also be the cause of future broken photo links.

                    My advice is to use Forno Bravo's photo sharing for posting photos to this forum. That is not a rule, just friendly advise. You can still use Flcker for extra storage, but keep your Forno Bravo photo log on your hard drive and on a separate storage disc for safe keeping.
                    Last edited by Gulf; 10-29-2019, 06:15 PM.
                    Joe Watson " A year from now, you will wish that you had started today" My Build Album / My Build

                    Comment


                    • #11
                      Originally posted by arnesr View Post
                      A few more progress pics to share.
                      I see this post is around a month ago and you have presumably progressed further. However, a word of caution here. If your oven is to be out in the weather rather than an enclosure or roof over the oven it is subject to water ingress. In particular, water running off the dome and onto the supporting slab can easily find its way into the insulating space that you have made below the level of the top of the supporting slab. It is a good idea to slope the top of the slab down slightly to encourage water flow to the outside of the slab rather than into the “basin”. In addition some holes through the slab near the centre to allow moisture to escape both in the drying fires stage and also drying out after some serious rain, is useful.
                      Kindled with zeal and fired with passion.

                      Comment


                      • #12
                        Gulf, the pie turned out decent. Sauce could have been better and the crust was a bit dow-ey. All-in-all not bad for a first run. Too much fire in the dome cooked the toppings too fast, as I was trying to cook before a guest had to leave. Probably did not help that I used a pan either, as I don't yet have a peel. It was my final drying fire for the inner dome, so just a quick test run while burning fuel.


                        I am aware of how Photobucket killed off some great online content. I do have my photo's backed up in case Flickr goes down. I have a paid account there and have more faith in them now that yahoo sold the company off to smugmug.

                        David S, great advice as always. I have read a lot of your posts and picked up some great wisdom, thank you. I have made more progress over the last month. This is where I stand right now with my oven:


                        Our first snow accumulation was yesterday, about 3-4 weeks early this year. I'm running an electric blanket under the tarp to try to keep my outside vermicrete render from freezing before it dries out.

                        Here is a better picture before I added the tarp:


                        I did drill some holes in the basin for drainage and my vermicrete render overlaps the basin rim by at least 1". A final render and sealing will have to wait until next season, so the tarp will remain on for the winter except when in use. The concrete counter slopes slightly away from the dome, about 1" higher at the dome edge compared to the counter edge.

                        A proper build thread with more pictures is coming....

                        Comment


                        • #13
                          Build thread started here:
                          https://community.fornobravo.com/for...over-sand-form

                          Comment

                          Working...
                          X