Announcement

Collapse
No announcement yet.

Apagios's 42" Pompeii

Collapse
X
 
  • Filter
  • Time
  • Show
Clear All
new posts

  • #16
    Re: Apagios's 42" Pompeii

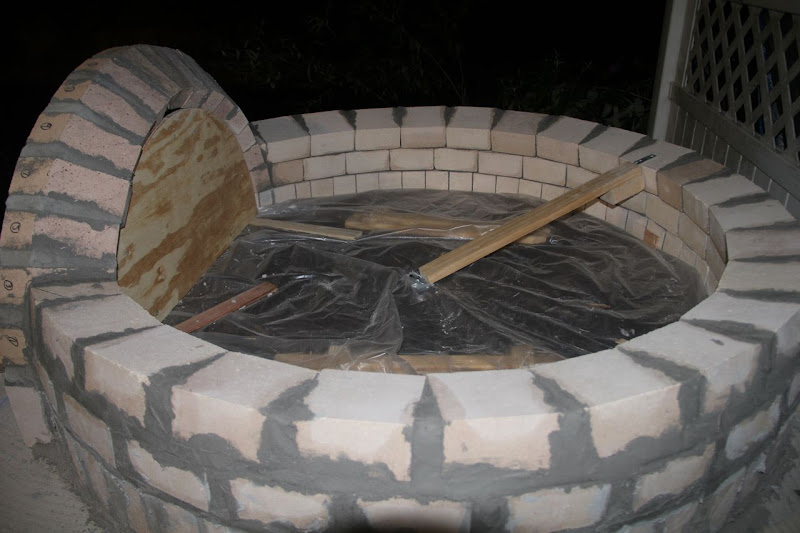
    Thanks - food for thought apagios. Much as I don't want to I feel you are right about those bricks. Even my wife who is my worst critic doesn't want them hidden.
    Amac
    Link to my WFO build

    Comment


    • #17
      Re: Apagios's 42" Pompeii

      Well in that case I think you guys can have a perfect arrangement. You don't have to hide them as long as she doesn't mind doing the repair work if they ever crack!

      Comment


      • #18
        Re: Apagios's 42" Pompeii

        Yeah - that'll work OK 
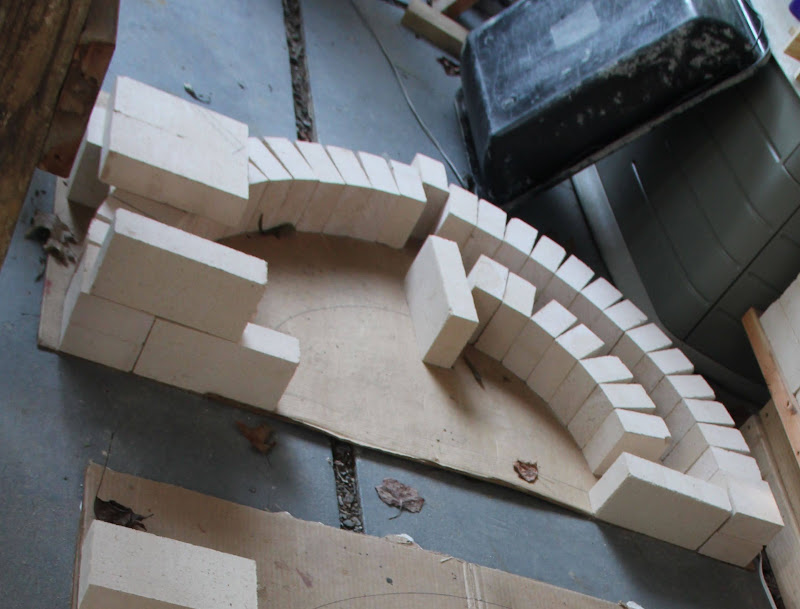
On second thoughts maybe I'll follow your advice - get some normal bricks and do it the sensible way unless someething like this could be done with the firebricks?

        I even got a gallon of Qwikcrete masonry sealer to waterproof my red brick arch and the entire "bar top" around my oven, just to try and prevent water from absorbing into the red brick facade arch.

        Btw while the arch subject is still fresh, there is something I'd like your opinion on. I originally set out to build a 36" - but to get a semicircular arch with sufficient height - I wanted it to be about 12" - would have made a very big opening relative to the dome and didn't want to go to 42" because of fuel consumption issues.
        So I made the following compromise. I increased my dome size to 39"
        That still would have left a 24" wide opening which I still felt was too wide so..after a lot of head scratching I came up with this solution:

        I decided the opening width I could tolerate (no science here just gut) was 21" and that determined that the arch radius would be 10.5".

        To get the extra height to 12" I set the indispensible tool pivot to sit 1.5" above the dome centre. That meant that both my arch and my dome were effectively lifted 1.5" but still maintained the arch/dome semicircle to hemisphere "perfect" relationship.
        I used the indispensible tool while building the arch - it has a threaded head so is possible to rotate - to confirm it would not deviate from where the dome walls would meet it.

        The drawback is that the opening is a bit lower than this so called "golden ratio" of 60% but I think there is more than a bit of mythology about the importance of that. Also the internal dome hieght is now almost 21"

        Anyway I would like to hear your views?

        Also maybe you (or Dave above) might be interested in how I arrived at the arch brick pentagon shape - you showed something similar with the bricks laid out above. The quality of the pic is not great but you can get the idea:

        1. Draw four concentric semicircles (or even quarter circles) - the smaller two represent the radius of the inside and outside of the arch - the larger two, the inside and outside radius of the dome. (these can be full size or to scale).
        2. Draw two parallel lines at tangents to the outside topmost point of the arch and the inside topmost point of the arch to cut.
        3 Then draw a dome radius line from the center of the circles to the point where the top tangent cuts the outside circle of the dome.
        In the sketch the shaded area is the resultant correct pentagon shape for my arch brick. If you measure the angles three of them will always be roughly 90 degrees - the others will vary depending on arch and dome size - and where the arch joins the wall will be 1/2 a brick width.

        Transfer this to a wooden jig and use it to mark all the arch bricks for cutting - all bricks should be identical, and all will blend smoothly to the inside of the dome..

        If you are not confident about drawing to scale - just do it lifesize on a large piece of cardboard.

        The sketch also shows the idea of raising the arch and dome, by dropping the floor (or raising the IT even) 1.5", which I talked about above.

        Around post 33 on my thread is where I started building the arch and there is more detail there.
        http://www.fornobravo.com/forum/8/39...i-17334-4.html

        Sorry about the verbosity of this post - it is easier in the practise than the description.
        Last edited by Amac; 04-03-2012, 05:53 AM.
        Amac
        Link to my WFO build

        Comment


        • #19
          Re: Apagios's 42" Pompeii

          Wow yeah the pics and explanation are a much better way to to get the shape of the arch bricks. Might be worth a sticky in a separate thread, or possibly send a write up to James for an appendix in the eBook?

          My method was similar, but not as exacting or precise. I started with the false assumption that each brick of the arch would be a different shape, I was thinking that the keystone arch brick would have to be almost a full brick and the bottom bricks on either side would be ~1/2 a brick, so the arch would get deeper the higher it got. Turns out that assumption was dumb and by the time I realized it I had cut half the bricks so my arch is not as uniform as I would like, but you really can't tell unless you are in the oven, so obviously no one has noticed my arch bricks are not all perfectly identical! (this is one of my own little nitpicks about my work)
          ----------------

          So my thoughts on door height. I do agree there is probably a bit more emphasis placed on that "ideal door height" ratio then maybe there should be. I would say if you are close then you are fine, which it sounds like you are. As much as there is a science to everything, there's a lot of variables for a brick oven, so IMHO a door height ratio withing say 5% of recommended is probably fine.

          What occurred to me after my first pizza & issues with keeping the oven above 700*F, was that it is not simply a height ratio. Thinking of only height ratio (door height/dome height) is over simplifying the problem. Total cross sectional door area and door shape also factor in, so instead of simply looking at 1 factor, you have 3 factors to design for.

          I focused on the height ratio & cross sectional area in my design, I forgot to account for shape. When I had trouble getting my oven hot I realized my arch was at the proper height ratio, but because I did a true arch it was much wider.

          I designed my opening with 13" arch radius (42" oven), which gave me an opening cross sectional area of 265 in^2, the eBook recommended 20" wide by 12.5" tall, or 250 in^2. I knew before I cut my first brick that I was 6% over sized, but I figured 6% was no big deal since I had not realized the shape was a factor.

          What I came to realize was that it wasn't simply that I was 6% over-sized, it was that my bottom width was too wide since my shape was a semicircle rather then a rectangular door.

          It goes back to my second post in this thread about regulating cold air in and hot air out, your only real control is over the cold air intake. As the hot exhaust gasses will simply increase flow velocity to account for the cold intake air, the by products of wood combustion, and the increased energy (heat). Rate in = Rate out. If you maximize your wood added, you're not really going to make it burn any hotter, so that leaves you with cold intake air as the only "control" left. (Excluding some complex metal damper allowing you to control the exhaust gasses, but it's far easier to passively control cold air intake then actively control hot exhaust gasses!)

          So the recommended opening was 20" by 12.5", a rectangle. Because my arch was wider at the bottom I was pulling in much more cold air intake then I needed, and the excess intake air was simply causing the exhaust gasses to move faster, the overall effect was a cooler oven. (Less dwell time of the hot air to get as much heat from the combustion into my bricks as possible, i.e. low efficiency)

          My 2 side bricks were cut not only to reduce my bottom width from 26" down to ~20" (I can measure when I get home if needed), but I also sized them so that I reduced my opening cross sectional area back to the recommended 250 in^2. So my side bricks fix both the width of the door at the bottom to control cold air intake, and also correct the overall size of the door.

          So 2 simple bricks cut to fit closely fixed all my problems, allowed me to have a more variable oven temp (I can pull them out for a ~600*F roasting temp), and did not change the structure or strength of my true arch.


          ... However I think you are looking at the opposite situation.

          you basically have a 10.5" arch radius, sitting on top of a 21" by 1.5" rectangle right?

          so your arch is ~173.2 in^2 and the 21 by 1.5" gets you another 31.5 in^2 = ~204.7 in^2.

          The recommended opening area in the eBook for the 36" oven is 228 in^2.

          My suspicion is that you should be fine, I would think smaller opening would simply draw cold air intake faster to match the rate of the exhaust gas out. Especially since your arch design favors cold air intake (as opposed to a rectangle which would have the same "inlet" area width as "exhaust" area width. By that I mean if one were to find the line in mid air in your doorway where the air goes from cold to hot. (BTW I love telling friends to find that line, air temp goes from ambient intake air to hundreds of *F for the exhaust gasses in a very short distance, less then say 1/2 inch of vertical movement, as you raise your hand. Just stand back so you don't get elbowed when they yank their hand out of the doorway and curse you for trying to burn them )

          If anything, I might expect you may end up with a pretty efficient oven (getting more heat into the bricks from a certain amount of wood).

          As a worst case scenario, if you find your opening too small. Since you clearly are not going to grind out your arch, you can simply get a small blower and just put a couple inch diameter air hose resting in your opening during warm up to help heat the oven, think the same concept as the "blast furnace" style doors, expect now with forced induction. Effectively you'd be supercharging your oven during heat up! Once heated it will certainly have the heat capacity to cook pizza for hours with a small fire!

          Though as I had the opposite problem I would certainly suggest listening to others advice on the topic as well!

          haha and same apology for the verbosity!
          Last edited by apagios; 04-03-2012, 09:14 AM.

          Comment


          • #20
            Re: Apagios's 42" Pompeii

            I designed my opening with 13" arch radius (42" oven), which gave me an opening cross sectional area of 265 in^2, the eBook recommended 20" wide by 12.5" tall, or 250 in^2. I knew before I cut my first brick that I was 6% over sized, but I figured 6% was no big deal since I had not realized the shape was a factor.
            I was going to do those calculations but I stopped when I realised that as you make your opening bigger you also make your dome area smaller as you are taking over floor space. It may not affect the calculations hugely but it threw another variable in the mix - enough to put me off

            It goes back to my second post in this thread about regulating cold air in and hot air out, your only real control is over the cold air intake. As the hot exhaust gasses will simply increase flow velocity to account for the cold intake air, the by products of wood combustion, and the increased energy (heat). Rate in = Rate out. If you maximize your wood added, you're not really going to make it burn any hotter, so that leaves you with cold intake air as the only "control" left. (Excluding some complex metal damper allowing you to control the exhaust gasses, but it's far easier to passively control cold air intake then actively control hot exhaust gasses!)
            Still struggling with some of this I'm afraid. What puzzles me is why when you restrict the flow of air in to a fire it causes the a fire to blaze up?
            Amac
            Link to my WFO build

            Comment


            • #21
              Re: Apagios's 42" Pompeii

              Well technically if you think of it as controlling the flow rather then restricting it, It' might be easier. I am an aerospace engineer by trade, so I tend to think about things a little differently.

              Basically you have a single arch door. You have air going in and air coming out. So some portion of the bottom of the arch doorway is flowing in, while the top portion is flowing out and up the vent.

              So think of a wide open arch door way. The two opposing streams of air have to reach a balance, and there will be a little mixing in the middle. Any breeze or obstruction (like reaching you arm in to add a log) will disrupt this balance and the two streams of air have to re-equalize. Also since the bottom stream of cold air has the entire width of the arch, it can move slower the the hot exhaust air which squeezes out the top of the arch. Slower moving air does not mix as well and doesn't reach the back of the oven as well.

              By putting a door in place (like jcg31's), you are better separating the two opposite streams of air.

              I would venture a guess that the total flow rate of cold air into jcg31's oven is not being reduced at all (proving that would require some level of flow metering though which would be way beyond this discussion).

              Whats happening is the smaller holes on the bottom force the oven to "suck" air in, and the smaller holes require the air to travel faster then if it had the entire doorway. This is that "blast furnace" effect. Same amount of air but now it must move much faster through the smaller hole. This really helps the combustion process because faster moving air generate turbulence and mixing as it moves through the logs. And the air is better distributed through the base of the fire and to the back of the oven. When you blow on a fire you achieve a similar result.

              Also the faster moving cold air is traveling along the bottom of the archway door, better then if the door wasn't blocking the top of the arch. Because you get a fast stream of cold air along the floor, it in effect gives a little more "buffer" zone between the 2 streams of air as compared to a wide open arch.

              The steady fast flow of air should also be much less susceptible to gusts of wind, which upset this flow balance, which you see as smoke sometimes coming out of the front of the oven when the wind blows out the front of the oven.

              Hopefully that helped a little. If you think of it more as a control of the air vs reduction in the amount of air or rate of air into the oven it might make more sense.

              You could even argue that with the increase velocity of cold air, better mixing and combustion could actually increase the amount of air being drawn. If you think about it, the better the fire burns, the more air it needs to burn, so with the faster moving cold air, there's a chance you are even getting more air being drawn in then if you didn't have a "blast furnace" type door in place.

              Comment


              • #22
                Re: Apagios's 42" Pompeii

                Ok well just thought of this, the "blast furnace" type door does "restrict" cold air from going in the top of the doorway. so it obviously helps when the wind blows.

                ...

                There are a couple different ways too look at it too. Now that I think about it, if the blast door is in fact reducing the total amount of air in, then it's basically passively giving the fire only what it needs.

                Any air going into the oven that is beyond what is needed by the fire is simply being heated and exhausted. This is where you have less efficiency because you are burning wood to heat air as well as your bricks.

                By using the blast furnace type door, the fire has to pull in the air it needs. So if it needs less air it'll pull in less, if it needs more it'll pull in more. The more air it draws in the faster the air must travel through the smaller opening, and you get your better mixing and better combustion.

                So it's a really interesting question if the door is in fact restricting the air intake down to keep it so that all the air coming is is used in combustion, and no excess air is let in (Stoichiometric Ratio)

                I can think of a reasonable way to test this by making a blast furnace door, and having a intake pipe attached, you could yank the Mass Air Flow sensor off of a car and rig it up (calibrate) to measure the amount of air flowing into the oven. You could weigh your wood and make approximate estimations to figure out if the blast door is keeping your fuel/air ratio at the proper Stoichiometric ratio.

                Not sure how to measure the basic "no door" configuration though...

                Comment


                • #23
                  Re: Apagios's 42" Pompeii

                  Hopefully some of that made some sense!

                  I know I may have doubled back and contradicted my first response a little. Maybe it's a good debate over pizza & beer!

                  Comment


                  • #24
                    Re: Apagios's 42" Pompeii

                    ... yeah the more I think about the more I wonder if the blast door effect is really helping the stoichiometric ratio. This is from the wiki link I posted above:

                    ------------------------
                    A stoichiometric amount or stoichiometric ratio of a reagent is the optimum amount or ratio where, assuming that the reaction proceeds to completion:

                    - all reagent is consumed
                    - there is no shortfall of reagent
                    - no residues remain.
                    ------------------------

                    In an oven, you have in effect 2 reagents: Wood (fuel) & Air (oxygen, for combustion)

                    Fire is very simply a chemical reaction where heat is a by product. "No residuals remain" is pointing at no extra cold air which lowers the efficiency of the oven as excess air is heated and wasted out the chimney.

                    So the blast door may be keeping the oven drawing in the exact amount of air it needs, and little to no extra (aside from Nitrogen, since air is 78% nitrogen, the fire is technically only using 21% of the air it draws in, air is ~21% O2). Since there's no extra air (oxygen) that it doesn't need (or at least less then a wide open arch with no door) it's heating your oven more efficiently, less waste heat out the chimney. (Heating the nitrogen is an inescapable waste of energy from your fire, but at least some of that heat is convected to your bricks, as it makes it way across your dome and up your vent)

                    I think the higher velocity of the cold air stream promoting better mixing and penetrating deeper to the back of the oven might be more of a beneficial side effect, that aids in combustion obviously, but not the main reason those blast doors help so much during heat up.

                    This is probably way more info then you ever wanted to know or think about! Sorry for the rambling musings! See what happens when you poke an engineers curiosity!
                    Last edited by apagios; 04-03-2012, 02:08 PM.

                    Comment


                    • #25
                      Re: Apagios's 42" Pompeii

                      Hopefully some of that made some sense!
                      Actually it makes a lot of sense - it always helps to have some idea of the processes involved. It is amazing the complexity of such a simple object.
                      Also next time I hold a newspaper across the front of the fire to help start it I'll have some idea what is going on!
                      Amac
                      Link to my WFO build

                      Comment


                      • #26
                        Re: Apagios's 42" Pompeii

                        Originally posted by apagios View Post
                        Sorry for the rambling musings! See what happens when you poke an engineers curiosity!
                        ... or never tell an engineer "this has never been made"
                        Let me join the theoretical discussion as I started my wood fired oven investigations the same way as your "rambling musings", but the search pointed me to very different conclussions than my starting ideas were.
                        Originally posted by apagios View Post
                        Fire is very simply a chemical reaction where heat is a by product. "No residuals remain" is pointing at no extra cold air which lowers the efficiency of the oven as excess air is heated and wasted out the chimney.
                        In fact this is true with organic fuel gases, butane, propane, metanol... But with wood things happens different.
                        Wood+O2+heat -> CO2+H2O+CO+C+...
                        Here comes the complication. Not all the carbon compounds burns perfectly, not at the usual ovens temperature. For get full combustion of CO and C (black smoke) is necessary to reach temperatures over 650 ?C (1200 ?F). So, as you pointed, the ballast gases Nitrogen, H20 and excess O2 makes things worst as they make the combustion chamber colder than the desired high temperature environment. Usual wood ovens reach an efficiency of less than 30%. So the blast door can "make up" things a little bit, but still far from the efficiencies of separate fire chamber systems that easily overcome 85%. But here total excess air intake is around 60%, secondary preheated air intake are included usually in the designs and it reaches the "flame" area with proper jet speed as chambers are smallers than the oven cooking chambers.
                        By the way, in industrial furnaces is compulsory to enrich the combustion with extra air over that stoichiometric amount to avoid explosions.

                        When I started thinking about building an oven the initial idea was 1.5" thick dome, fiberglass isolation, then I discovered the pompeii oven, then the masonry heaters, then the flow of gases in furnaces theory... and intuition says that yet more things to come for better understanding this fantastic hobby that joins engineering and cooking arts.
                        Regards
                        Last edited by Dmendo; 04-04-2012, 01:10 AM. Reason: grammar

                        Comment


                        • #27
                          Re: Apagios's 42" Pompeii

                          full combustion of CO and C (black smoke) is necessary to reach temperatures over 650 ?C
                          Hi dmendo - is it normal to reach the temperatures (>650 ?C) so no black smoke is issued ? I guess it will take some time to get to that so a lot of smoke at first and later some "cleaner" gases. My knowlege of combustion processes in minimal - but "black smoke" doesn't really sound like wood burning smoke. I would have thought "blue" would be more accurate or is that a technical term?
                          Aidan
                          Oh and I forgot to ask someone please recommend an IR thermometer - a pretty good one but for domestic rather than industrial use? I saw somewhere on here that somebody was recommending Extech 42512. That is online at $129 dollars which is within budget.
                          Last edited by Amac; 04-10-2012, 02:37 AM.
                          Amac
                          Link to my WFO build

                          Comment


                          • #28
                            Re: Apagios's 42" Pompeii

                            Hi Amac.
                            Of course, I can't imagine anybody burning tyres or plastic stuff in a cocking oven .
                            Black smoke refers to the black component of the smoke. Perfect combusted gases are colourless and you can see only white condensing water vapour leaving the flue. And yes, the starting wood combustion, no matter wich hi-tech device is always smoky, the difference with traditional fires is that well designed fireboxes need some minutes to reach the optimal working temperature and becomes smokeless.
                            Regards.

                            Comment


                            • #29
                              Re: Apagios's 42" Pompeii

                              A remarkable oven Dave! Great job, it shows the musings of an analytical mind.....

                              I'm happy to see the hemispherical arch with the diagonal cuts on the back side of the arch bricks becoming 'typical' in the construction of the pompeii oven. Well and truely done
                              Lee B.
                              DFW area, Texas, USA

                              If you are thinking about building a brick oven, my advice is Here.

                              I try to learn from my mistakes, and from yours when you give me a heads up.

                              Comment


                              • #30
                                Re: Apagios's 42" Pompeii

                                I have a question. For the arch, it looks as if a full brick was used with a 4 inch diagonal cut to match the half dome bricks. Is this true? Thanks

                                Originally posted by apagios View Post
                                Hi Dave,

                                So yeah I didn't exactly capture every step! I did start with all standard 4.5"x9"x2.5" firebricks. There was no magic really to figuring out the cuts, I originally was thinking something much more complex, but ended up laying it out so that the angle on the top of the arch would roughly match the angle of the course of bricks at that height. Basically the first full course of bricks above the arch would sit on the arch and load it evenly.

                                This is not the best picture because I only happened to catch it in the background of another shot. But you can see I laid out a sample arch representing my dome. Then I laid out a smaller arch representing my 13" arch doorway inside. If you look close in the pic you will see a pencil mark on the brick with a diagonal cut line that approximately matches the angle of the dome bricks:


                                I was originally thinking I'd have to match the angle at each level up, but it turns out you can cut the last bricks in each dome course to fit in the slot between the arch and the rest of the course. There will be some dihedral angles to cut there, but once you have a whole course done except for that last brick it's easy to see the shape you need and custom cut it.

                                Incidentally that diagonal cut on the arch bricks should be a length approximately equal to 4.5" since that's the size size of the 1/2 bricks used to build up the dome. That way the first course of brick sitting on your arch is entirely supported by the arch!

                                I would HIGHLY recommend building the doorway arch right after your soldier course is done, and before you do the 1st course on the dome. That way as you get higher you simply cut the last brick in each course to match the door arch, and since the door arch will already be set you have a nice visual reference.

                                Plus building arches you will come to find is easy, once you build the form you just mud the bricks and slap them up and the form holds them, It's good practice

                                I did spend some time laying out that bricks as you see in the pic and just trying to visualize in my head the 3-D shaping of the entire oven. It helps a lot. But if you cut that angle on the arch bricks like I mentioned, the first full course of dome bricks above the arch will sit on the arch, it makes for a very strong build IMHO.

                                If you look right next to my arch in this pic you can see the two smaller "keystone" bricks I cut to fit into the space between the arch and the 1/2 bricks of the rest of the course:


                                One other nice part about the arch being done and set up before building your dome, is that once you put those little custom cut bricks in, your course is now self supporting. It let me build pretty high before needing a form since the courses "lock" in to the arch, once that smaller brick is wedged in it's physically impossible for any of your other course bricks to slide down before the mortar sets.

                                And best of luck with your build! Just wait till your dome and chimney are done and you are doing curing fires. You'll feel like your done but there's still a ton of work to insulate and build the shell/weatherproof enclosure! I am thrilled with how mine turned out, but was definitely tough to get back to laying brick for the red brick bar top and bullnose bricks! I was mainly motivated by the impending frost, and my refusal to not get it done before winter!
                                Album https://plus.google.com/photos/10154...CKP9op6ilID7eA

                                Comment

                                Working...
                                X