Announcement

Collapse
No announcement yet.

Brick Chimney Flashing?

Collapse
X
 
  • Filter
  • Time
  • Show
Clear All
new posts

  • Brick Chimney Flashing?

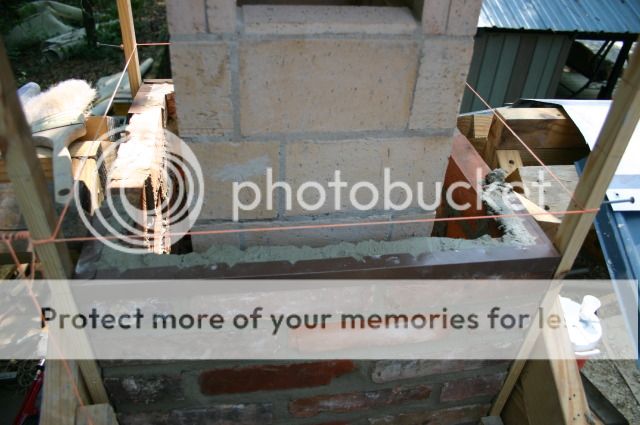
    I am hoping to top out my chimney this weekend on my backyard WFO project.
    I am using 8x17 clay flue liner cut down to make an (almost) round flue liner surrounded by pearlcrete and bricks.

    My roof deck is 1x6 rustic v-groove boards which will be covered in a mineral roofing paper and eventually some sort of corrugated metal panels - either galvanized or corten.
    1. How do I flash between the brick chimney and the roof decking/mineral paper? (until I decide and get the final corrugated material)
    2. How do I flash from the chimney and the corrugated roofing material?
    3. Does anyone have some photos of a similar situation?
    Thanks for any help, Eric

    Thanks, Eric

    My 42" dome build pics in Napa

    My build thread part I

    My build thread part II

  • #2
    Re: Brick Chimney Flashing?

    Standard step flashing, I have some pics I can post tonight, but just google, "step flashing detail".

    Comment


    • #3
      Re: Brick Chimney Flashing?

      Here you go:

      Comment


      • #4
        Re: Brick Chimney Flashing?

        Originally posted by Tscarborough View Post
        Here you go:
        Tscar, thanks for the reply and snapshot.

        I know about step flashing with shingles, but I am not using shingles I will be using (eventually) corrugated sheetmetal.

        Until I get the sheetmetal it will just be rolled mineral roofing.

        Also, for the counterflashing, do you just cut it in after the chimney is completed like we used to do on reroofs (a long long long time ago for me!)

        Thanks again, Eric.
        Thanks, Eric

        My 42" dome build pics in Napa

        My build thread part I

        My build thread part II

        Comment


        • #5
          Re: Brick Chimney Flashing?

          Yes, just cut it in. I rolled the metal roof up an inch all the way around the chimney instead of stepping it, then counter flashed as shown. I also caulked well.
          Last edited by Tscarborough; 11-01-2012, 11:31 AM.

          Comment


          • #6
            Re: Brick Chimney Flashing?

            And for caulking use something like "Through the Roof" elastomeric caulk. It's GREAT, doesn't dry out, shrink, crack -- will be there for 20+ years without a leak. Compared to other caulk it's a bit pricy, but hey, you'll probably only need one tube, so go for it.

            Comment


            • #7
              Re: Brick Chimney Flashing?

              Sorry about this late repy. It may be a little late to offer a suggestion. I was out of town last week with no internet.

              I made a two piece type of counter flashing and layed the drip edge in with the courses as I went through the roof. If you lay the drip edge into the brick, you can temporarily cut the height of your flashing to lay flat against the decking. (The top edge of the flashing slips under the drip edge) When you come back and install the metal, you can simply cut the top edge to allow for the metal and then permanently install.
              I have always used this method because it made the initial flashing easier and years later it makes reroofing a snap.

              http://i438.photobucket.com/albums/q...Oven/00125.jpg

              http://i438.photobucket.com/albums/q.../Oven/0135.jpg

              http://i438.photobucket.com/albums/q...Oven/00225.jpg
              Joe Watson " A year from now, you will wish that you had started today" My Build Album / My Build

              Comment


              • #8
                Re: Brick Chimney Flashing?

                Originally posted by Gulf View Post
                ..I made a two piece type of counter flashing and layed the drip edge in with the courses as I went through the roof. If you lay the drip edge into the brick, you can temporarily cut the height of your flashing to lay flat against the decking. (The top edge of the flashing slips under the drip edge) When you come back and install the metal, you can simply cut the top edge to allow for the metal and then permanently install.
                I have always used this method because it made the initial flashing easier and years later it makes reroofing a snap.

                http://i438.photobucket.com/albums/q...Oven/00125.jpg

                http://i438.photobucket.com/albums/q.../Oven/0135.jpg

                http://i438.photobucket.com/albums/q...Oven/00225.jpg
                Gulf,

                Thanks, those photos help a bunch, and no it definately is not too late as I wont be back on the project until tomorrow (Saturday) it is supposed to maybe hit 80 degrees!!! So no excuses on my side.

                Eric.
                Thanks, Eric

                My 42" dome build pics in Napa

                My build thread part I

                My build thread part II

                Comment

                Working...
                X