Re: ~38" build in Seattle
Because of my oven's location immediately next to what we call the cooking cover, I need to have an extra tall chimney. Ouch, that's going to be expensive.
The peak of the cooking cover is ~13 feet high, so if the chimney starts at what, 6 feet, I'll need at least 9 feet of chimney pipe?
Can I use a smaller diameter pipe because the extra length will help with draw? 6" ID will certainly be less imposing than 8" ID pipe.
Also, what are good sources for heartbreak caulking and stuffing if I go that route?


-
Re: ~38" build in Seattle
I'd like anyone to know that I'm still in the running for taking the longest possible to build an oven. 3.5 years so far since the foundation was poured. SWMBO finally said it was an eyesore and I needed to get it functioning this year.
The progress for the last month. Up to row 8 out of 10, so the dome should be closing up soon. I used deejayoh's spreadsheet for the first 4 rows, something was off on row four and so I started just cutting to fit based on a good guess to start with and adjustments to individual bricks to compensate for non-roundness.
I'm not super happy with my IT, it has too many degrees of freedom. I should have epoxied the threaded rod into the caster to keep it from occasionally pulling out.
For anyone interested in the effects of taking too long, FB board will mildew if left wet over the winter.
Paper bags of sand and fireclay have their bottoms rot out over similar winter if left on the ground.
Leave a comment:
-
Re: ~38" build in Seattle
I agree that the upper edge does not to be the outer surface of the dome but that location is important, the brick needs at least that amount of surface available for the dome bricks to seat on. If the arch brick surface is not cut back at least that far or that much material is provided there will not be enough surface to maintain a uniform thickness of brick.Originally posted by pluscwc View PostLeave a comment:
-
Re: ~38" build in Seattle
I think you said it better than me, but that is what I was trying to say. One exception I would take is that the upper edge of the brick doesn't need to be the outer surface of the dome, but the other two variables, slope and lower edge are important.Originally posted by mrchipster View Post
Got almost all the soldiers mortared in today. Need to cut a half size piece to finish, but I had run out of mortar.
Also built a PVC tarp tent so I can hopefully be ok when it rains next. No pictures since it's dark.
Next up, testing out my brick jig and deejayoh's spreadsheet.Leave a comment:
-
Re: ~38" build in Seattle
I posted this before but it sometimes requires repeating.Originally posted by pluscwc View Post
The key for me in understanding this type of inner arch design was to understand that the slope of the cutoff for the top of the inner arch (the cut that will receive the dome bricks) is defined by the inner radius of the dome -- lower edge of brick, the outer radius of the dome - upper edge of brick, and the slope of the cut, as a vector from the center of the oven.
This works for straight sided openings as well as circular. You need to check alignment of all of the bricks in the arch if it is hemispherical as the shape starts at the first course.Leave a comment:
-
Re: ~38" build in Seattle
By the way, thank you to everyone who's offered help and advice so far. I hope my oven comes out marginally close to the quality builds I watched y'all do.
I'm nervous about actually committing to mortaring bricks together. Even knowing it's going to work out, it's tough to just jump in with zero first hand experience and a few years of reading these threads.Leave a comment:
-
Re: ~38" build in Seattle
I don't understand that. The shape of the roof of the oven should be defined by the IT and if I make each run level or not. Or how else I screw things up.Originally posted by brickie in oz View Post
My arch template is defining the forward edge of the arch. The back edge(s) of the arch is defined by the IT. Looking at the arch brick, these are the two rightmost faces. The upper face should be radial from the center point, the lower face should be perpendicular to that one, in the same plane as the inside of the oven. I can change where that is a little bit, but if I push it further back into the oven, I will need to make the arch taller to get it tangent with the interior of the dome. Without changing the template height, I can move the template back only as far as the bottom of the piece currently shown, which does nothing to the arch or dome geometry. It's just an artifact of having a template that is too thin.Last edited by pluscwc; 08-10-2013, 04:08 PM.Leave a comment:
-
Re: ~38" build in Seattle
You apparently have better firebrick than up here in the Pacific Northwest. I could scratch a thin track in both types of brick with the corner of a claw hammer. It was easier to split the standard firebrick than my mysterious firebrick-like substance.Originally posted by Gulf View Post
I took a MAPP torch to one side of a sample brick, but I didn't want to deal with how long it would take to get up to temperature, since I don't have a thermometer than can read high enough. Maybe next time I fire up the grill, I'll through one in.Leave a comment:
-
Re: ~38" build in Seattle
Your arch profile is too far forwards, you will end up with a tear drop shaped roof in the oven. ( the oven will still work ok though)Originally posted by pluscwc View Post
Try moving the profile back into the oven more.
Leave a comment:
-
Re: ~38" build in Seattle
I came in for a break and saw your reply. I went back out for a test on the brick that I have. I took one of my old trials and was able to half one of them with two strikes on one side. I did the same test on a medium density firebrick left over from my dome. I pretty much had to mark it all the way around, three strikes each, before it broke. I was easily able scratch a 1/4" trench in the old brick of mine with a the claw end of a hammer. The medium duty firebrick just sharpened the claw.Leave a comment:
-
Re: ~38" build in Seattle
One more pic from my build showing how the IT helps set the intersect between the arch and dome arc.Leave a comment:
-
Re: ~38" build in Seattle
Plus,
See if this helps with visualizing a tapered arch and helping you with the arch placement. http://www.fornobravo.com/forum/8/oc...tml#post111125Leave a comment:
-
Re: ~38" build in Seattle
Well, I checked the density before I picked them up and I thought it was alright. I just reran the numbers:
Mutual Materials standard firebrick:
9 x 4.5 x 2", 6.875 lbs
14.727 cubic inches per pound
My reclaimed brick:
8 x 3.75 x 2.75", 4.75 lbs
17.368 cubic inches per pound
If you molded my brick into a standard firebrick shape, it would weigh 5.6 lbs. It's about 18.5% less dense than the standard firebrick. I thought it was closer than that, so I'm glad you pointed it out and I checked.
Other than density, how can I test it? Build a drystack mini oven and put a fire in it? Any tests for abrasion/spalling problems?
Lower density will mean what? Lower heat capacity and retention, maybe more fragile?
I don't mind buying more brick if this is a concern, I'd rather build once and the brick doesn't drive the total build cost that much.Leave a comment:
-
Re: ~38" build in Seattle
Pluscwc,
What kind of firebrick are you using. The color has me concerned. I have removed brick that looked similar to those from behind the firebrick of old coal fired fireplaces. The brick I have were used as a type of insulated firebrick brick. They are heavier than most insulated firebrick sold nowadays, but not near as heavy as a medium density firebrick. This subject came up a year or so ago on somebody's build. I still have a pic that I posted on that thread back then. Sorry,but I can't remember the thread.
The bricks on the left are what I am referring to.
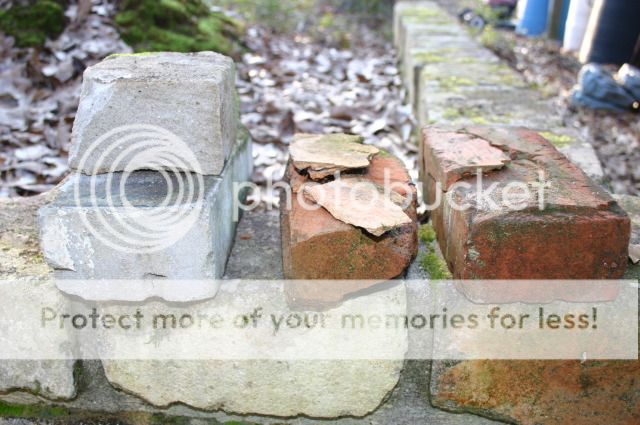
I hope that I am wrong.Leave a comment:
-
Re: ~38" build in Seattle
OK, I rebuilt things a little bit, since I'm still too dense to quite understand.
I think I want the arch bricks cut like the last picture, with 3-4" of flat top. The third picture has such a narrow wedge of brick on the inside that it seems likely to chip, and no flat spot on top unless I make it pretty long.
I don't think I can move the oven any closer to the front of the hearth without having to make some significant modifications to the roof above it for chimney clearance. With a 10" OD double wall chimney + minimum 2" clearance, I may already have to shave a bit off the roof. That's the correct size chimney, right?
I've also included a picture of my makeshift saw stand. A random piece of steel I picked up from work that had been part of a shipping crate for lab benches plus 4 casters and some scrap plywood and 2x. There's enough table behind the saw to hold a bucket of clean water for the pump. I cut a hole in the plywood under the drain plug, so when the tray fills up, I can rest a bucket on the 2x chunks in front, drain the water in there, and water my landscaping with dusty water.
I know I need to put some shims under my arch form, and make it plumb and a bit more stable. Any other advice before I start mixing mortar?Leave a comment:
Leave a comment: