
That is the way that most will tell you to do it. I did mine the other way and was about 3\8" off at the top. I decided that was close enough for me. It just looked like you were about an inch out of line to me. It is hard to tell in pictures though. Good luck with whatever you do. Your quality is top notch so I know you will do a great job.
Randy





-
At first I didn't understand what you meant. I thought you meant the width of the outermost part of the arch brick before it slopes down towards the center of the oven. I got the slope right but I had wondered about making the bricks recess farther into the dome by using progressively longer bricks. I knew I'd have some overhang of the uppermost bricks as they hung off the inner edge of the arch. It shouldn't be too hard to redo the arch. I had wanted to build the arch first and then tie the dome into it but I think I may redo it and do them simultaneously....Originally posted by RandyJ View PostLeave a comment:
-
It looks gr ra at. But it looks like your IT tool does not follow the edge of your arch. I could be wrong but it looks like the bricks are the same with from top to bottom. They should follow the IT and come in to the dome some. This is the same thing that I did and it will give your dome a tear drop shape. It makes it a little harder to do the cuts but not impossible. Here are a few pics of what I had.
RandyAttached FilesLeave a comment:
-
-
Hey Alex,
I think it looks awesome! Much prettier than mine. Nice job! And your small joints between the bricks in your arch look great. Really good work!!!! I had to make a few little wedges to fill some gaps that I thought were too big but i don't see anything like that in yours. Keep up the great work.
NateLeave a comment:
-
I haven't been able to work on my WFO as much as I anticipated but got some work done nonetheless. It's definitely slow going. Here's where I left off today:
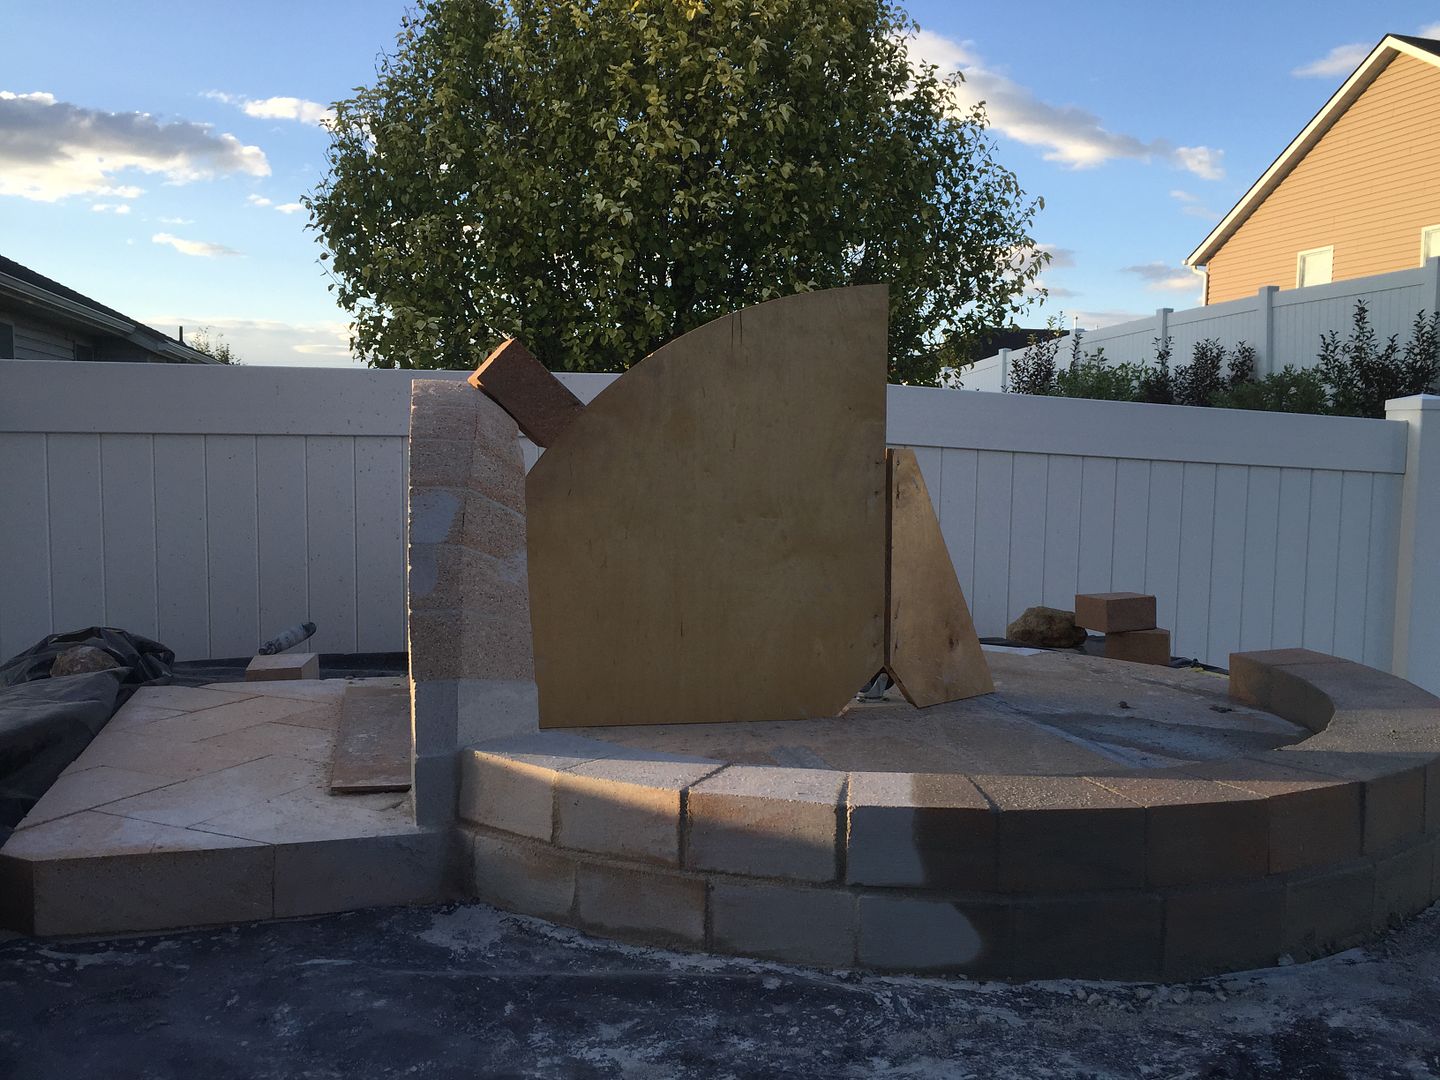
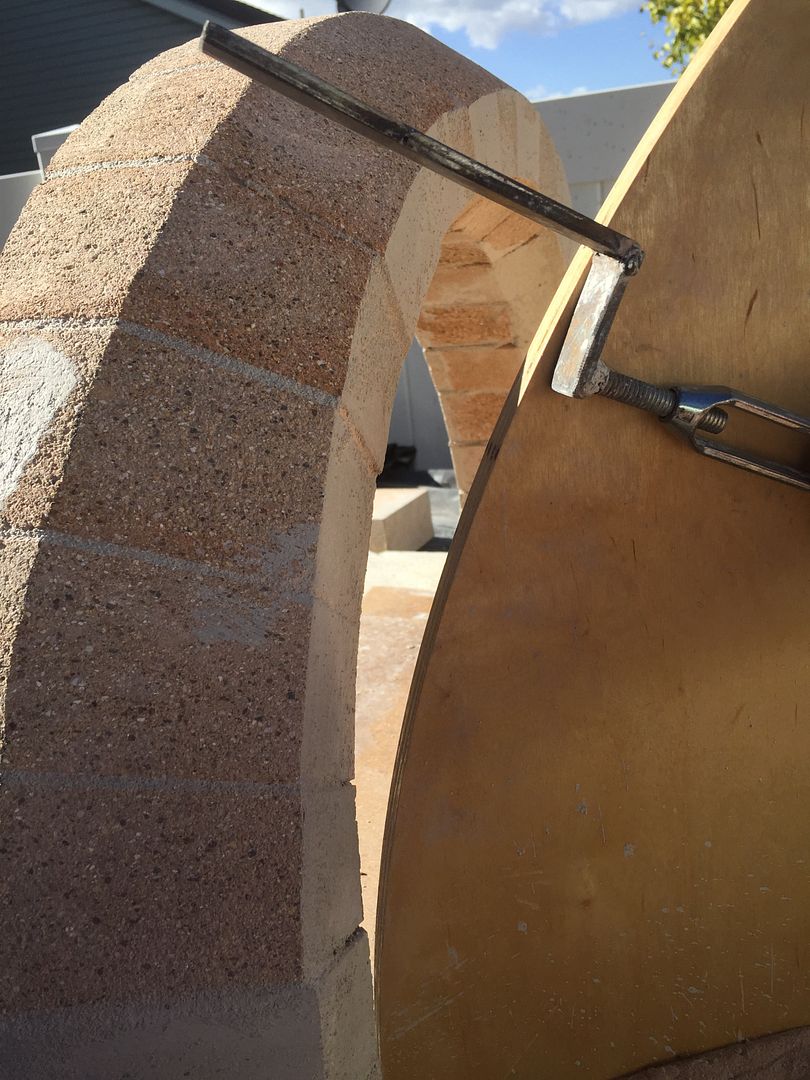
I used a combination of the IT and my quarter hemispherical template to help me determine where to make the cuts for the entry arch. I began by using the quarter hemi template to help me determine how long the arm of the IT needed to be for each level of chains. i.e. when the back of the L bracket is flush with the outer rim of the quarter template. Then, I would lay the IT on my entry arch adjacent to the next brick to be cut for the arch for the appropriate level of chain that I had just determined. That is, the height of chain two is noted and marked at that same level on the entry arch. The long finger of the L bracket is 4.5", that way I can see how much and where to cut off each entry arch brick. Made for a lot of small tedious cuts but I think it will line up OK with the dome... I hope!
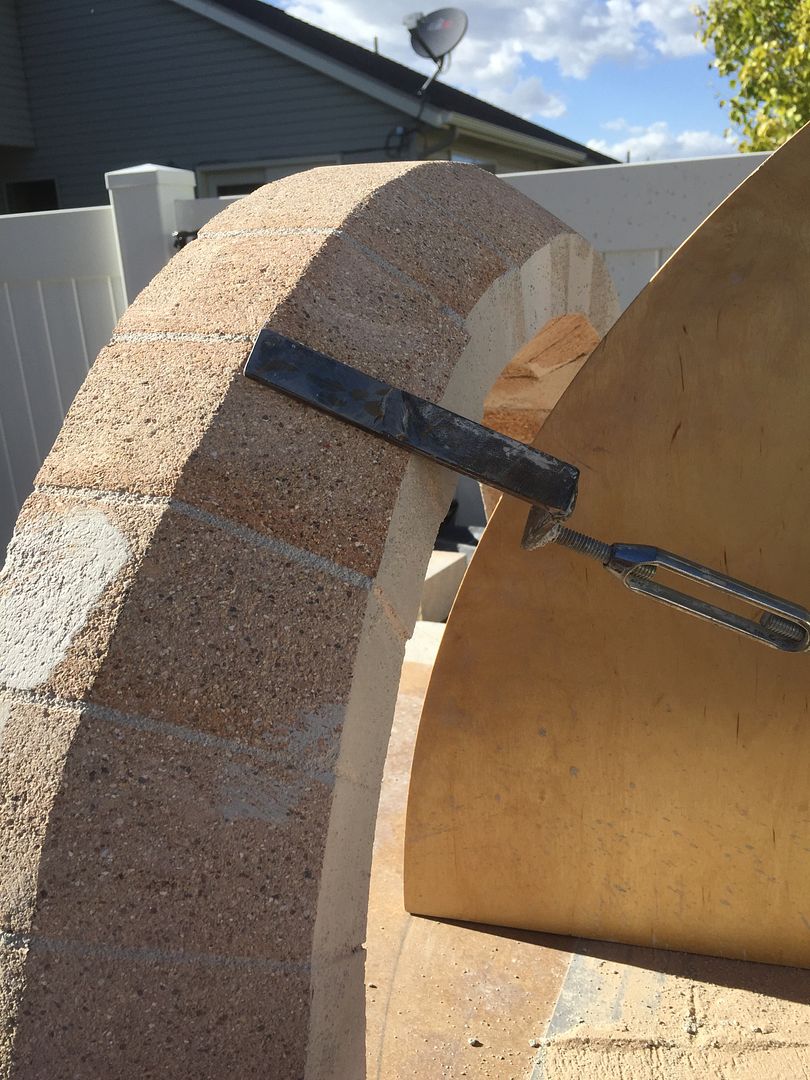
I know most of you know how to do all this already so I feel like I'm preaching to the choir. I did notice that Proc was asking about how to do this on his build so I thought I'd throw my screwball way of doing out there in case he can learn anything from it...
Sorry for this last pic being crappy. I didn't realize that I didn't have a front view shot until after the sun had gone down. I'll be sure to replace it when it's daytime.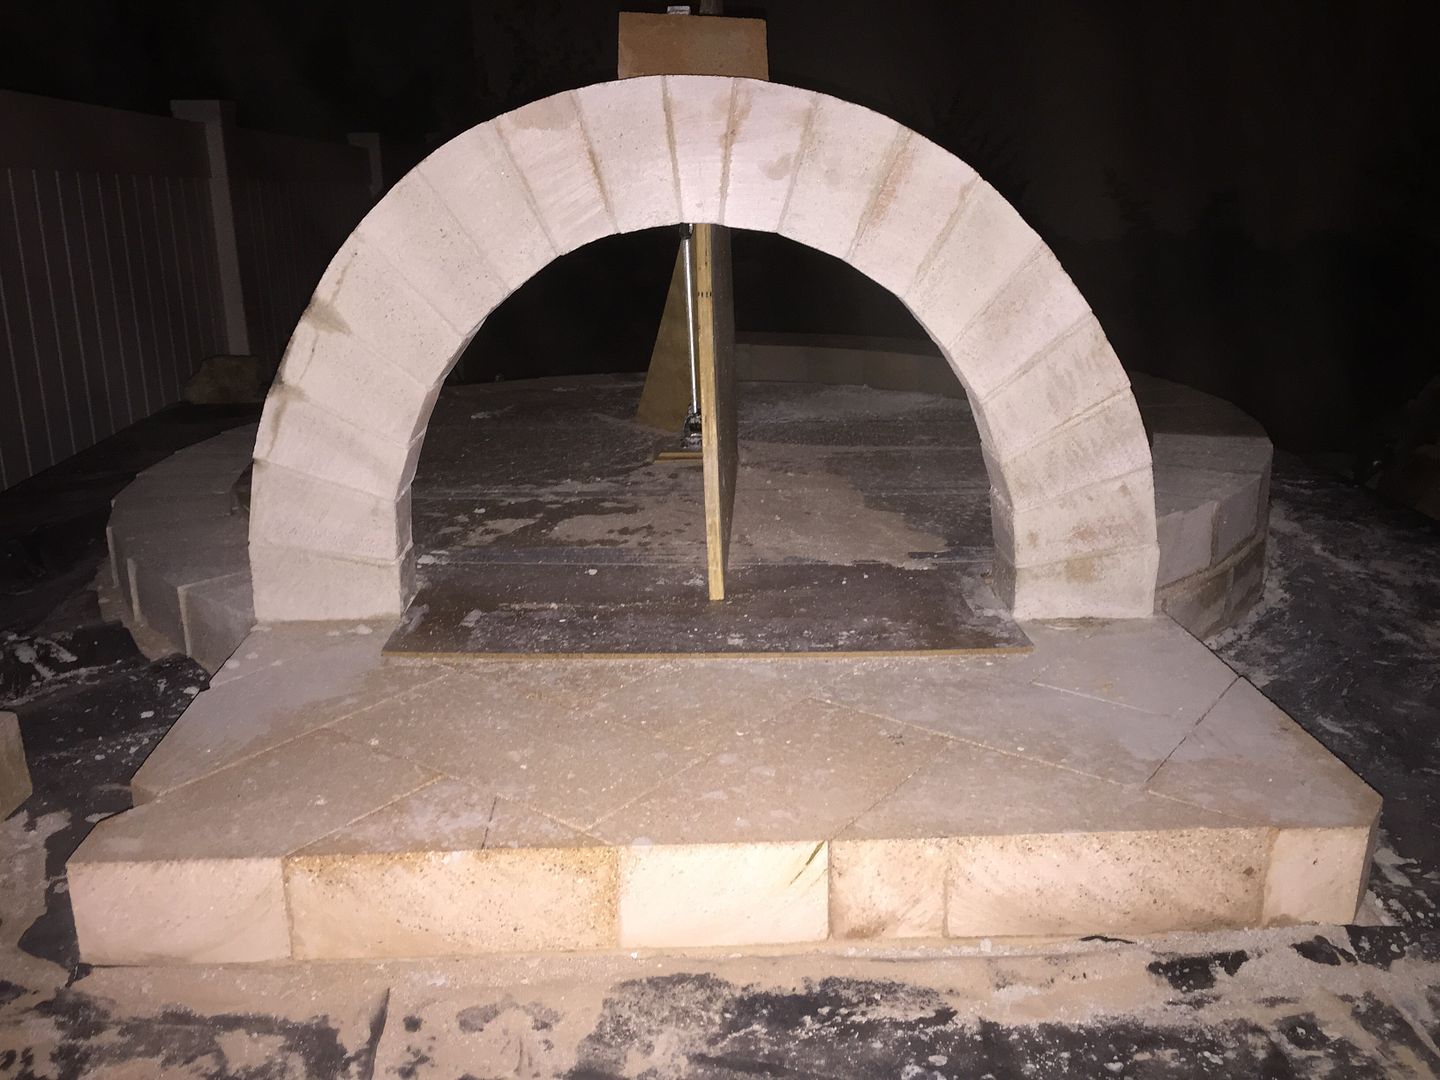
-AlexLast edited by sharptailhunter; 07-28-2015, 06:27 AM.Leave a comment:
-
Thanks for the kind words, guys. The waterfall still has a long way to go but it's been nice to change gears and start working on the WFO again. This rainy weather is making it hard to get any real work done though. Got my IT made and the first chain done. I had a tough time figuring out the angles of each brick and then when I got it figured out I realized that I had forgotten to put in the cardboard spacer. That changed the angles a little so the first few bricks kind of have a sawtooth look to em but at least they'll never be seen since they're on the very bottom of the dome :-)
 Last edited by sharptailhunter; 07-23-2015, 11:56 PM.
Leave a comment:
-
Alex - Outstanding job on your water feature! Great symmetry, and it looks really natural. Can't wait to see progress on your dome. No matter how much 'extra' work it turns out to be, take your time and put those mad skills you got to good use.
John
Leave a comment:
-
Wow it is looking great. I have done a pond and water fall before. That is a ton of work and you did a great job. Good luck on the rest of the build it is looking great. Oh yeah I also thought it was way more work than I thought it was going to be. It is a blast to use once you are done though.
RandyLeave a comment:
-
Well, I've been busy trying to get some other things done around the yard and as such the WFO had to take a back seat. I had to put in a sprinkler system, lay sod, and worked on the water feature.

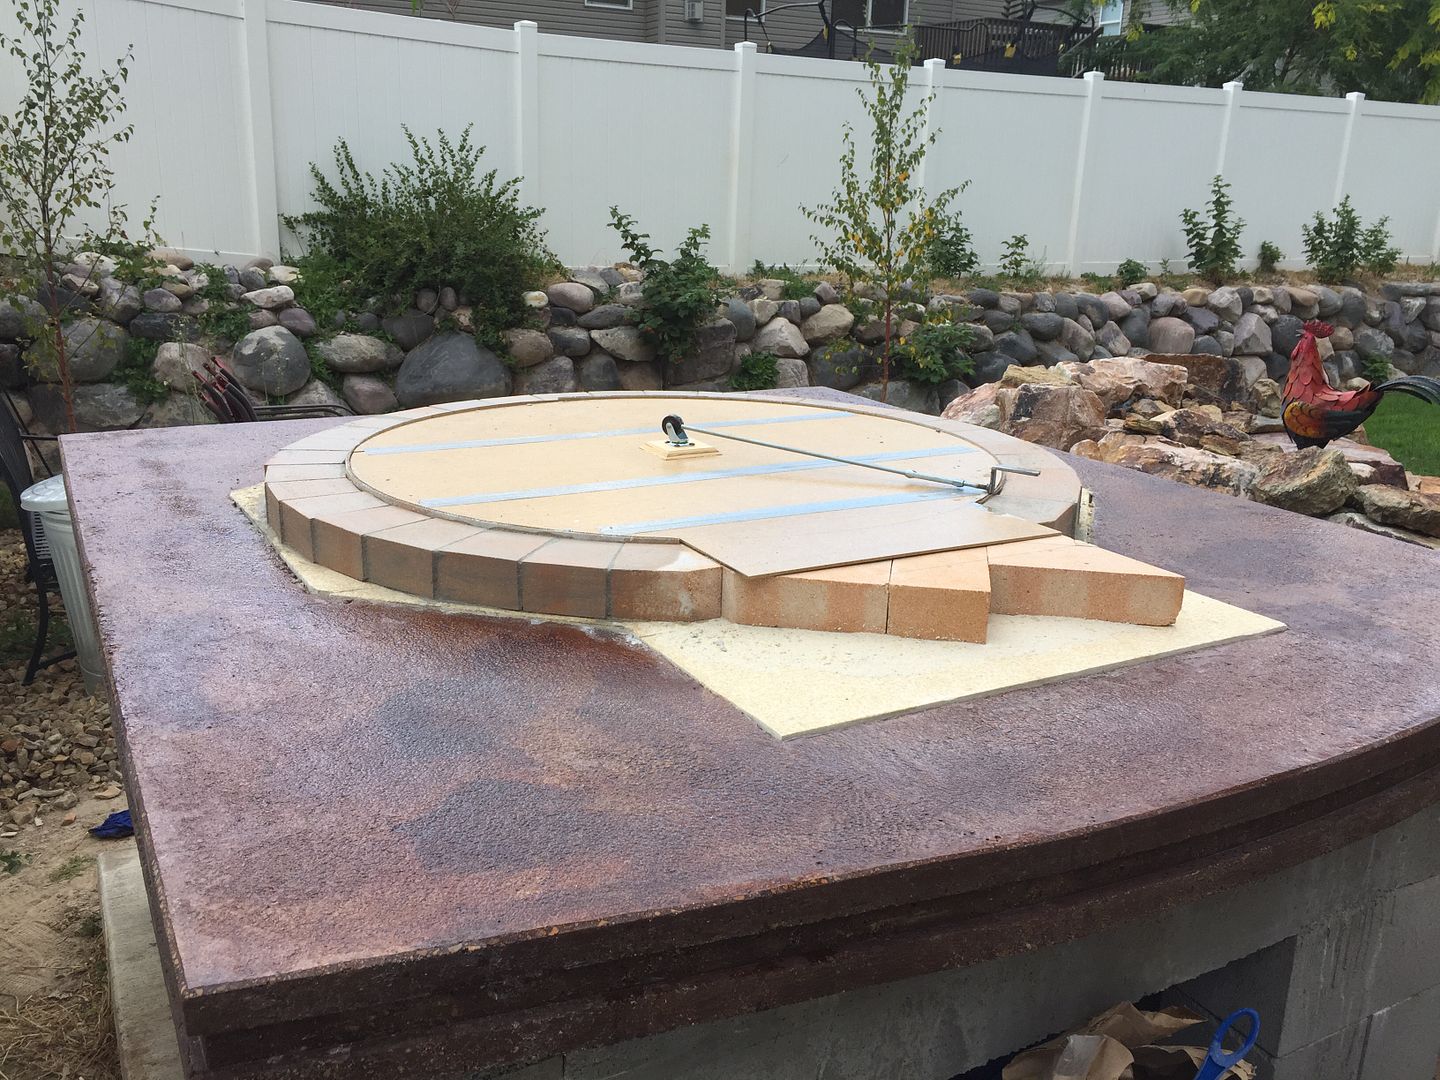
Thank you to all those friendly forum members who helped with the questions I had about the waterfall. I got sick of mortaring rocks to concrete so I decided begin working on the oven again. All I really got done today was cutting the insulation board and placing/leveling the floor bricks on the insulation.
Here's the first inch of 4" of insulation.
Here's the rest of it.
That stuff was way nasty to cut! Despite all the protective clothing and equipment, I'm still itching. As you can tell in the background, the skies were getting darker. I didn't have time to get a shot of the floor bricks down before it started to rain. So, I covered it all up and will hit it tomorrow. Centering and leveling the floor bricks took longer than I imagined. Wait, this whole project has taken wayyy longer than I imagined :-)Last edited by sharptailhunter; 07-27-2015, 10:09 PM.Leave a comment:
-
Re: 42" Idaho spud
Hey Alex,
Your build is looking awesome. Nice job and keep up the good work!
NateLeave a comment:
-
Re: 42" Idaho spud
Thanks, John! The recess didn't turn out as nicely as yours did but I agree with you, it should help to protect my ceramic fiber board. Also, I didn't want to pour it after the oven was built, figured might as well do it all in one pour.
I got the floor bricks cut and they're just waiting for their turn to be placed... if the rains would ever stop!
Leave a comment:
-
Re: 42" Idaho spud
I love the recessed support slab! It will protect your insulation nicely during the build.Leave a comment:
-
Re: 42" Idaho spud
For some reason I lost the link to that last pic. Anywho. it's fixed. Sadly, its pouring rain right now and has been all night. Guess no working on the yard or the oven today :-(Leave a comment:
-
Re: 42" Idaho spud
Hey guys, thanks for the replies and the interest :-) I've been busy but not really much on the WFO. I did round up the materials for the homebrew. Thanks for the tip for looking for fireclay at a ceramics dealer. Capital Ceramics in SLC had some in stock and they're very pleasant to work with. And, I have been saving the brick dust from cutting the floor bricks.
When I went to the store to get my sand, I picked up a big bag of quartz sand. I hope that the right stuff??
I pulled off the forms from the hearth and stained and sealed the hearth. Heres what it looks like:
The weather forecast has been showing high probabilities of rain forever now so I've been waiting to start the dome build until I can let my hearth dry sufficiently. As DavidS suggested, I'm going to drill some holes in the hearth where the octovoid is so that the water can drain and then in case there ever is a bit of water that finds its way inside the enclosure it might help to drain.
Just as a side note, I'm also building a waterfall and pond. It will be made out of concrete and stone and that's sort of related to the kind of stuff on here that we like ;-) so here's a shot of the rain and mud I get to play in right now: Last edited by sharptailhunter; 05-17-2015, 06:03 PM.
Leave a comment:
-
Re: 42" Idaho spud
Don't worry about fireclay! You'll be throwing it away by the bucketload when you start cutting bricks. You'll have enough from cutting your floor bricks to get you started - and then you just get more from there. Especially if you're tapering your bricks.Leave a comment:


Leave a comment: