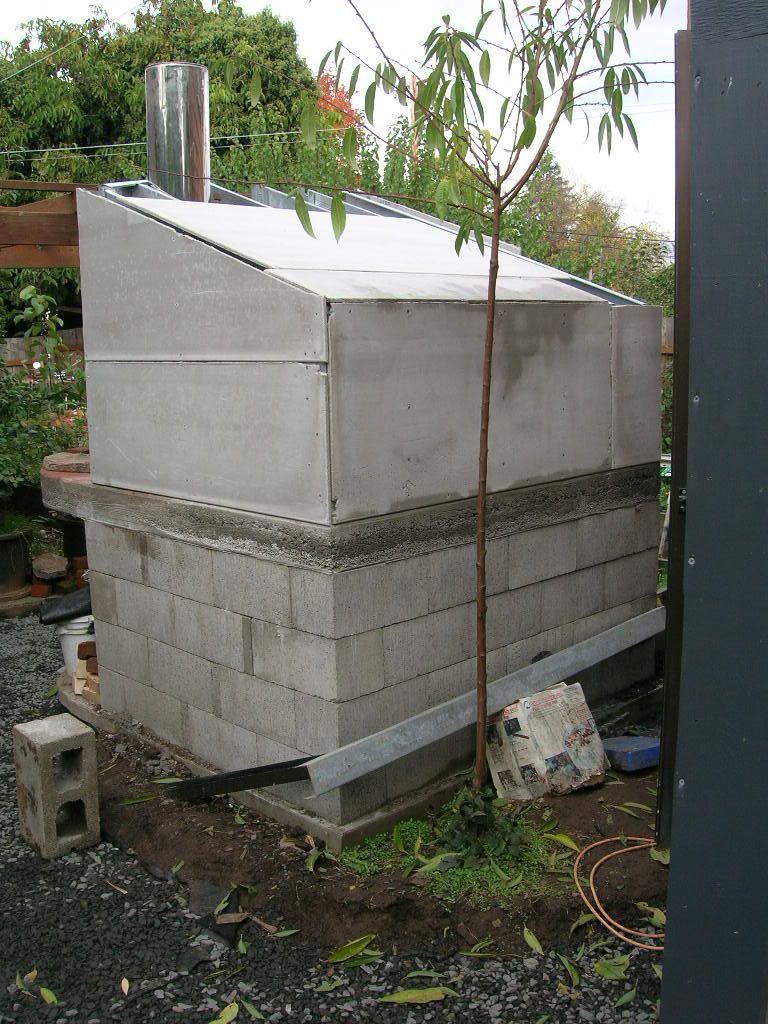
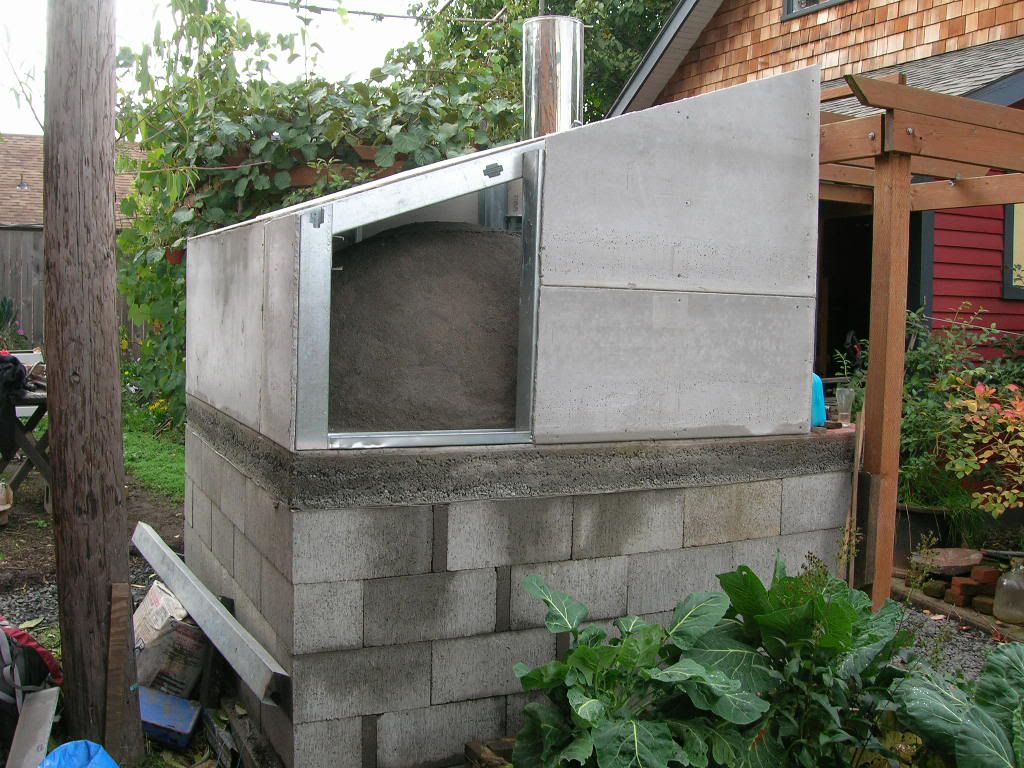
has anyone provided venting for their enclosure? i was thinking it would be a good idea to install attic style venting (probably just some holes with screen) to allow any heat and moisture to vent.
Announcement
Collapse
No announcement yet.
pompeii oven construction began today
Collapse
X
-
-
#57 Your venting idea sounds like a good one
#57
(P) "has anyone provided venting for their enclosure? i was thinking it would be a good idea to install attic style venting (probably just some holes with screen) to allow any heat and moisture to vent."
(M) I think that's a great idea and will incorporate it when I get to that stage.
(M) I had previously announced that I was going to by-pass a pre-made flue vent and build my own chimney with bricks. I changed my mind. After setting 2 more pieces of 1/4" flat iron to support not bricks but one foot sections (that's as long as I could find) of clay chimney liners, I begin to worry that heat from the escaping smoke may soften the flat irons and cause the whole 130 +/- pound chimney to sag. It is a calculated risk but if problems develop I would have to ultimately open the front of the gable house and substitute a lighter 4' section of double walled steel liner.
(M) I may have mentioned this in an earlier posting but whoever suggested using aluminum foil as a moisture barrier had what I think was an excellent suggestion. Before I cover the dome with any perlcrete, I will put down a layer of foil to also act as a slip plane, and a smoke leak preventer.
(M) I have to borrow a friend's camera to show how I mounted the first of 4 or 5 sections of one foot clay liners but that should be viewable within a few days.
Ciao,
Marcel"Everything should be made as simple as possible, ...
but no simpler!" (Albert Einstein)
Comment
-
Regards heat on the outside of your double walled flue pipe. Most double walled flue pipes consist of a stainless steel inner pipe 25mm (1) of insulating material and a stainless / galvanised steel outer. With only 25 mm insulation the outside of the flue pipe will invariably become hot, and is taken into account by the manufactures. Hence, their installation instructions to alloy 50 mm ventilation gap between the flue pipe and any comb usable materials.
Don?t encase the flue pipe with any other insulation materials near the oven, as this is the hottest part of the flue and make provision for venting the cavity above the oven. The venting will allow heat from the flue pipe to escape and maintain an even temperature around the flue pipe and the oven.
Alf
Comment
-
slip planes and vents
In my search for various folks builds I ran across numerous version of the Alan design. After the brick course and before the insulating layer (usually a slurry of the insulating material) a shield of foil is placed. You an see this in August's web site about mid way down.
or Matt Cosadine figure 174
Many of the sites had comments about steam coming off of the structure as it cures. August just happened to have some spare stainless steel tubing hanging around and after making cuts in it used it to provide an escape for moisture.
It would probably be prudent to leave some sort of vent to allow excape of moisture.
je
Comment
-
Foil
My memory is that the aluminum foil is a slip plane between the brick vault and the 4"-5" concrete cladding. Those are both thermal layers, but built using different types of material -- so they will expand and contract at different rates.
The Pompeii oven really doesn't have a "cladding" layer, other than the mortar you use to hold the oven together -- so I am not sure that there is a need for that step.
James
Comment
-
#57 My "cladding" will be an insulating layer of perlcrete
(M) Hi, James,Originally posted by jamesMy memory is that the aluminum foil is a slip plane between the brick vault and the 4"-5" concrete cladding. Those are both thermal layers, but built using different types of material -- so they will expand and contract at different rates.
The Pompeii oven really doesn't have a "cladding" layer, other than the mortar you use to hold the oven together -- so I am not sure that there is a need for that step.
James
I'm not sure if your comments were in response to my post, but I am not adding a thermal layer to my Pompeii dome, but rather an insulating one of perl-crete. I believe Jim's doesn't specify that material on the dome but because there has been so much discussion of lowering the thermal mass, as well as discussion of cracking, that I deviated again from Jim's good design.
================================================== ======
Today 07:34 AM jengineer In my search for various folks builds I ran across numerous version of the Alan design. After the brick course and before the insulating layer (usually a slurry of the insulating material) a shield of foil is placed. You an see this in August's web site about mid way down.
(M) I guess what I'm trying to do is have the best of both worlds by incorporating an insulating layer of perlcrete, as Paul used, but putting down a layer of foil to act as: 1- Moisture barrier 2- Smoke barrier, and 3- a Slip Plane since perlcrete and firebrick almost certainly have a different coefficient of expansion.
(M) I see this site as fostering quite a lot of variety, such as the floating island, or perhaps the inversion of the hearth slab's thermal and insulating layer. It seems that we are still in uncharted territory. Maybe what I am doing is a mistake but if so, I doubt whether it would have negative structural implications.
Ciao,
Marcel"Everything should be made as simple as possible, ...
but no simpler!" (Albert Einstein)
Comment
-
i definitely decided to provide some sort of venting in the structure---no big deal.
i have however, run into a problem finding perlite! home despot doesn't have it, as it's out of season, and all of the garden centers have small bags for too much money. i calculated needing roughly 1/2 cu yard, which would be 16 4cu ft bags @ $10 a bag. ouch.
Comment
-
Hi, Paul
In matter of isolation effect, Vermiculite/cement works like Perlite/cement mixture and is easy to found in depots or garden centers.
At least on my country the first mixture is less expensive than the second one.
I had used an 8/1 mixture of each (may be higher) and it works well.
Keep in mind that the installation of an isolation blanket (Kawool or fiberglass) highly decrease the Vermiculite/Perlite thickness.
Regards.
Luis5 Photos
Comment
-
it may be due tue the type of volcanic rock found in the cascade range of the pacific NW, but i found perlite easier to find than vermiculite. i've already caoted my dome with insulation; i'm rather at the stage of backfilling the cavity around it with loose vermiculite/perlite.
Comment
-
Good idea. For a housing type structure I recommended either ridge venting with soffit venting or a disk vent in the gable end. I did the former two for mine.Originally posted by paulagesi definitely decided to provide some sort of venting in the structure---no big deal.
Look for Vermiculite insulation. I found both at a large garden center but you want their big bags (3 or 4 cu ft, not the quart sized ones -- about $13 for the big guys). You can also find Vermiculite at building supply centers that sell insulation (not HD/Lowes - they focus on batts & blown in cellulose). It also comes in large bags.i have however, run into a problem finding perlite! home despot doesn't have it, as it's out of season, and all of the garden centers have small bags for too much money. i calculated needing roughly 1/2 cu yard, which would be 16 4cu ft bags @ $10 a bag. ouch.
Jim
Comment
-
When we were over in Washington DC installing an oven last month we had a devil of a job finding large quantities of vermiculite from DIY stores. So we went to the commercial seed wholesalers / retailers, horticultural suppliers, greenhouse equipment suppliers, hydroponics suppliers and landscape contractors. A large sack was $10 and we used 9. Also have a look on Ebay.
Over here we get it from our builders merchants and it is quite large pieces say 25 mm, the vermiculite we found in Washington was a course grade, however, much smaller than I am used to. I usually mix vermiculite concrete around 8:1, with the smaller grade we mixed it at 6:1 and it set ok.
Alf
Comment
-
Paul
Probably you know this, but if eventually not...
The vermiculite/perlite need to be mixed with the cement when both are dry. This lets that each vermiculite/perlite grain be totally covered by a cement layer before the water application, equalizing the specific weight of each vermiculite/cement arrange.
The water need to be aspersed in the mixture, it better to be just wet, not soaked.
Just sprinkle a little water over the upper surface of the vermiculite/cement heap, mix well, sprinkle/mix again, and so on, until feel that the mixture is lightly wet when touched with your fingers.
The isolation could be applied directly over the dome walls using your hands, like if you were working in a little sand castle.
Do not press to much the mixture, giving slightly taps. When dry it will set up Ok.
I hope this help.
Luis1 Photo
Comment
-
thanks, luis. i'm not mixing this at all. this perlite is only for backfill inside the encasing structure, so it will by loose and dry. i found 4 cu. foot bags for $8, which seemed pretty cheap to me. it all comes from one supplier here, but it's considered out of season, and some places were just charging way too much. this company makes a construction grade, but this i couldn't find at all.
i insulated around my dome with a castable insulation, made by a refractory materials supplier. it was free, and seems to work at least as well as the perlcrete. vermiculite is far more expensive here than perlite.
i've almost got the structure closed in, but it rains everytime i have the time to work on it! i even have a helper today. dammit, stop raining!
Comment
-
-
#61 Nice work Paul, with your cement umbrella
#61
(M) Getting the majority of your oven so nicely protected must feel good. Congratulations, Paul. Will you be using a stucco coat, and if so, will you add color?
(M) Are you planning to leave an access panel?
(M) Now to decide on what to plant on your roof garden.
Ciao,
Marcel"Everything should be made as simple as possible, ...
but no simpler!" (Albert Einstein)
Comment


Comment