
Re: Pompeii oven in Switzerland: pics
6th course. Its astounding that they stay up there, looks like they shouldn't, but somehow they do. Now I'm singing "every brick I take, every move I make, I am watching you..." As long as I don't get to "London bridge is falling down" I'll be ok.





-
Re: Pompeii oven in Switzerland: pics
OK, so this is how I put in the door. I'll put in several pics, seeing as there anren't that many of openings with angle irons yet...
Leave a comment:
-
Re: Pompeii oven in Switzerland: pics
I think the issue of wetting bricks is heavily dependent upon the type of mortar being used. I hope to find the best way (for my mortar) before I reach the top course! P.Leave a comment:
-
Re: Pompeii oven in Switzerland: pics
I was soaking my bricks tonite.
Sometimes it seemed hard to get the mortar to stick.
Maybe I will try your method tomorrow.Leave a comment:
-
Re: Cracks in your mortar joints
Frances,
Since the first ring, I have also been experiencing some shrinkage cracks using a pre-mixed air-set mortar, but it's very inconsistent. I'm almost certain that some cracking has occurred where I've over-wet the bricks, so perhaps the mortar is too sloppy and hence shrinks more? I had my brickie help out on part of one course (to show me how I should be doing it), and he advised against wetting the bricks at all, or perhaps just a light spray with a spray bottle. His technique was different from mine, and started out with a normally buttered brick of about ½" thick, then he pounded hell out of it with a rubber mallet to get it down to the required height. But there was still the odd hairline crack!
I'm currently dipping each brick into a pail of water briefly, and lightly spraying the brick bed, thinly buttering the brick and laying it. This seems to produce the best results in terms of plasticity of mortar to bed it in easily, and minimal cracking.
Despite all the cracks though, it feels as solid as a rock!
Cheers, Paul.Leave a comment:
-
Re: Pompeii oven in Switzerland: pics
I don't think I ever saw that picture,Originally posted by Hendo View Post

although I remember seeing the finished oven. As a side note, those big bricks with square holes are very odd by USA standards. I guess everything is different in Louisiana.Leave a comment:
-
Re: Pompeii oven in Switzerland: pics
Yes it does help, a great deal! Good pictures, thanks guys! I think I've got it all worked out. All I need now is a diamond saw and some time...
BUT, you won't reading any more posts from me for a while, not because I've given up in disgust, but because we're going on holiday for two weeks. To Italy actually, the Land of Pizza :-)
So, does anyone have any tips on how to deal with ovenbuilding withdrawal simptoms? Lots of Pizza and Chianti? Yeah, that might do the trick...
FrancesLeave a comment:
-
Re: Pompeii oven in Switzerland: pics
Frances,
I've just found another pic of 'normally oriented' angle iron with what appears to be bits of firebrick cut to the desired angle. It's at http://www.fornobravo.com/pizza_oven...ouisiana3.html. Again the iron seems to be just sitting there.
Hope this helps,
Paul.Leave a comment:
-
Re: Pompeii oven in Switzerland: pics
David,
Was it Marcel? The post at http://www.fornobravo.com/forum/f8/f....html#post9483 has a photo of an upside down angle iron over the entry which I think comes from Marcel in a response to whocanitbenow. There is a link to Marcel's photobucket site, and on it the angle iron seems to be simply sitting freely on the vent sides.
Cheers, Paul.Leave a comment:
-
Re: Pompeii oven in Switzerland: pics
This:Originally posted by asudavew View Post

is a very fancy way of doing an angle iron entry. There is the original method, which has an angle iron bridging the side walls of the oven entry, that support the upper course of bricks. Someone had the bright idea of putting the angle iron upside down, so that there would be an 45 degree iron face to the angled bricks, rather than big gobs of mortar in the angle iron.
Here's a pic of the original method:
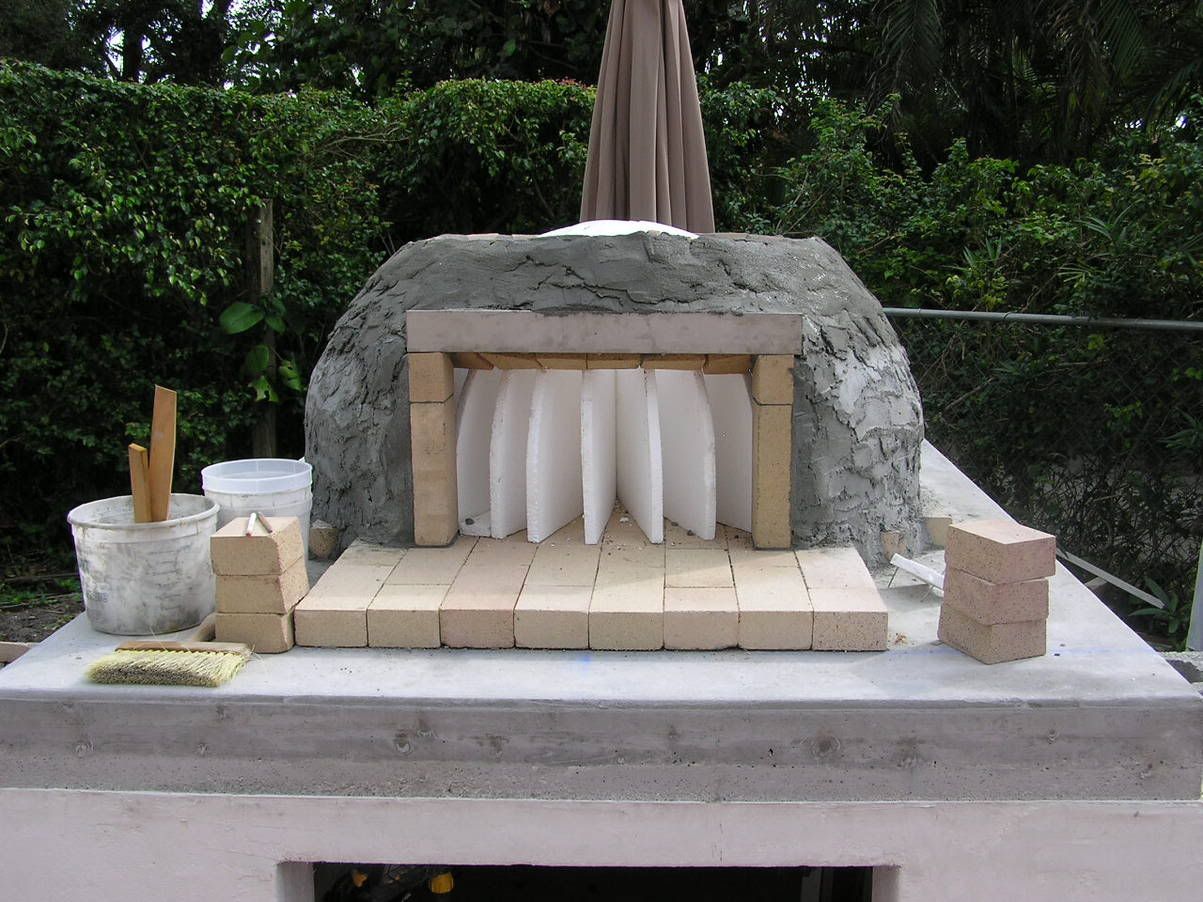
from here
I can't find a pic of the up-side down method, maybe someone with a better memory or searching skills can jump in.Leave a comment:
-
Re: Pompeii oven in Switzerland: pics
I think you are doing great~!
And you will be eating pizza before me.
That's for sure!
Keep it up.Leave a comment:
-
Re: Pompeii oven in Switzerland: pics
Thanks Dave. I know It's not perfect or anything, but like I said, its mine. Hey, and now I actually have proof that it holds up! It rained in the night and all the water pooled in the plastic covering, must have been quite heavy, but the bricks are all still in their places! Cool!
The circular saw is actually a rental, I only had it for a day. It had a diamond blade and I thought it worked really well. However, I'm not sure how easy it would be to make precision cuts and angles with it. Depends what kind of oven you're planning. For now I'm using a dinky little one as described in Dave's link. It works for me, as long as I only cut one brick per course (ok, two max), but I'll certainly need a bigger one for the upper part of the dome.Leave a comment:
-
Re: Pompeii oven in Switzerland: pics
It wasn't Balty
It was Neill.
Here's a link.
It shows a picture of his very nice angle iron door jamb towards the bottom of the thread.Leave a comment:
-

Leave a comment: