Announcement

Collapse
No announcement yet.

Gus's Corner - Timo's Build

Collapse
X
 
  • Filter
  • Time
  • Show
Clear All
new posts

  • Gus's Corner - Timo's Build

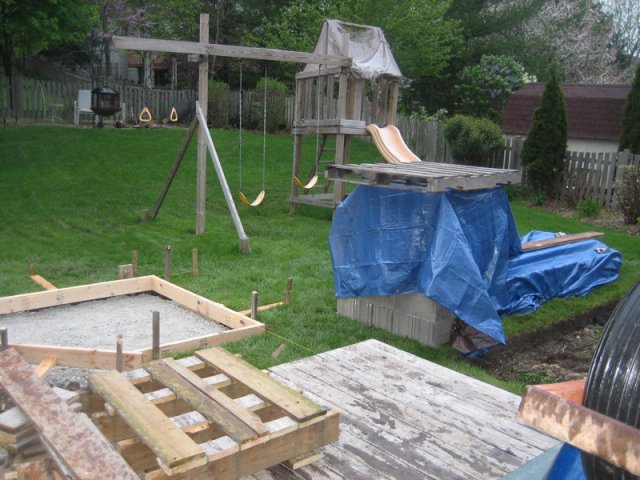
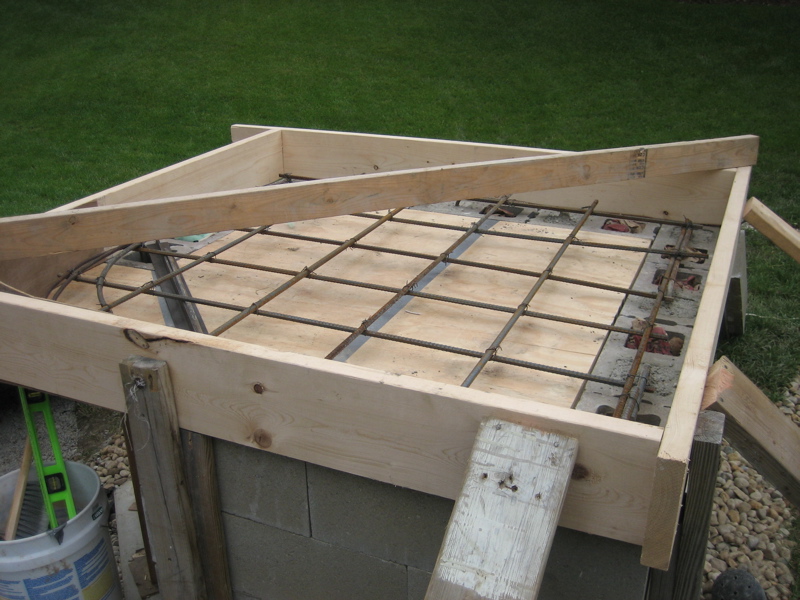
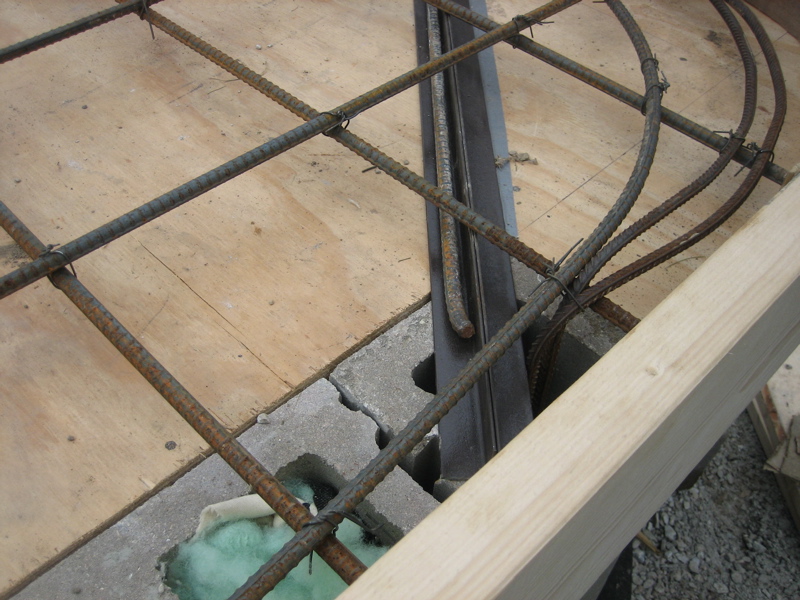
    Hello and here's what I've been working on for the last seven weeks. The foundation, stand and hearth are almost done, so now I am getting nervous about the actually oven part. Here's a look at my oven project so far. I thank this forum for all the info made available and appreciate any helpful oven tips and information.

    This is just for fun, like building an oven. I already have a tiled steam shower and Vespa, so a brick oven fits the scheme of things. That's my father-in-law on the Vespa.


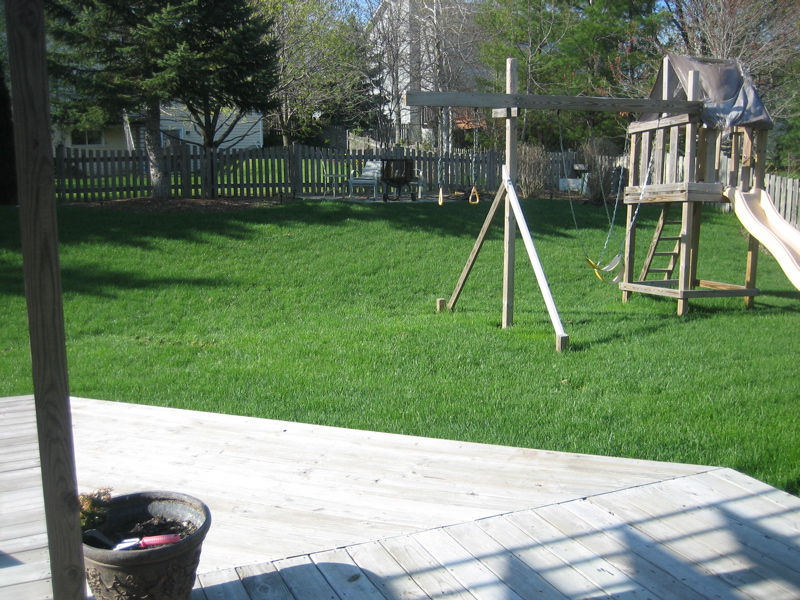
    Here's where the oven is going.


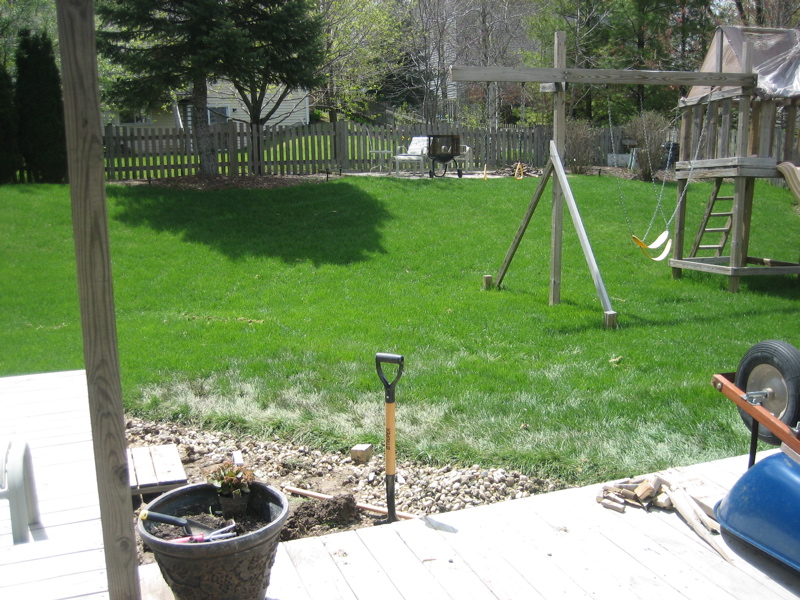
    This is serious now that I destroyed part of the deck.


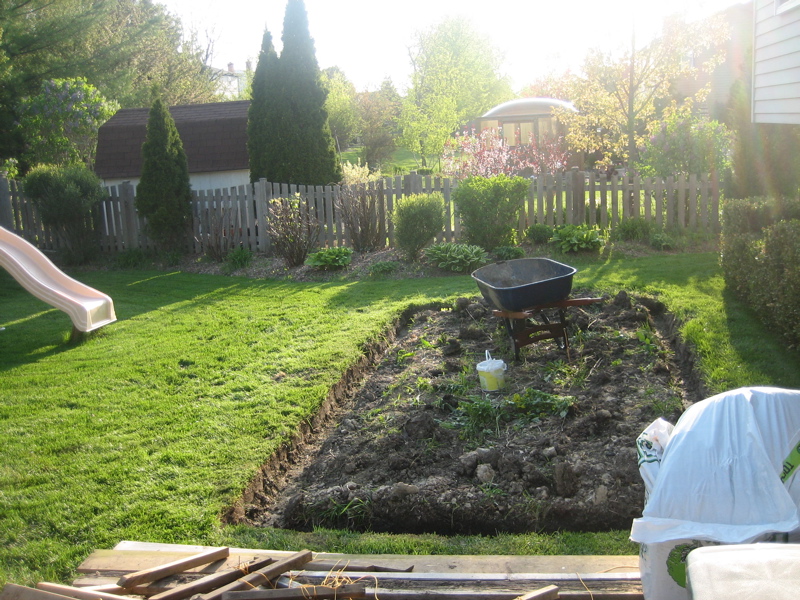
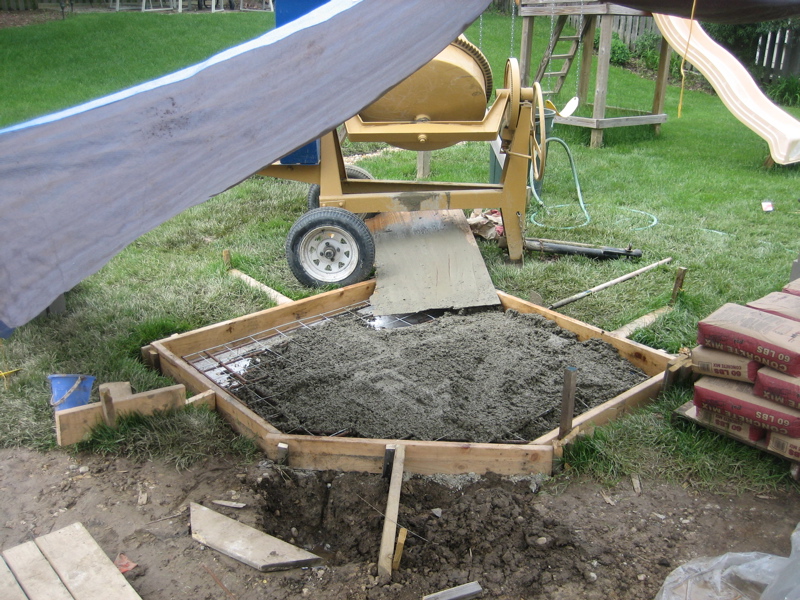
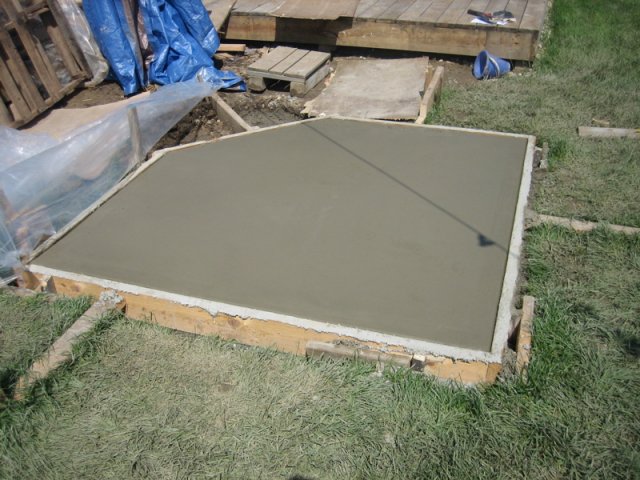
    Here's the foundation digging.


    Because I can't post more than four pictures I will continue on the next post.
    My Build Thread

  • #2
    Re: Gus's Corner - Timo's Build

    Here's the frame for the foundation.


    Here's the clay base dug out about 8"


    Here's the garden where I hope to pull peppers and tomatoes from and use for the pizzas. Needs lot of work.


    This was my back's wake up call. Blocks, concrete, and mortar.
    My Build Thread

    Comment


    • #3
      Re: Gus's Corner - Timo's Build

      Here in Illinois we are getting more rain than sun, thus the tarp on foundation day.


      Here's the pouring into the forms.


      Here's the finished poured foundation.


      I didn't know it at the time but I put the dog's, Gus, footprint into the concrete just two weeks before he would pass away. Thus Gus's Corner.
      My Build Thread

      Comment


      • #4
        Re: Gus's Corner - Timo's Build

        Here's the first row of blocks leveled with mortar.


        Here's the rebar bent for the cores.


        Here's the drainage system I put in. 8" of small river rock over and around 4" drain tile and landscape fabric set at the bottom of the crushed rock.


        Here's the clean out for the tile. Really it's to see how much water is draining.
        My Build Thread

        Comment


        • #5
          Re: Gus's Corner - Timo's Build

          Here's the rebar sticking out of the cores.


          Here's a mock up for my friends and family naming the oven,


          Here's the hearth foundation and rebar.


          Here's one of the two front corners. I didn't pour their cores with the other because I wanted all the rebar and corner cores to be included with the main pour so maybe I can add more strength. The front is to hang over about 8"
          My Build Thread

          Comment


          • #6
            Re: Gus's Corner - Timo's Build

            Here's the grid layout of rebar. It's on 11" centers just because that's the way it worked out and I had extra rebar.


            Here's the hearth pour. Took 3 hours in the wheelbarrow. I am glad I got the 6 cubic foot mixer for the foundation, though.


            This is as far as I am right now. I have a source for 8# firebricks and I have to pour the perlite tomorrow. I made a cardboard mock up of the oven and found that the most I can squeeze into the space I have is a 39" oven, which is about right for me. The part that I am getting to is the oven part and that's what I have the hardest time picturing in my head. Anyway, that should begin next weekend. In the meantime I will get about 175 firebricks and begin splitting them. Thanks so far, Forno Bravo.
            My Build Thread

            Comment


            • #7
              Re: Gus's Corner - Timo's Build

              wow thats a good lay out, good for you,where abouts are you located in n. Il.

              Comment


              • #8
                Re: Gus's Corner - Timo's Build

                Hey Gus, it took me 2 days to do what you got done in 1 day! (just kidding, no one is as slow as me).
                Your foundation looks great, good job on the rebar, filling every other brick cell AND putting in J bent rebar! Very impressive. Built like I'd recommend it. Thanks for posting nice, clear pics of how you are doing it. It's nice to see your progress and it will be really helpful to others too. Keep up the good work, Dino
                "Life is a banquet and most poor sons-of-bitches are starving to death." -Auntie Mame

                View My Picasa Web Album UPDATED oct
                http://picasaweb.google.com/Dino747?feat=directlink


                My Oven Costs Spreadsheet
                http://spreadsheets.google.com/ccc?k...BF19875Rnp84Uw


                My Oven Thread
                http://www.fornobravo.com/forum/f8/d...arts-5883.html

                Comment


                • #9
                  Re: Gus's Corner - Timo's Build

                  Thanks Dino. Now onto the oven. You did some outstanding cutting for the vent and overall build. I have read just about every post at the forum trying to understand the process and have taken bits and pieces of info from many different builds to help with mine.

                  I have been trying to find a decent tile saw for months now (at a decent price, too) but haven't found anything yet. I poured the perlite yesterday and poured a bit of the landing today. Tomorrow I will get about 180 firebricks and start cutting them up with an old small tile saw. I'll see how far I get with it. I might end up getting really frustrated and surprise the wife with a Harbor Freight tile saw for a belated father's Day present. Ha, ha.

                  Thanks all previous Pompeii builders!
                  My Build Thread

                  Comment


                  • #10
                    Re: Gus's Corner - Timo's Build

                    I don't know if anyone will see this, but I'll give it a try here. I have had some interesting firebricks dealings today and need some input.

                    #1. I found some angled firebricks. I paid $1.60 a piece for them. The brick yard guy didn't even know they had them until I pointed them out. I want to use these for the vent arch and landing arch. They are a bit dirty. Should I just use a steel brush to clean them up, or do I need to acid wash them. There is some algae and gunk on some.

                    #2. Since these angled bricks seem to form about a perfect 12" arch without mortar, I'll have to take a brick out and fill the remaining gap with mortar. For the strongest arch how much of a mortar gap between bricks should I have?

                    #3. I need fireclay. Get this, Brad at ACME Brick in Waukegan would rather have me spend $75 on a 5 gallon pail of premix then order some $14 bags of fireclay for me. I just spend $300 of brick, so I need to do something to keep expenses down a bit. No one wants to sell me fireclay dang it.

                    Anyway, hope to get cutting the bricks soon.

                    Timo
                    My Build Thread

                    Comment


                    • #11
                      Re: Gus's Corner - Timo's Build

                      Hi timo have you tried Illinios brick or a place called Roselle Supplies in Roselle I got mine there call them maybe they deliver or take a ride, on Irving rt.19 west of Roselle rd.or there is a company in south holland Armil Inc. they have all that is needed for the oven and they deliver you name they have it .

                      Comment


                      • #12
                        Re: Gus's Corner - Timo's Build

                        Mavona, thanks for the heads up on those. I see Illinois Brick has a place in Des Plaines so I'll give them a call. I am up here in Gurnee, so I was hoping to find a few places willing to sell that stuff up here.

                        Also there's a place call Clay Products in Spring Grove I'll give a call to also.

                        Thanks much,

                        Timo
                        My Build Thread

                        Comment


                        • #13
                          Re: Gus's Corner - Timo's Build

                          Have you tried a pottery supply store for your fireclay? They'll probably have bags available for you.

                          #3. I need fireclay. Get this, Brad at ACME Brick in Waukegan would rather have me spend $75 on a 5 gallon pail of premix then order some $14 bags of fireclay for me. I just spend $300 of brick, so I need to do something to keep expenses down a bit. No one wants to sell me fireclay dang it.
                          Anytime I buy something from ACME, I either end up being slingshot directly into a cliff, or the canon malfunctions, or the springs operate unpredictably.

                          Comment


                          • #14
                            Re: Gus's Corner - Timo's Build

                            Today I found fireclay for $11.40 a 50# bag at Clay Products in Spring Grove, Illinois. I also bought 150 regular firebricks, and some interesting #2 tapered firebricks. I think I got a deal on them, but now I need to decide on an arch.

                            Here's what I have so far. Height is about 13", but that's rough with 3/16" mortar gaps. Width is about 18" The questions I have (seeing how I've never done anything like this before) are:

                            Is the overall design sound? Will this vent area be enough? The #2 tapered brick is 8 1/4" Should I taper the ends of the brick across the top to lock in vertically? Shoule I cut the tapered bricks in half? Any ideas for reveal? I was thinking I could cut in the brick like a long "L"

                            -Timo


                            My Build Thread

                            Comment


                            • #15
                              Re: Gus's Corner - Timo's Build

                              You lucky dog! I am looking for arch brick for building my oven. I plan on building @ 42" inside diameter and would prefer finding #1 arch brick.

                              IF the brick you have are standard, the taper probably goes (2 1/2" - 1 6/8").
                              The bricks I am looking for are #1 Arch that taper at ( 2 1/2" - 2 1/8").

                              So you can use these exactly like in the plans, cut in half, etc. EXCEPT you get to use a lot less mortar between rings! As a matter of fact, if you go with one row/ring of your #2 Arch and one row of "straights" ( normal, untapered brick) without any thick wedges of mortar you would naturally end up with a dome with a radius of around 21" ... a 42" inside diameter! That would average out to be almost identical to my plan of using #1 Arch brick in my rings. Cool.
                              So you can get by with 1/16" thick mortar joints between the rings. You will still have the spaces between the 'ends' of the brick to fill with cement mix.
                              You are very lucky!

                              (The above is based on many years working for A.P Green Refractories as an Engineer in the field).

                              Comment

                              Working...
                              X