


 Tweet
Tweet
Greetings all from cold, snowy south central Montana, we just had what I greatly hope will be our last snow of the season so that I can getting started on my oven project. But more likely it will be at least another month.
A brief intro - I am an avid do it yourselfer and cook who baked professionally in a former life. I've been married for 17 years to a man I affectionately call "The Cruise Director". We entertain extensively! My husband is a wine broker and I am the director of Outreach for our local university.
Outdoor brick ovens first caught my attention during trips to the Dry Creek area of California. I have been gathering information on pre-fab units for several years now, but nothing motivated me to take the plunge. Last summer a good friend had a barrel oven built and while I loved the oven, wasn't thrilled with the price. And then one afternoon of internet surfing brought me to Forno Bravo. I download the plans and have been fixated ever since.
I am now on my fourth read through of the plans, have spoken three times with our local building department and located local suppliers for everything I will need. I met with the a rep from the fire department today. I left him looking perplexed and with a complete set of plans for what I have planned. I don't think they get many do it yourselfers building brick ovens in Montana! He said he would have to look it over and would get back to me in about a week. I'm pretty certain I will be able to overcome any concerns he has. I feel ready to role up my sleeves.
My plans have expanded to include a fairly extensive outdoor kitchen. Never lacking in confidence, I have a tendency to think there isn't anything I can't do. But I have been known to get it over my head on occasion. I've been emailing James over the last several weeks and he directed me to this forum. Imagine my excitement - a whole group of people who seem to be willing and able to help me out if I get in over my head. Any everything I've read so far has been greatly inspiring!
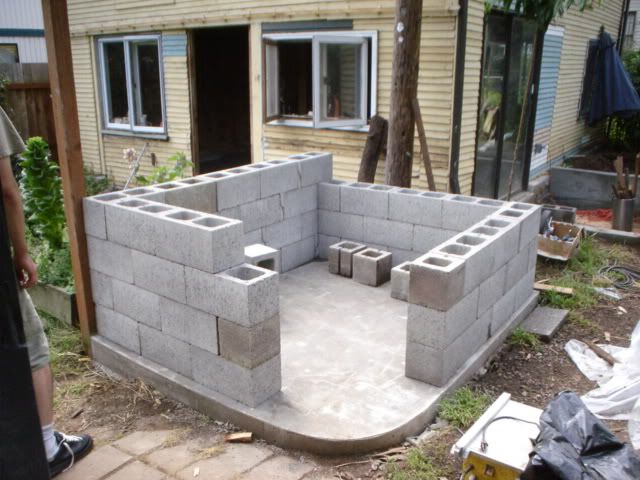
My initial questions are: 1) I am planning a corner installation. What is the best way to install the fourth block course over the wood storage area? I understand the use of angle iron and cutting out the 3/8 to accommodate its thickness, but how to I handle the void that remains on the side walls by tying into them at an angle? Should I miter the corner blocks? Should I extend my framing lower and fill in the wedge when I pour the structural concrete layer? Or am I better off no having a row of blocks over the opening (they way gaptogap did on his recently posted photo)? Or is there a better alternative someone can offer? 2) The diagram on page 15 of the plans shows a 62? outside measurement on the 43? oven, what does this reference? Based upon everything I read, I was anticipating a 72? block stand. However, the corner installation on page 19, photo 2.3 of the plans looks like it is 80?. What is the best stand size for a 43? corner oven? 3) What?s the best way to finish the roof on a corner installation? A gabled roof that will accommodate the front angled wall could get tricky. I am leaning toward enclosing with concrete block and stucco. I like the roof on the Stucco House on page 49 of the plans but am concerned a flat roof may not be a good choice in my northern climate. Anyone have a recommendation? 4) Does anyone have a strong opinion to offer on what?s is a better cooking surface ? the four piece pie shape that Forno Bravo carries or fire brick? 5) All of the pictures I have seen posted on this site and others, show ovens built yards that are much larger than mine. I will be building in a fairly tight space and the back of the oven will be right up against a 6' privacy fence. Is this going to be a problem? I'm not concerned about making it difficult to build, I am on great terms with my neighbor and I know he won't mind if I take boards out temporarily to grant access during the building process, I am more concern about problems that might arise when I use the oven.
I think that?s it for know, no doubt I will have a lot more questions as I progress.
Thank you all,
Sharon
A brief intro - I am an avid do it yourselfer and cook who baked professionally in a former life. I've been married for 17 years to a man I affectionately call "The Cruise Director". We entertain extensively! My husband is a wine broker and I am the director of Outreach for our local university.
Outdoor brick ovens first caught my attention during trips to the Dry Creek area of California. I have been gathering information on pre-fab units for several years now, but nothing motivated me to take the plunge. Last summer a good friend had a barrel oven built and while I loved the oven, wasn't thrilled with the price. And then one afternoon of internet surfing brought me to Forno Bravo. I download the plans and have been fixated ever since.
I am now on my fourth read through of the plans, have spoken three times with our local building department and located local suppliers for everything I will need. I met with the a rep from the fire department today. I left him looking perplexed and with a complete set of plans for what I have planned. I don't think they get many do it yourselfers building brick ovens in Montana! He said he would have to look it over and would get back to me in about a week. I'm pretty certain I will be able to overcome any concerns he has. I feel ready to role up my sleeves.
My plans have expanded to include a fairly extensive outdoor kitchen. Never lacking in confidence, I have a tendency to think there isn't anything I can't do. But I have been known to get it over my head on occasion. I've been emailing James over the last several weeks and he directed me to this forum. Imagine my excitement - a whole group of people who seem to be willing and able to help me out if I get in over my head. Any everything I've read so far has been greatly inspiring!
My initial questions are: 1) I am planning a corner installation. What is the best way to install the fourth block course over the wood storage area? I understand the use of angle iron and cutting out the 3/8 to accommodate its thickness, but how to I handle the void that remains on the side walls by tying into them at an angle? Should I miter the corner blocks? Should I extend my framing lower and fill in the wedge when I pour the structural concrete layer? Or am I better off no having a row of blocks over the opening (they way gaptogap did on his recently posted photo)? Or is there a better alternative someone can offer? 2) The diagram on page 15 of the plans shows a 62? outside measurement on the 43? oven, what does this reference? Based upon everything I read, I was anticipating a 72? block stand. However, the corner installation on page 19, photo 2.3 of the plans looks like it is 80?. What is the best stand size for a 43? corner oven? 3) What?s the best way to finish the roof on a corner installation? A gabled roof that will accommodate the front angled wall could get tricky. I am leaning toward enclosing with concrete block and stucco. I like the roof on the Stucco House on page 49 of the plans but am concerned a flat roof may not be a good choice in my northern climate. Anyone have a recommendation? 4) Does anyone have a strong opinion to offer on what?s is a better cooking surface ? the four piece pie shape that Forno Bravo carries or fire brick? 5) All of the pictures I have seen posted on this site and others, show ovens built yards that are much larger than mine. I will be building in a fairly tight space and the back of the oven will be right up against a 6' privacy fence. Is this going to be a problem? I'm not concerned about making it difficult to build, I am on great terms with my neighbor and I know he won't mind if I take boards out temporarily to grant access during the building process, I am more concern about problems that might arise when I use the oven.
I think that?s it for know, no doubt I will have a lot more questions as I progress.
Thank you all,
Sharon


 Gentlemen, I am overwhelmed! Thank you for your incredibly quick and helpful responses.
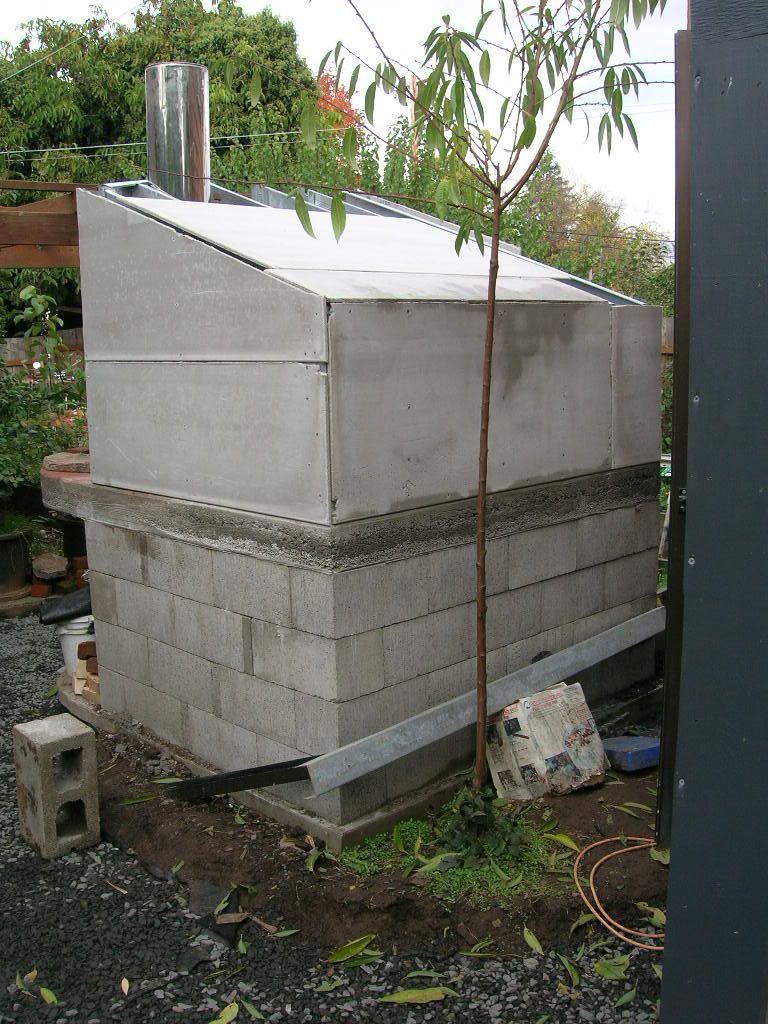


Comment