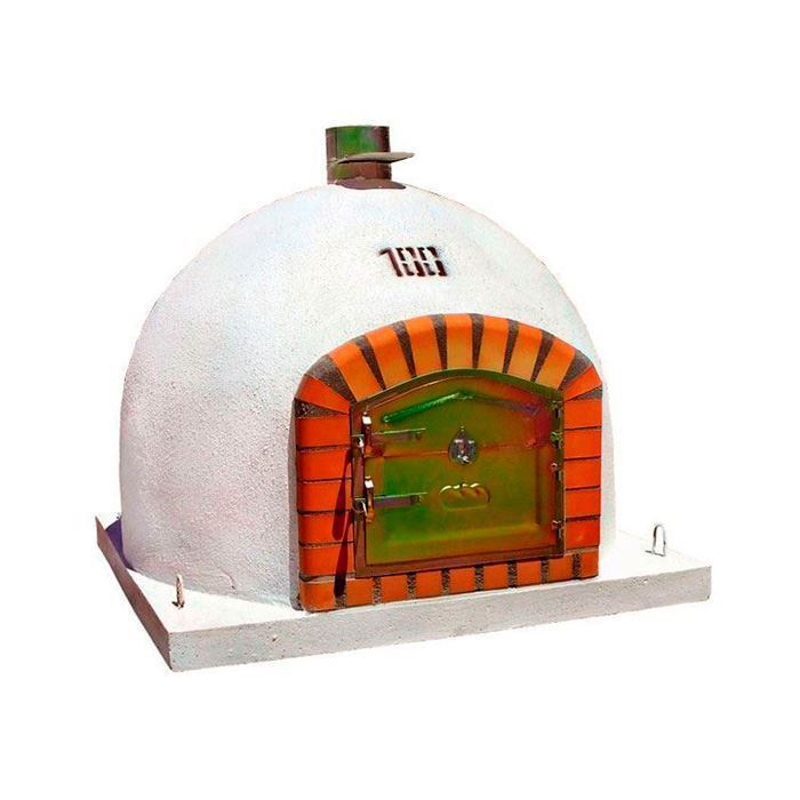
Announcement

Collapse
No announcement yet.

1st time build, Insulating the slab

Collapse
X
 
  • Filter
  • Time
  • Show
Clear All
new posts

  • 1st time build, Insulating the slab

    Hi all
    thie is my first build and trying to make sure I get my plinth/stand right.
    my plan is to build a block base with a reinforced slab. I’m wondering about insulation below the oven.
    Would it be beneficial if I put a sheet of 2mm aluminium on top of slab then create a 100mm vermiculite insulating layer then place the oven
    or should I put ceramic blanket before I lay the vermiculite
    layer
    Thanks for any help
    Glenn
    Last edited by Oh Crap; 12-08-2021, 02:52 PM.

  • #2
    If you have not already, download the eplans from Forno Bravo, it is a good design and construction baseline, a little dated but a good start.
    Most questions are answered there or in the blog by using the search function.

    Ceramic "blanket" is NOT used under the floor only over the dome, it is too soft. Do you mean CaSi board.? Do not place aluminum under the floor, it will trap moisture and also has a very high thermal transmission factor (K value). Again most question are answered in the eplans or the blog.
    Russell
    Google Photo Album [https://photos.google.com/share/AF1Q...JneXVXc3hVNHd3/]

    Comment


    • #3
      Welcome Glenn! Normally we recommend keeping insulation separated from the hearth slab to eliminate moisture wicking from the concrete or from water that may seep in from the perimeter of the build. In the last few years, best practice is to cast or drill several weep holes in the top slab and then lay pieces of porcelain or mosaic tile sheets such that the weep holes are not covered. Laying ceramic insulation board on top of the tile will prevent the board from absorbing water. A thin layer of sand & clay on top of an uneven board surface helps to lay your cooking floor firebricks level. If you choose to use a perlite or vermiculite concrete insulation under the cooking floor, it will take a long time to dry out and is only about half as efficient insulation as ceramic board...in other words it takes about 100 mm of 5:1 perlcrete to insulate as well as 50mm ceramic board. You would also want to lay some garden cloth over the base tiles before applying the wet perlcrete so the "drain channels" don't get clogged.

      Recently, moisture resistant ceramic board has become available and some builders have put down a layer of foamglas between the hearth and ceramic board as extra insulation and as a moisture barrier. For many folks in wetter climates, building an enclosure/shelter over the oven gives you a dry place for your guests at a pizza party or just to keep you out of the rain while working the oven. I hope this all makes sense and helps...relax & enjoy this journey!
      Mike Stansbury - The Traveling Loafer
      Roseburg, Oregon

      FB Forum: The Dragonfly Den build thread
      Available only if you're logged in = FB Photo Albums-Select media tab on profile
      Blog: http://thetravelingloafer.blogspot.com/

      Comment


      • #4
        Thanks for the replies
        Utahbeehiver, I now most definitely NOT be using aluminium (i thought the reflective surface would be a help, shows what I know ), I also did mean blanket but now realise the folly in that thought. I can get CalSil board or vermiculite board in the hardware beside me.

        SableSprings, everything yous said makes sense.I had thought of drain holes but not the tiles to prevent blockage. Also is there any harm in putting 2 CalSil boards together? The thickest I can get is 30mm

        Comment


        • #5
          I've attached a link below to a thread with good illustration/pics of the base layers. Glad my response made sense...

          Yes, you can layer the CalSil insulation boards without issues. A total of 60mm is a decent base insulation of ceramic board. You will want to lay them so seams do not line up between the top & bottom layer. I also suggest checking with friends for scraps of mosaic tile sheets. In the States, we often need to buy tiles by the case/box and almost always end up with a couple extra pieces.

          Also, if you use the mosaic tile sheets, the individual tiles are set onto a mesh backing. Simply by flipping the sheet upside down, the mesh acts as a barrier to keep the channels between tiles open.

          https://community.fornobravo.com/for...andpoint-idaho
          Mike Stansbury - The Traveling Loafer
          Roseburg, Oregon

          FB Forum: The Dragonfly Den build thread
          Available only if you're logged in = FB Photo Albums-Select media tab on profile
          Blog: http://thetravelingloafer.blogspot.com/

          Comment


          • #6
            SableSprings, that’s a really good read, lots of pics explaining everything..cheers

            Comment


            • #7
              Glad it helped & we hope to see you have a successful & fun build. Don't forget to take pictures & post as you go.
              Mike Stansbury - The Traveling Loafer
              Roseburg, Oregon

              FB Forum: The Dragonfly Den build thread
              Available only if you're logged in = FB Photo Albums-Select media tab on profile
              Blog: http://thetravelingloafer.blogspot.com/

              Comment


              • #8
                I'm having trouble obtaining foamglas or alternative. So Im thinking of going the vermicrete route with a 60mm calsil layer. Would I be wise to use the mosaic tiles under the calsil board?

                Comment


                • #9
                  No, you’ll want the draining channels at the bottom of the insulation layers, ie against the supporting slab, Unfortunately the 5:1 vermicrete mix will fill the channels in, so lay some weed mat over the tiles first, lay up the vermicrete, give it a couple of weeks to dry, then place the cal sil board over it.
                  Last edited by david s; 12-08-2021, 02:08 PM.
                  Kindled with zeal and fired with passion.

                  Comment


                  • #10
                    That's makes sense.
                    Im Planning on building the stand /slab etc over the Christmas period. 100mm slab with drainage, tiles or similar to cover drainage, 100mm vermicrete and then 60mm calsil board.
                    Then place oven on calsil...this is where I'm getting concerned as to the style Ive bought, reading more and more though the forum I'm concerned regarding heat retention due to the flue in the centre, In saying that I am adding 2" fibre blanket and 2" vermiulite insulation followed by rendering and then mosaic tiling and seal it.
                    Last edited by Oh Crap; 12-08-2021, 02:55 PM.

                    Comment


                    • #11
                      Ovens with a vent out the top and through the center of the dome do not perform correctly. If you look at the Eplans, I mention you should down load and study, then you will get a better feel on pompeii design. If you want a chimney off the top (but not through the dome) then you need to do a squirrel or beaver tail design.
                      Russell
                      Google Photo Album [https://photos.google.com/share/AF1Q...JneXVXc3hVNHd3/]

                      Comment


                      • #12
                        Thanks Utah, yep I downloaded the plans but unfortunately I purchased this oven already, it was deliver d yesterday ..
                        afternoon. Too embarrassed to admit I made that stupid mistake (pretty looking prebuilt oven at right price) .but it's done now so I need to fix my mistake. For others that my find themselves in this position, i've spoken with the manufacturer and it is made with refractory brick etc BUT he says that they are supposed to be insulated after putting in placr
                        After further digging around, I’m wondering could I somehow cut out the existing chimney and retrofit a keystone of sorts and insulate it as per normal. Then build an outer arch and place the chimney there?
                        Last edited by Oh Crap; 12-09-2021, 02:47 AM.

                        Comment


                        • #13
                          Some pictures of the oven you purchased would be helpful Glenn. If it will be practical to block off the top exit chimney and create either a "normal" front arch landing & smoke chamber flue...that's the way to go (IMHO). You might also think about blocking the dome exit hole & then create a squirrel tail flue that collects the oven exhaust in the front arch & runs back up to the top chimney... again some pics would help us to see what options might work for you. Don't be embarrassed by your purchase "mistake", it should be the manufacturer that's shamed for using this design.
                          Last edited by SableSprings; 12-09-2021, 01:22 PM.
                          Mike Stansbury - The Traveling Loafer
                          Roseburg, Oregon

                          FB Forum: The Dragonfly Den build thread
                          Available only if you're logged in = FB Photo Albums-Select media tab on profile
                          Blog: http://thetravelingloafer.blogspot.com/

                          Comment


                          • #14
                            Pictures of chimney, with damper Pic of inside done ceiling and pic from top of chimney down.
                            trying to upload pics of front of oven aswell Edit : I can reduce size of oven picture so I've posted the pic below which is the oven. There is about 20mm depth between the arch and the dome.
                            Last edited by Oh Crap; 12-09-2021, 12:15 PM.

                            Comment


                            • #15
                              Here's a link to the actual oven, if that is of any use
                              https://www.brasaovens.com/en/tradit...zza-oven-100cm
                              Last edited by Oh Crap; 12-09-2021, 12:32 PM.

                              Comment

                              Working...
                              X