Announcement

Collapse
No announcement yet.

Concrete mixer basics

Collapse
X
 
  • Filter
  • Time
  • Show
Clear All
new posts

  • Concrete mixer basics

    This project is the first time I've used a concrete mixer. It's not entirely intuitive, and I thought I'd share what I learned, as I never found explicit instructions elsewhere. On line concrete mixing guides lean towards "throw a shovel full of this into 32 imperial ounces of that" kind of nonsense.

    First Lesson: Get a good concrete mixer.
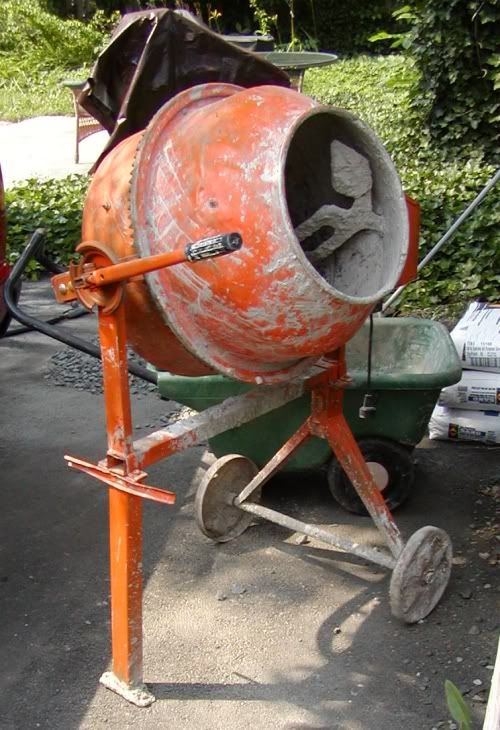


    This was the first mixer which I borrowed from a friend. Here's the news: Sometimes free is too expensive. It turned, if making a lot of noise, empty, when i picked it up. It had had a hard life. The mixing blades were coated with concrete,
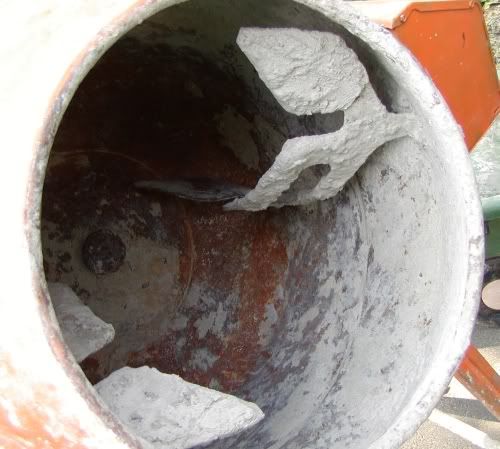


    and it was really dented. It turns out that someone had tried to remove hardened concrete in the drum with a hammer, and succeeded in bending the bevel gear ring. It turns out that with even a couple of buckets of stuff in it the motor slipped and it didn't turn. Off to the rental place, to get the plastic drum model, with the smooth bumps instead of frightening blades inside. It has cushy wheels to travel uneven ground to the worksite, and the good motor and plastic drum make it half as noisy as the old one.

    Lesson 2: Proportions are important

    I've done masonry projects in the past, with pre-mixed bagged concrete mix, mixed half a bag at a time in the plastic mixing bin. This project is an order of magnitude bigger, and there are significant savings in cost and bag-lifting if you buy the sand, gravel and portland cement individually. Your stone yard will dump the bulk materials in your truck, and you can shovel it out at home, take your time, save your back.

    The proportions are 5 to 1 aggregate to portland. This is usually shown as 2 1/2 each, 3/4" gravel and sand. My little mixer held 5 domestic buckets of material, so I would use two buckets of sand, two of gravel, and 4/5 bucket of portland.

    Here's a hint about opening a bag of portland cement:
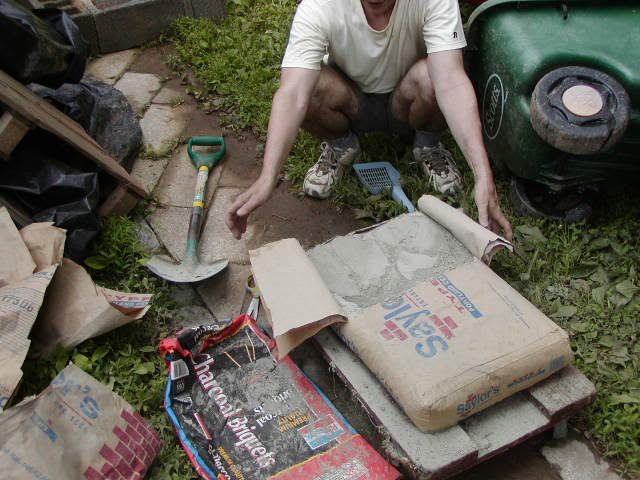


    Make an "H" shaped cut in the side of the laying flat bag. 94 pounds is too heavy to pick up and pour a full bag. This way you can shovel out a lot of portland, and then have a smaller bag to pour or store the remaining cement.
    My geodesic oven project: part 1, part 2

  • #2
    More concrete mixer basics

    Lesson 3: The order of ingredients matters.

    Everyone tells you to start with water first, but nobody tells you why. (When you're mixing by hand, you add water to dry ingredients.) The reason is that if you start with dry ingredients you will end up with a bunch of unmixed crud in the bottom of the mixer that you're going to have to scrape out and mix by hand. They are also a little mushy on the subject of how much water to use. (Wetness of aggregates vary.) It turned out for me to be about the same amount as your portland cement, 4/5 bucket. As you don't want to pick up anything more than necessary, I made note of how high the right amount of water reached in the mixer, and filled it with the hose.

    Add your first bucket each of sand and gravel to the water and start the mixer, this will be really sloppy.


    Add your entire amount of portland to the running mixer and back off. You don't want this stuff in your lungs or eyes. The reason you add this to the running mixer, is that the first flop over the portland tends to shoot a bunch of it out on your shoes.

    You are wearing bad shoes, right?

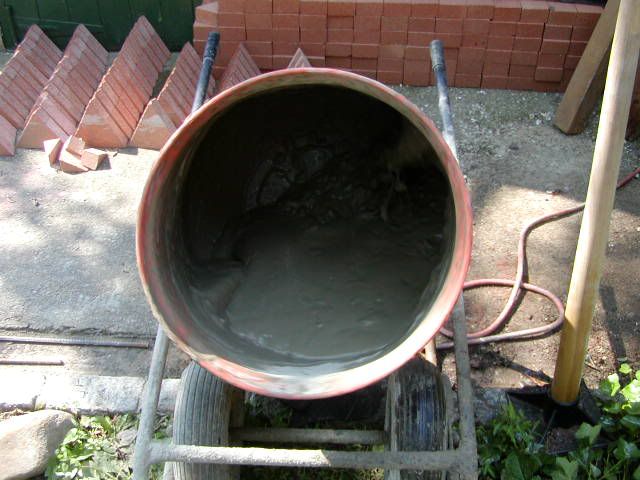
    You now have a slurry the thickness of thick cream of mushroom soup.


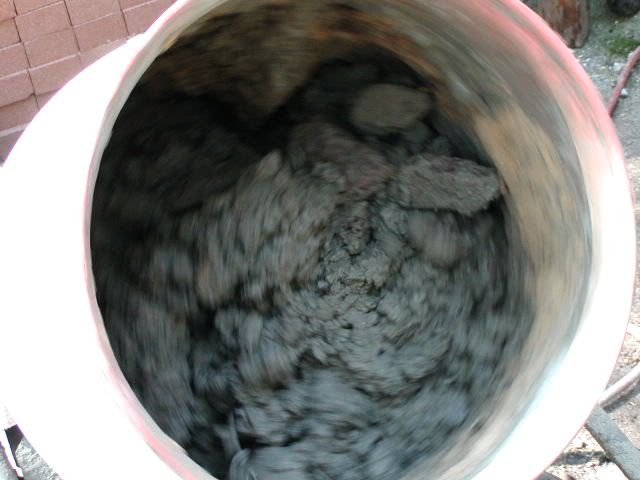
    To review: you have most of your water, half of your aggregates, and all of your portland in the mixer. This uniformly mixes the portland throughout the whole load. You now throw in in one more bucket of sand and gravel each. The mix is now really stiff and clumpy:


    With the hose you squirt in little amounts of water until it just begins to slump. The classic amateur mistake is to make concrete too wet. The stiffer it is, the stronger your bond will be. You mix the full batch for three minutes. I occasionally scraped the sides and mouth of the mixer with a trowel, you may not need to do this.

    Stop the mixer, dump the concrete in the forms. Return the mixer to the mixing area and squirt in water for the next batch, washing down the sides of the mixer. This is the point in the process to take a break if you need one, and you will, now or soon.

    Good luck. Anyone who knows more about this than me, feel free to add comments.
    My geodesic oven project: part 1, part 2

    Comment


    • #3
      This is a timely post for me.

      While I can't add to the discussion I thought I might ask a related question. I have an opportunity to purchase a light duty mixer and am curious if the price is right. This mixer is a Red Lion brand Big Cat mixer with plastic (easy to clean) drum. The seller purchased it new for some yard projects and now that he is done is ready to sell it, asking $215. I'm thinking I'll offer $180 and see what he does. My plan is to use it in the next 6-9 months and then sell it. What do you think?

      Comment


      • #4
        I don't know brand names, but harbor freight is offering a cheap import mixer new for 190. If it's a top brand name, you may be able to sell it advantageously, but perhaps not. Keep an eye on eBay.

        http://www.harborfreight.com/cpi/cta...emnumber=31979

        With few exceptions, bad drives out good in every market.
        My geodesic oven project: part 1, part 2

        Comment


        • #5
          poor abused cement mixer

          I was looking at that one, too...

          Until a saw the pics just posted here. looks like the neighbor had an orange cement mixer (just like in the HB link) that was all messed up. Did it have a hard life or is it just not that robust? I guess when you leave concrete in a mixer and slam it out with a hammer once it's dry - you tend to expect a problem here or there.

          Not been all that happy with the orange tools - but that was years ago. The tile saw my wife bought me (at 20% off, too - subscribe and they will send you coupons) seems pretty good. I may have to give them another shot.

          If I can't find a used mixer on craigslist.com, then I'll go the orange route.

          Christo
          My oven progress -
          http://www.fornobravo.com/forum/f8/c...cina-1227.html
          sigpic

          Comment


          • #6
            Re: More concrete mixer basics

            Originally posted by dmun View Post
            The order of ingredients matters. [...] start with water first [...]Add your first bucket of sand and gravel to the water... [...] Add your entire amount of portland... [...]
            Return the mixer to the mixing area and squirt in water for the next batch, washing down the sides of the mixer. This is the point in the process to take a break if you need one, and you will, now or soon.
            Yes, the order of ingredient are very important as you point out. I use a sligth variation, I put the stone before the sand and there is a little reason for that.
            When you start every new batch of concrete with water first and then the stone (and after the sand and concrete), then, every time we have finish with one batch, we can pour in water and a bucket of stones. Stone and water (instead of water only) are cleaning out the concrete that stays in the drum. So, by letting the drum rolling with water and stones, it cleans out itself while you relax a bit. And if you want to do a new batch you just continue with your recipe, otherwise you just empty your drum and rince the sligth mud that could stay inside with the water hose.

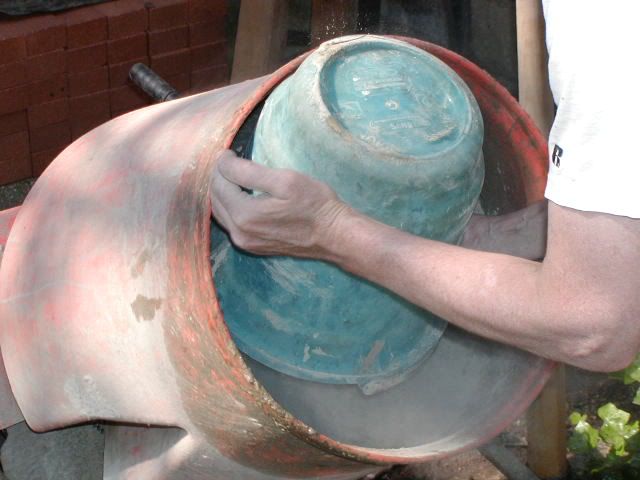
            from what we can see in your first picture, Cleaning the drum quickly is the KEY. And by quickly I mean : never keep concrete in the drum (from A to Z) for more than an hour. This procedure (water and stone at the end of each batch) should prevent what happend to your friend 's mixer.

            Ciao ! Thanks for your post and picture. It is true that there is not a lot of info on how to use a mixer. Thanks.

            Comment


            • #7
              Re: Concrete mixer basics

              Hi,

              I always start with the sand and then the cement and mix the dry ingridients first. Then add water. I think it is very important to mix before water. If the mixer is kept at the correct small angle (as close to horizontal as possible) and the batch is of the correct size and consistence (?), it will not stick to the wall or bottom of the mixer. As I empty the mixer I throw in the first batch of sand and let the mixer run on this until any moisture is picked up before I add the cement.

              regards from karl

              Comment


              • #8
                Re: Concrete mixer basics

                I might chime in here,
                A couple of days ago, I reponded to aureole in the UK in regards to his foundation and submitted this advice:

                "When you mix your concrete, we should always start with sufficient water in the mixer for most of the batch being made in that mix. I usually mix to and beyond the mixer's capability which sets a few other challenges there. I had a 3.5 cubic foot mixer when building the house and now have a 2.5 cubic foot mixer which get a thorough workout occassionally. I like to 'fill' a large builders wheelbarrow with each mix.
                Next add the portland cement as this is the 'glue' part of the mix. Add your 'aggregate' which I would call the crushed gravel or rock. This is simply the bulking agent and its surface should be thouroughly coated with the wet cement mix. Then add your sand which fills in all the gaps between the aggregate. Add a little water to achieve the required 'slump'. This will make your maximum strength concrete so long as you stick to the makers formula for the concrete's final use."

                I also agree with Crivil with the aggregate helping to ensure that the bowl is clean from a build up of concrete that was too dry and stuck to the base and sides including the paddles of the mixer. Water is also essential for this operation to work.
                Dmun,
                I hope this explains your query as to why we put the water in first. Yes, it is different to mixing concrete by hand but unless it was to be mixed in a wheel barrow (heaven forbid as that is hell on your back) it would be a hell of a messy job on a concrete slab.
                Try mixing it this way, it works exceptionally well, quick and consistent. I usually use a bucket to premeasure the water but a hose can be used especially if you are filling your water drum up with a hose.
                This method of mixing concrete is exactly the same way that I mix metallic screen printing inks. If you don'f methodically follow these directions, the ink will not mix properly, it will rub off on your finger and be matte in appearence.
                I agree that few people can tell you why you need to mix things a certain way, even pizza dough needs ingredients added in certain orders and percentages to achieve the best results.
                Follow the recommended mixing instructions, be consistent and achieve the best results.

                Neill
                Prevention is better than cure, - do it right the first time!

                The more I learn, the more I realise how little I know


                Neill’s Pompeiii #1
                http://www.fornobravo.com/forum/f8/n...-1-a-2005.html
                Neill’s kitchen underway
                http://www.fornobravo.com/forum/f35/...rway-4591.html

                Comment


                • #9
                  Re: Concrete mixer basics

                  I just bought the Harbor Freight small mixer for 149.00,this thing works really great, It does mix a whole 80 lb. bag of premix and for the price you really cant beat it, plus its cheaper than renting one for two or three weekends Along with saving you back. After the project is done i think i will keep it around as it doesnt take up that much room.
                  Mark

                  Comment


                  • #10
                    Cleform Gilson 59000D Wheelbarrow Cement Mixer ???

                    Am looking at the subject Cleform Gilson 59000D Wheelbarrow Cement Mixer (mfr in St.Joseph, MO) mixer for small cement and grout applications.

                    Batch Output 1-1/2 cu. ft.
                    Pre-mix Bags (88 lb) 2 Bags
                    High torque motor, 1/2 HP single phase, 115 volt electric motor
                    Strong polyurethane drums will not crack or rust
                    Ring gear is completely enclosed for safety
                    Clears a 30 inch door opening
                    Simple drive system
                    Lightweight, 125 lbs.
                    Quiet operation
                    Easy clean-up
                    On/Off Switch

                    Anyone have any experience with that make and/or model ?

                    Thank you for your help.

                    Comment


                    • #11
                      Re: Concrete mixer basics

                      Hello, I'm new to this post and have a question about keeping the fire bricks wet after setting them. I have a kindly but nosey old neighbir who keeps telling me to keep the bricks moist after I have set them. I'm using fire brick and a premixed, high heat motar called BNZ Black Bond Refactory Mortar.
                      Thanks in advance.
                      Valentine

                      Comment


                      • #12
                        Re: Concrete mixer basics

                        I think dmun and Crival's directions are pretty good. I'll add a few tips:

                        Before starting, get all metal surfaces, including the exterior frame and the entire wheelbarrow wet. This will help prevent crud buildup.

                        Use two separate shovels. One "dry" exclusively for the cement, the other "wet" for the aggregate and mixed concrete.

                        Always turn off the mixer if you have to put a shovel or stick in it to scrap off any unmixed stuff. There is a huge amount of torque available and a jammed shovel can cause some serious injuries.

                        I would mix it longer that 3 min. I mix for 5 min minimum.
                        Last edited by Neil2; 06-05-2009, 05:51 PM.

                        Comment

                        Working...
                        X