If this is your first visit, be sure to
check out the FAQ by clicking the
link above. You may have to register
before you can post: click the register link above to proceed. To start viewing messages,
select the forum that you want to visit from the selection below.
I just read your blog start to finish. Very nice, and I will try at least one of your recipes (the sausage pastry). I do have 2-1/2 questions: Why the cast refractory on top of the foamed glass, and why didn't you place the floor brick at the same thickness of the walls and run them at 45 degrees to the entry?
By laying the hearth bricks streight rather than at 45 degrees I have avoided having to cut any of them, there would be no advantage to do this in a round oven. The cast refractory over the foamglas and the hearth bricks being the same thickness as the walls gives me the thickness of the hearth that I wanted and the foamglas is very brittle so I did not want to lay the hearth bricks directly on top of it. The hearth is about 40% thicker than the walls giving it more heat storage potential, the contact of bread dough on the hearth means that is looses heat energy more rapidly than the walls or vault, if it was the same thickness as the vault it would cool faster than the rest of the oven.
Nice work, just read your build blog. I ended up rendering the foamglas on my build for the same reason, although waterproof and a good insulator it cannot handle too much abrasion or rough handling. Great looking items coming out of your oven.
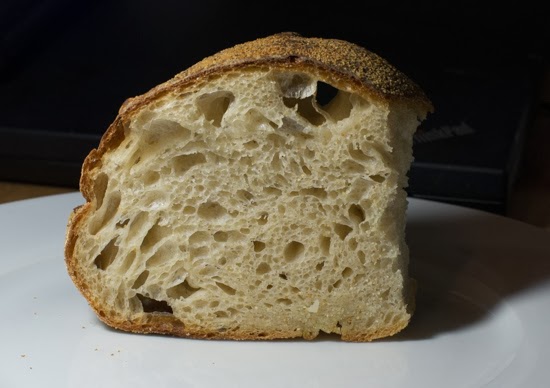
Did our first bread bake today in the oven to see how it was shaping up. only have a little temporary insulation on it so I was a bit unsure how things would turn out. A good learning experience and a lot of fun.
The floor is also the hardest part to heat up, that is why I questioned it. If your primary goal is bread it makes sense though. When you build your fire, you should spread the coals over the entire floor and turn them frequently to get more heat into the floor.
edit- You cut brick one time, you deal with edge-catching for the life of the oven, it is worth running them at a 45 degree angle.
Last edited by Tscarborough; 02-01-2014, 04:17 PM.
I've never seen a barrel vault oven with the bricks running at 45 degrees. After laying the hearth bricks I smoothed off any uneven edges with a diamond polishing disk. If your bricks are at different heights you will catch the peel noi matter what angle that are at.
Gudday
Hitting a mm of raised brick at 90 degree can bring your peel to sudden stop. Hitting the same 1 mm raised edge at 45 degree to the direction of travel means the peel glances off . No sudden stop.
My ovens a few years old now ,no real high spots, nothing that will stop a peel. Have never contemplated grinding the hard outer surface of the brick surface unless it absolutely the last thing. And if I had too take such action it would be only one corner not the whole edge.
I'm writing this comment not as a reflection on you but rather as best practice for others to read.These ovens we build are going to move after a few years ... May as we cover as much as we can.
It's been interesting to watch your build,an insulated but fairly low mass oven for extended baking. Be interested to see how it performs against the "old school" high mass low insulation types
Regards dave
Measure twice
Cut once
Fit in position with largest hammer
Now I have seen one . I guess that the reason why this style of oven has them mainly straight is because that is how Alan Scott did it and he was so influential. This oven is an experiment in order to get the design right before building a much larger one. It sounds like a good suggestion, so on the larger oven I will probably use larger square hearth tiles and at 45 degrees.
Please keep the suggestions / observation coming. This is exactly why I have started the thread
Also, I was thinking next time to not have the side walls sitting on the hearth bricks and have some sort of expansion joint around the hearth, I have seen this on some ovens, but I would love to hear from someone who has done this.
There are many issues with the Alan Scott design. I wish I had had a chance to speak with him before his passing, but I never did.
I think most of the ovens built on this site use the floor inside method of construction, I do not think it matter one way or the other when using firebrick for the floor. If using biscotti tiles, then it certainly should be built inside as there is a very good chance that they will need replacing.
I have also seen much written about issues with alan scotts design. I was originally thinking of building from his instructions, but the area around the reducer arch in particular bothered me so I started to try to redesign this area to make the oven better insulated, also the use of perlcrete did not sound optimal. The oven builders I think called Turtle rock who have replaced a few alan scott ovens seemed tomhave some great ideas, I stumbled upon their blog and got lots of good ideas from them. The pictures on their blog gave me the confidence to build this oven.
A week away for work again has kept me away from the oven, although I did keep up with the forum and thinking about the next steps. There is one area of the oven design I would like to improve, the transition between arch and the back wall opposite the oven door. The end wall just stands there, not bonded to the dome, just mortared together. I was assuming that this area would crack and it has. Often oven had a poured concrete jacket over this area, but as I only have brickwork I need an alternative solution. I have seen on a few posts people discussing a break between the dome and the external arch of the Pompaii builds. I my current best plan is to leave a small gap there and fill this with a ciramic roap or compressible gasket material, such as this Wysokotemperaturowa Uszczelka Ceramiczna VITCAS | Materia?y ?aroodporne do budowy komink?w.
I wanted to hear the forums experiences with this, get some ideas etc. before I commit to an approach.
Thanks
Comment