Announcement

Collapse
No announcement yet.

Northwest PA 36" oven build

Collapse
X
 
  • Filter
  • Time
  • Show
Clear All
new posts

  • Northwest PA 36" oven build

    First off I would like to say how grateful I am for all the information on this site! First post for me but have been reading non-stop for the last few weeks.

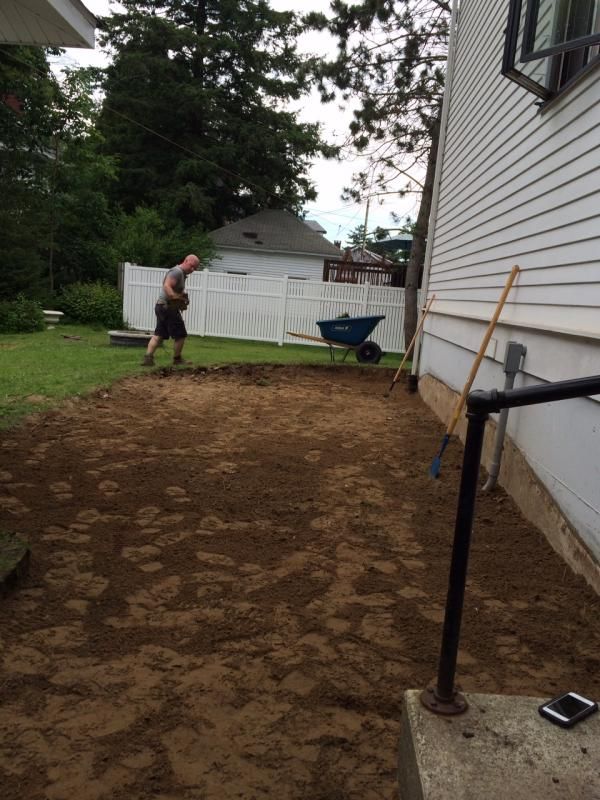
    My project started about a month ago by digging out a boat-load of soil to get ready for a patio pour.


  • #2
    Re: Northwest PA 36" oven build

    Great looking prep work!! Best of luck to you w/your build.
    My Build:
    http://www.fornobravo.com/forum/f8/s...ina-20363.html

    "Believe that you can and you're halfway there".

    Comment


    • #3
      Re: Northwest PA 36" oven build

      Then I poured the first of three pours of concrete. Not too bad for my first stenciled concrete job


      Comment


      • #4
        Re: Northwest PA 36" oven build

        Then I poured the first of three pours of concrete. Not too bad for my first stenciled concrete job


        Comment


        • #5
          Re: Northwest PA 36" oven build

          Next I dug four holes 18 inches in diameter and 4 feet down, filled the holes with about 1 foot gravel. Packed the gravel down and drove rebar into the ground and pored the support pillars for the oven.

          Comment


          • #6
            Re: Northwest PA 36" oven build

            This next step is going to probably freak some people out. In order to speed up the build process I decided that instead of letting the pillars cure for a week then poring the hearth slab on top. I would pore the hearth slab on the ground at the same time and lift the slab once cured and place it on top of the pillars.

            The hearth slab is 66" in diameter 3.5 inches thick with 1/2 inch rebar 10-12 inches in a grid along with screen welded in for good measure. I used 5000 psi mix with fiber


            Comment


            • #7
              Re: Northwest PA 36" oven build

              Removing the outer form from the hearth slab.


              And how the slab sits now. I have been keeping the slab wet for the last 3 days.


              This is where I am on the build currently. Tomorrow I plan on hoisting the slab up with the help of 8-10 guys. By my calculations it should weight between 1000 and 1050 pounds. Should be doable but will definitely be interesting

              Stay tuned as I am sure this will be interesting.

              Comment


              • #8
                Re: Northwest PA 36" oven build

                Yesterday I managed to do the 2nd concrete pour. Getting very excited, our outdoor living space is starting to come together!


                Comment


                • #9
                  Re: Northwest PA 36" oven build

                  Big day today. With the help of 10 other guys, we managed to lift the hearth slab on top of the pillars! Now the real fun can begin.


                  The slab ended up dead level. I think everyone was more shocked than I was. I set the slab in a 1/2 bed of type s mortar just to make sure we had nice even contact the whole way around the pillars.


                  Tomorrow I pour the vermiculite/portland cement insulation pad.

                  Comment


                  • #10
                    Re: Northwest PA 36" oven build

                    Scott,

                    That is a very impressive oven build you have going there. To get that many able bodied friends, over at one time, (for work) I would have to cook something in advance. Or promise a pickup truck load of iced down beer . From the postures in the pic, it looks like ya'll were all glad that it was set. Were there any requests for liniment, or Preparation H? .

                    I don't know the soil conditions for yor area. I am sure that you do. In my area, it would help greatly to bell the bottom of the 18" holes.

                    Very nice faux brick stenciling. At first look, I thought that it was stamped.

                    Great job!
                    Joe Watson " A year from now, you will wish that you had started today" My Build Album / My Build

                    Comment


                    • #11
                      Re: Northwest PA 36" oven build

                      Scott, nice start. I wasn't sure you were going to be able to lift that slab in place but it's done, good job with the stencil also. I'm an hour or so away in Edinboro, glad to have another NWPA member on board. Erie has a full blown refractory supply house if you need materials let me know.
                      Chris

                      Link to my photo album:
                      https://www.flickr.com/photos/hodgey...7646087819291/

                      Link to my build: http://www.fornobravo.com/forum/f21/...nia-19366.html

                      Comment


                      • #12
                        Re: Northwest PA 36" oven build

                        Thanks guys. This is a project of many firsts for me. First stenciled concrete job, first brick job, etc... The perfect project for me, not so much for my family. I have a bad habit of getting a bit too into my projects and not quite keeping up with my normal day to day responsibilities. Fortunately my wife is very supportive.

                        I had to call in a lot of favors to get that many people over at one time. Fortunately most of them have had my cooking in the past and when I promised they would all be invited for a pizza / food night we had more people than we really needed. I was more than a bit concerned about lifting the slab up. It almost seemed to lift itself, like it wanted to be on top of the pillars

                        And hodgey1 I am definitely interested in the name of the refractory supply house. I am on vacation all this week itching to get a faster jump on the build. It would be great to be able to purchase most of my needed materials within driving distance.

                        Comment


                        • #13
                          Re: Northwest PA 36" oven build

                          Built the form for the insulation layer last night and poured the perlite/portland cement this morning (could not find enough vermiculite locally, and perlite was $13 per 4cu ft. bag) mixed at a ratio between 5-6 to 1.


                          Purchased 220 fire bricks last night and made the floor template. While the insulation cures I'll be cutting the floor bricks to fit inside the dome.

                          How long has everyone waited between pouring the insulation layer and laying the floor bricks? Is it necessary to wait 7 days? Or can I start once the floor feels good and firm?

                          Comment


                          • #14
                            Re: Northwest PA 36" oven build

                            Originally posted by scottwr View Post
                            Thanks guys. This is a project of many firsts for me. First stenciled concrete job,
                            Maybe shifting of the main topic, but could you illustrate the stenciled concrete job in more details, pictures maybe? I mean how are those tiles achieved?
                            Last edited by v12spirit; 08-27-2014, 12:20 PM.
                            Why is this thus? What is the reason for this thusness?
                            I forgot who said that.

                            Comment


                            • #15
                              Re: Northwest PA 36" oven build

                              Originally posted by v12spirit View Post
                              Maybe shifting of the main topic, but could you illustrate the stenciled concrete job in more details, pictures maybe? I mean how are those tiles achieved?

                              probably easier to give you a youtube link.

                              https://www.youtube.com/watch?v=dFLQFfV2Lzs

                              This is pretty much how I did it but I used a bull float instead of the roller to knock down the stencil as the rollers are stupid money (more care is needed not to screw up the stencil). You can also skip the antiquing texture process to cut cost as the stencil and color hardener powder are expensive. Just for example, I think I paid $350 for a 1000 sq ft roll of the stencil. and enough color powder to cover about 700 sq ft was also about $350.

                              My opinion is that if you are not a professional concrete guy it is easier to do a stencil job than trying to get a perfect finish on a normal slab. Imperfections actually make the stenciled concrete more realistic. I would think anyone that can build a pizza oven can do stenciled concrete without too much problem.

                              Comment

                              Working...
                              X