Announcement

Collapse
No announcement yet.

42" Idaho spud

Collapse
X
 
  • Filter
  • Time
  • Show
Clear All
new posts

  • #31
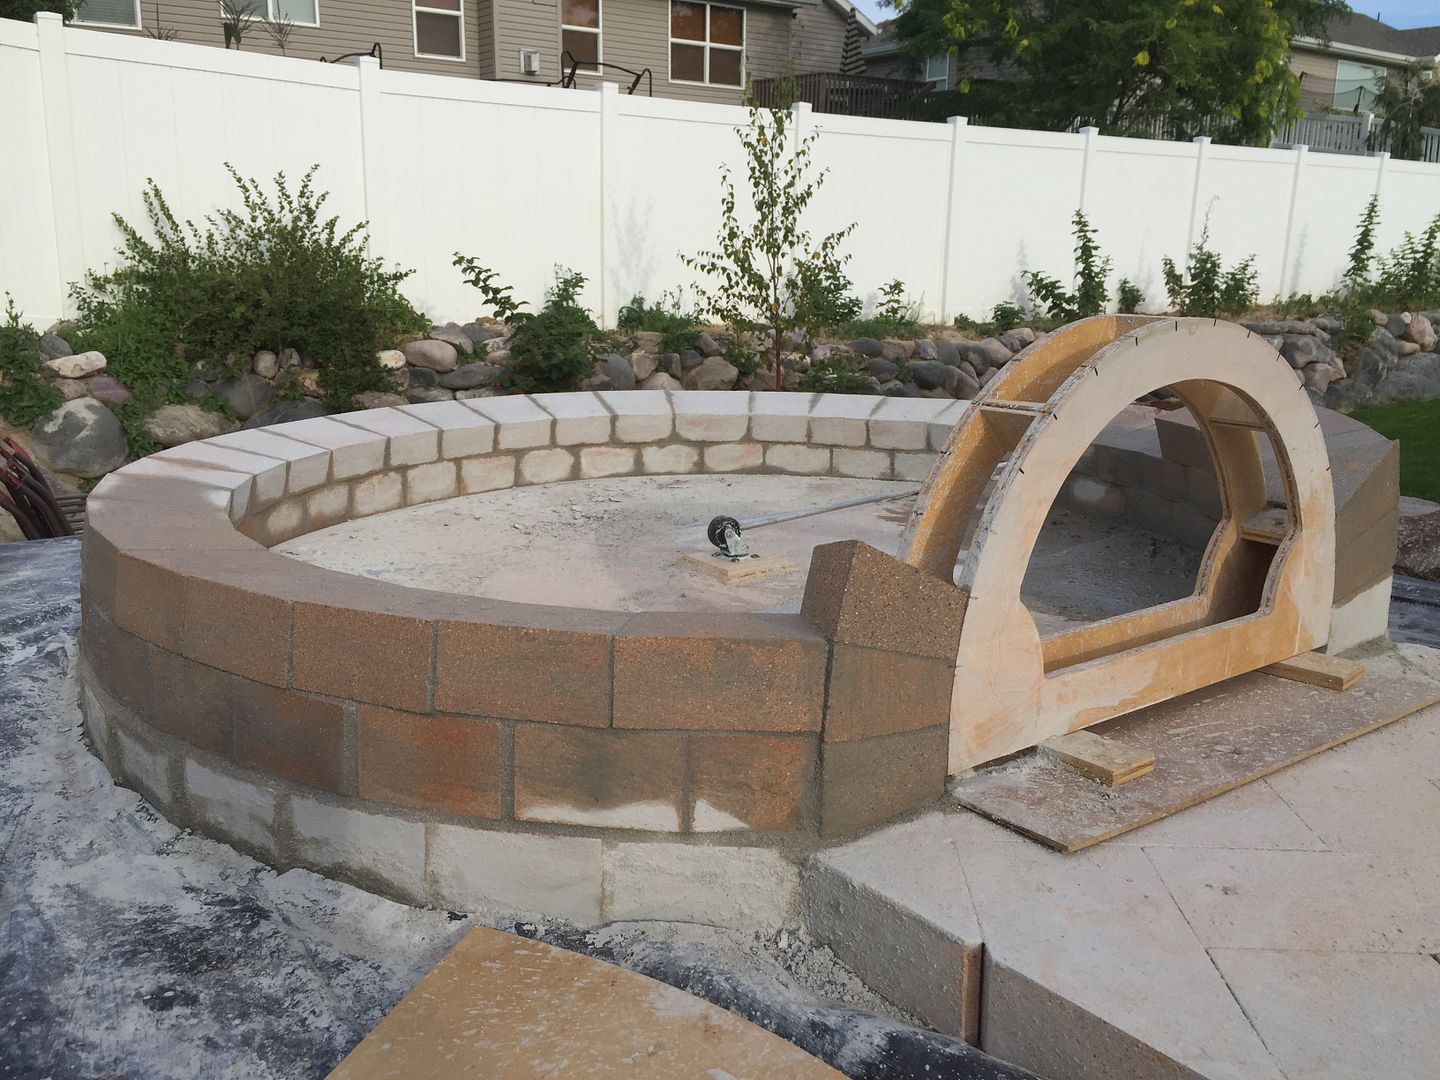
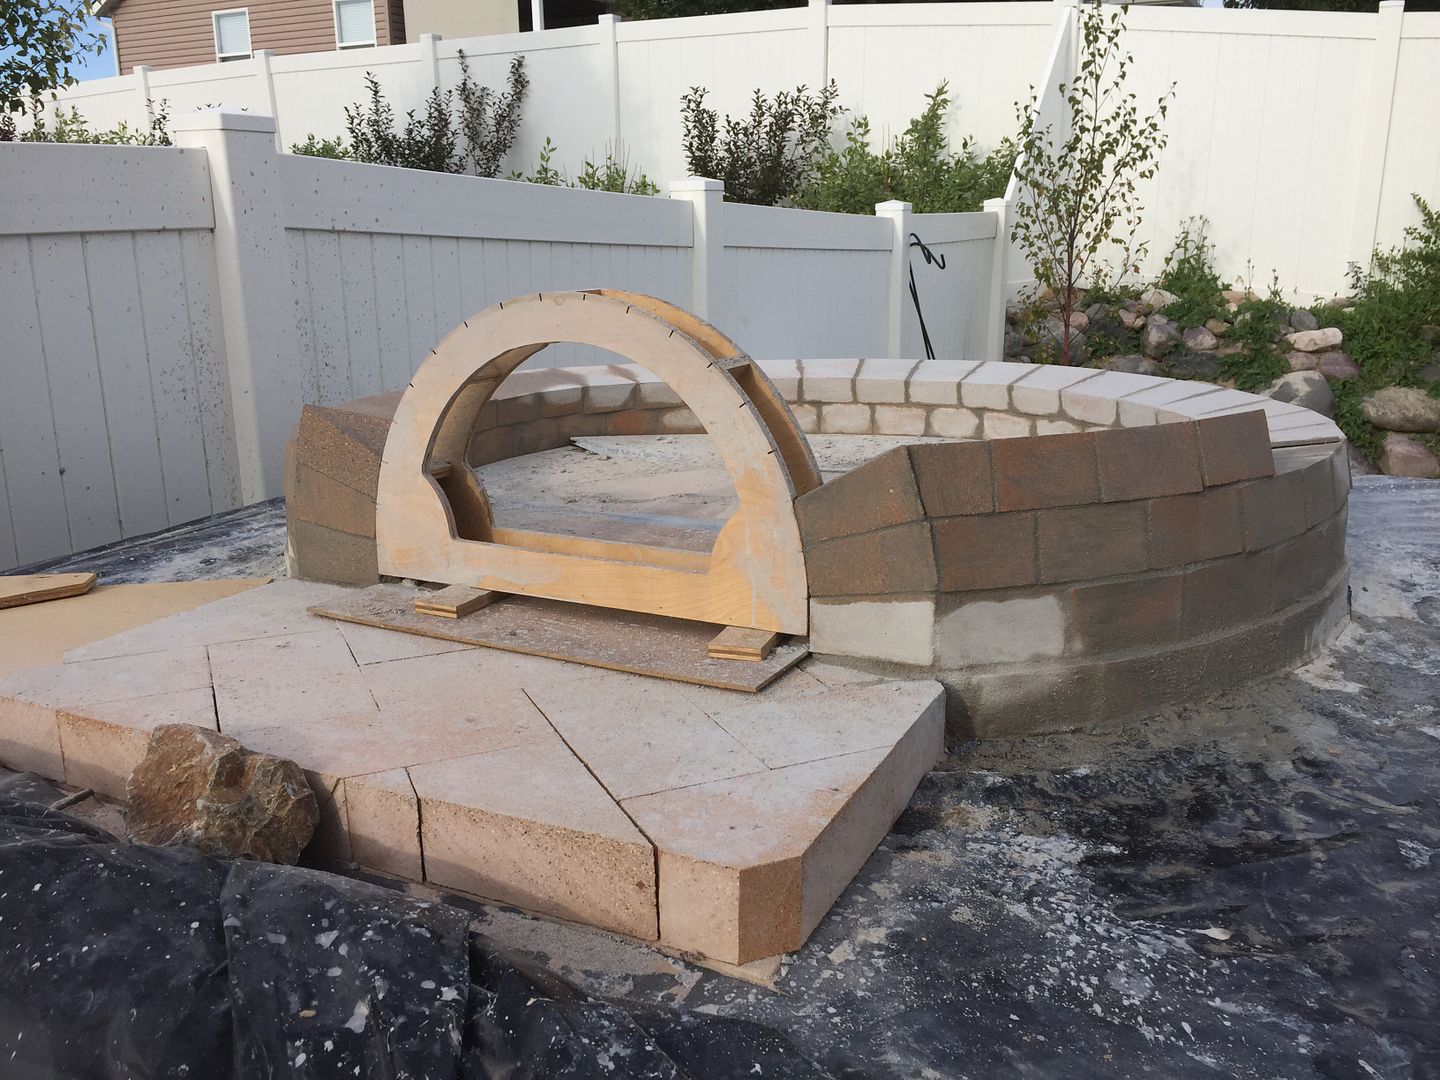
    Wow it is looking great. I have done a pond and water fall before. That is a ton of work and you did a great job. Good luck on the rest of the build it is looking great. Oh yeah I also thought it was way more work than I thought it was going to be. It is a blast to use once you are done though.

    Randy

    Comment


    • #32
      Alex - Outstanding job on your water feature! Great symmetry, and it looks really natural. Can't wait to see progress on your dome. No matter how much 'extra' work it turns out to be, take your time and put those mad skills you got to good use.

      John

      Comment


      • #33
        Thanks for the kind words, guys. The waterfall still has a long way to go but it's been nice to change gears and start working on the WFO again. This rainy weather is making it hard to get any real work done though. Got my IT made and the first chain done. I had a tough time figuring out the angles of each brick and then when I got it figured out I realized that I had forgotten to put in the cardboard spacer. That changed the angles a little so the first few bricks kind of have a sawtooth look to em but at least they'll never be seen since they're on the very bottom of the dome :-)
        Last edited by sharptailhunter; 07-23-2015, 11:56 PM.

        Comment


        • #34
          I haven't been able to work on my WFO as much as I anticipated but got some work done nonetheless. It's definitely slow going. Here's where I left off today:


          I used a combination of the IT and my quarter hemispherical template to help me determine where to make the cuts for the entry arch. I began by using the quarter hemi template to help me determine how long the arm of the IT needed to be for each level of chains. i.e. when the back of the L bracket is flush with the outer rim of the quarter template. Then, I would lay the IT on my entry arch adjacent to the next brick to be cut for the arch for the appropriate level of chain that I had just determined. That is, the height of chain two is noted and marked at that same level on the entry arch. The long finger of the L bracket is 4.5", that way I can see how much and where to cut off each entry arch brick. Made for a lot of small tedious cuts but I think it will line up OK with the dome... I hope!


          I know most of you know how to do all this already so I feel like I'm preaching to the choir. I did notice that Proc was asking about how to do this on his build so I thought I'd throw my screwball way of doing out there in case he can learn anything from it...

          Sorry for this last pic being crappy. I didn't realize that I didn't have a front view shot until after the sun had gone down. I'll be sure to replace it when it's daytime.

          -Alex
          Last edited by sharptailhunter; 07-28-2015, 06:27 AM.

          Comment


          • #35
            Hey Alex,

            I think it looks awesome! Much prettier than mine. Nice job! And your small joints between the bricks in your arch look great. Really good work!!!! I had to make a few little wedges to fill some gaps that I thought were too big but i don't see anything like that in yours. Keep up the great work.

            Nate
            http://www.fornobravo.com/forum/f8/p...two-21068.html

            Comment


            • #36
              It looks gr ra at. But it looks like your IT tool does not follow the edge of your arch. I could be wrong but it looks like the bricks are the same with from top to bottom. They should follow the IT and come in to the dome some. This is the same thing that I did and it will give your dome a tear drop shape. It makes it a little harder to do the cuts but not impossible. Here are a few pics of what I had.

              Randy
              Attached Files

              Comment


              • #37
                Originally posted by RandyJ View Post
                I could be wrong but it looks like the bricks are the same with from top to bottom. They should follow the IT and come in to the dome some
                At first I didn't understand what you meant. I thought you meant the width of the outermost part of the arch brick before it slopes down towards the center of the oven. I got the slope right but I had wondered about making the bricks recess farther into the dome by using progressively longer bricks. I knew I'd have some overhang of the uppermost bricks as they hung off the inner edge of the arch. It shouldn't be too hard to redo the arch. I had wanted to build the arch first and then tie the dome into it but I think I may redo it and do them simultaneously....

                Comment


                • #38
                  That is the way that most will tell you to do it. I did mine the other way and was about 3\8" off at the top. I decided that was close enough for me. It just looked like you were about an inch out of line to me. It is hard to tell in pictures though. Good luck with whatever you do. Your quality is top notch so I know you will do a great job.

                  Randy

                  Comment


                  • #39
                    Well, between being a single papa to three awesome kiddlets and turning the big 4-0 this week, not much has happened on the WFO. I did remove my previous vent arch and will build the new one as I go up with each dome chain. I also moved the whole vent arch location about an inch closer in towards the center of the dome. That should give me more arch brick to tie the dome into... I hope.

                    Comment


                    • #40
                      I think that is a great plan. Sorry you had to tear the last one down, but I think you will be happyer in the long run. Looking good, and happy birthday.

                      Randy

                      Comment


                      • #41
                        I'm certain that I have to be THE slowest WFO builder ever... nonetheless, got a little bit more done today. Here's the third chain of bricks, two if I'm only counting the ones above the level of the floor.


                        Here's the third brick for each side of the entry arch. I'm trying a different approach to tie the entry arch into the dome, we'll see how it works out.


                        Here's all that I got done before kids and neighbors pulled me away from it.

                        Comment


                        • #42
                          I've begun to shop around for the chimney products. Just wanted to check with the brain trust out there... 8" flue for a 42" oven, right? Anybody know any good places to purchase the duratech brand stuff or an equivilant?

                          Comment


                          • #43
                            The stuff I went with came from menards. It was like way less than half the price and basically the same thing.

                            Randy

                            Comment


                            • #44
                              My oven is 36" and I have a 6" flue. I think that I have seen in the site somewhere that 8" is recommended for larger ovens.
                              I think that 42" would need an 8" flue.

                              I got my Duratech flue pipe at a local Wood stove store. I went to the Duratech site and it directed me to a local distributer.

                              David

                              Comment


                              • #45
                                Very neat brick work.

                                David

                                Comment

                                Working...
                                X