david,
i'll give you a proper reponse when i get home in a few days. i"ll have to double check the height (17.5" i think), but the floor is 42" in diameter. the opening in 11.5" X 18".
what exactly do you want to know about the cedar shakes?


-
Beautiful job Paul.I'm looking forward to the vent /chimmney installment as this was the area that i'm stiill wondering about?Though i've built mine,i'm still uncertain as to a few things and plan on possibly changing the design for my next one!I have yet to add a semi-circular steel plate in the doorway.(Does this improve the draw/airflow?)I 'm not sure if this is the reason I am getting some smoke escape from the oven doorway,or if it is just due to natural external breezes?I'm concerned about the smoke issue as the next one I build will probably be an Interior oven(Any thoughts James?)The low dome Neapolitan ovens use a centered chimmney (or even a rear I believe?) so that all the heat from the oven is utilised as it escapes up the vent and runs over the dome.What are your interior H & W dimensios BTW?Can you please post a detailed series of photos of how you did the Cedar Shakes as this is my next project !Regards,DavidLeave a comment:
-
the dome went up over the course of 3 days i think (not sure, but the dates are posted on the posting times with the photos). i'd say a good 8 hours at least, but the only thing that kept it from going really fast was figuring out how to cut the bricks for the header. i'm stubborn and so i wanted to go with the arch style header, just to do it, but i can see the advantage to using jim's angle iron header or a solid piece (refractory suppliers have solid cast header lintels sometimes).
as for removing the styrofoam---it took about five minutes, including sweeping to floor out. it really did make keeping the dome shape very easy.three quarters of the way up, the bricks just layed where they needed to go. however, i can also see the advantage to jim's freestanding method for the first several courses, allowing for easier cleaning of the inside as the walls go up. the styrofoam templates were jim's idea though (actually i used 1" styrofoam board, sold for coolers instead of the 2" rigid insulalation he suggested, as it was significantly cheaper), and it worked great.
i mostly regret the 3" bricks for asthetic reasons, but that won't matter too much when i get back and start using it. can't wait!Leave a comment:
-
Paul, loks great! I would not worry about the 2.5" vs 3" brick thing. Your oven will perform as designed.
I am curious as to how easy it was to dismantle the foam board template?
Also, how many days did it take to build the dome using the template?
K.O.Leave a comment:
-
Awesome!
This is an inspiring series of photos. I'll have to start posting my own.
I've been working on pouring my foundation. It's a bit odd since I'm straddling the hearth across the top of a 3 foot retaining wall, but almost done.
Thanks for the detailed posts, they will be a help to me and others I'm sure.
TarikLeave a comment:
-
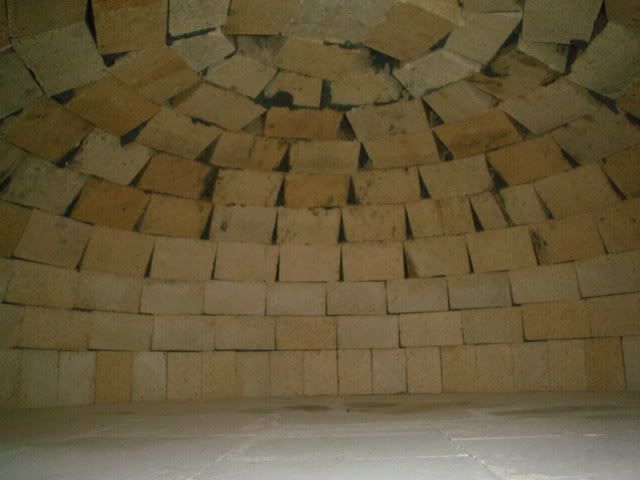
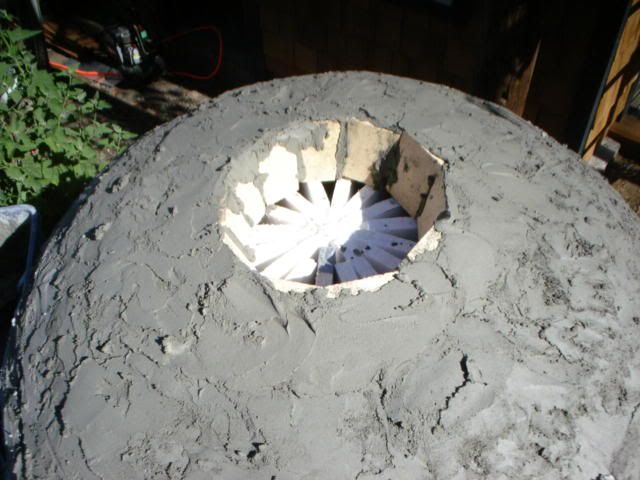
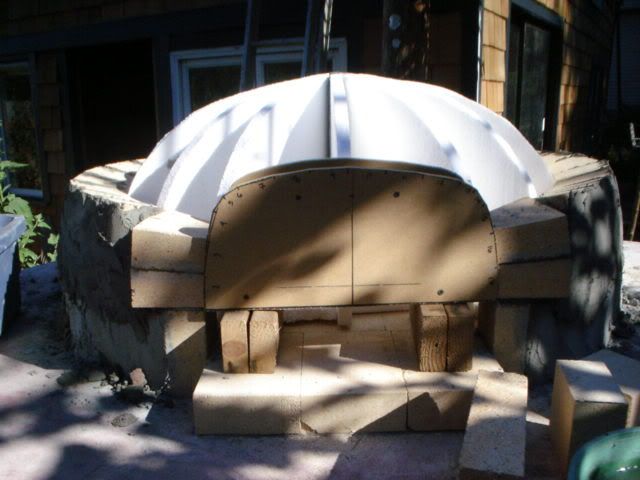
dome completed!
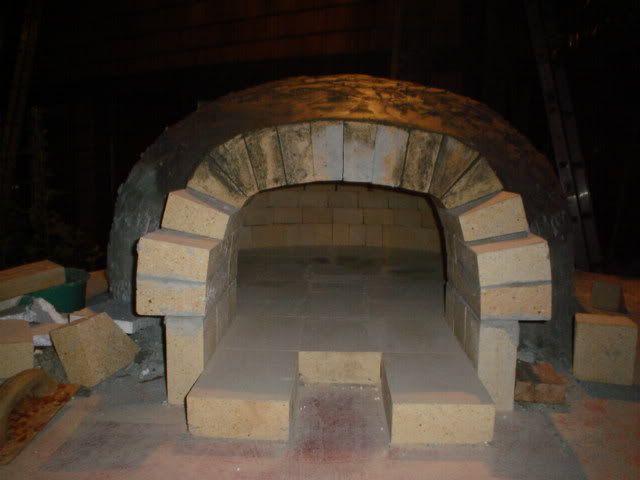
it turns out that my brick supplier ran out of low duty firebrick in a 2 1/2 series, so iwent with the 3". bad idea. check out how much bigger the gaps are as the dome closes inward, and how much mortar shows (i haven't cleaned it up yet). at the bottom wouldn't have mattered as much. oh well, c'est la vie. i'll have to point some of the larger cracks with mortar when i get back from japan. or not...it is standing freely only 3 hours after completing it.
Leave a comment:
-
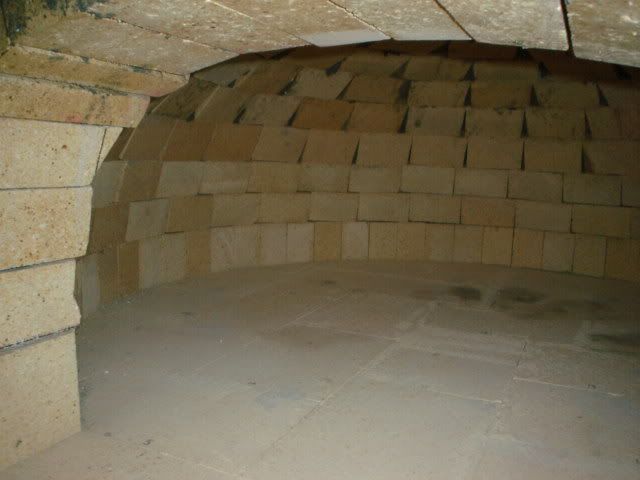
dome completed!
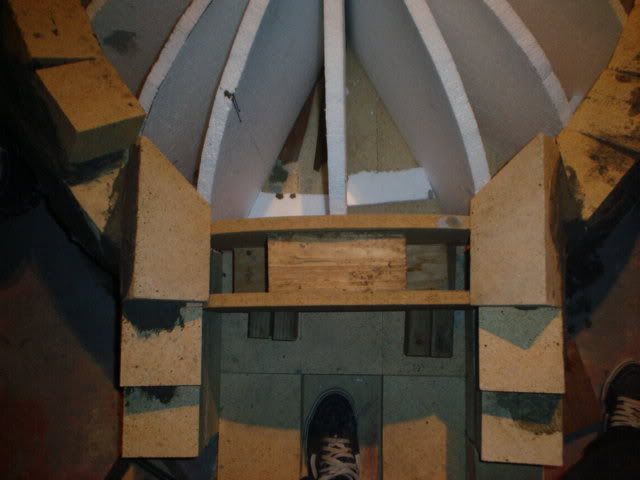
here's how the header tied in to the next course. not too easy, but not terribly hard.
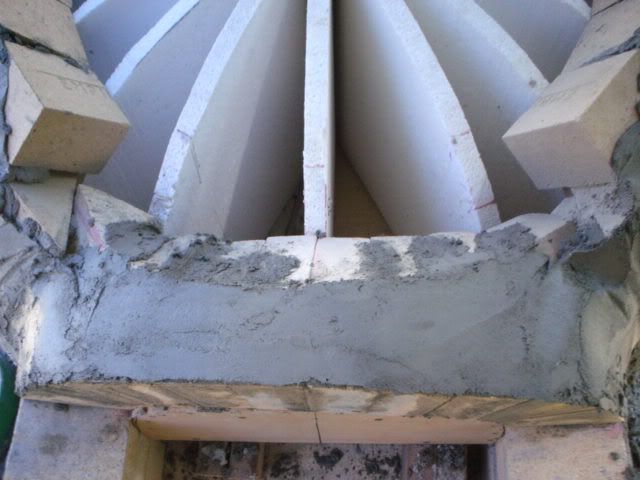
i cut trapezoidal pieces for this---no measuring, just figured they'd fit more snugly, and they fit together like a puzzle...
 Last edited by paulages; 07-17-2005, 11:02 PM.
Leave a comment:
-
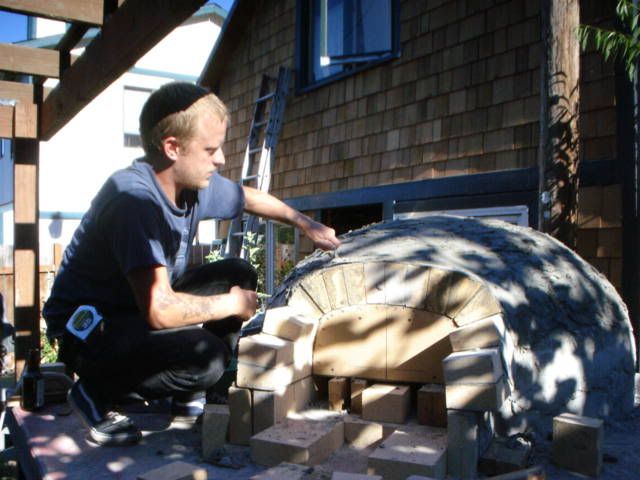
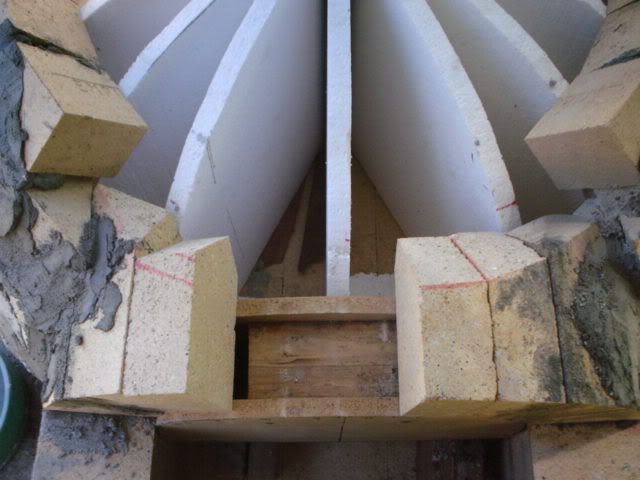
kim helping set bricks while i deal with the dome cuts...
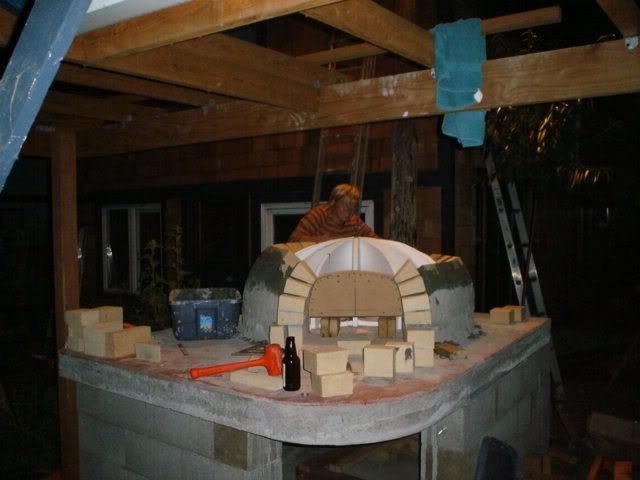
this one sort of shows how the dome intersects the door header. the bricks are staggered in the archway so that the top of the section of arch that will be open for the vent will be anchored by the adjacent sections. (this will make more sense when it's done.)
i hope to finish the dome tomorrow, so this thing can do some pre-curing while i am in japan for the next three weeks. believe it or not, i've actually had some decent wood-fired oven cooked pizza in japan!Leave a comment:
-
by the way
i don't remember seeing anyone suggesting it, but it's really important to dunk the firebricks in water before laying them. they are so dry, they just suck up the moisture in the mortar instantly, resulting in less adhesion.Leave a comment:
-
the entryway will be made of the exact same archbrick, extending forward 12" or so, with the vent just outside of the existing brick, like a tunnel with a slot in the middle of the top. can't make it until i finish this arch.
by the way, when i bought my remaining firebricks, the supplier gave me as many buckets as i wanted of refractive mortar. it had slighly dried on the top, so they couldn't sell it. i just scooped the top layer off, and it's good to go. kind of a bummer that i already have the fireclay, but this stuff has plenty of alumina, etc. in it, and oughta outperform the handmixed stuff. plus, i don't have to mix it! too bad i didn't ask for this in the beginning. drat!
...(edited later)
okay, scratch that. the stuff is a little too stiff, and though it is a nice pasty mortar, it would be much more work to get this stuff to the right consistency than it is to just hand mix the fireclay mortar.Last edited by paulages; 07-16-2005, 02:36 PM.Leave a comment:
-
Hello. Fabio here. Nice job on the brick cuts, and like the idea of the Styrofoam ribs for the dome, it make perfect sense and easier than shiiming the corses of bricks. Any thoughts on the flute, and how deep is the entry way. Where and how far back or forward is the flute going to sit from the oven. I am in the process of building an outdoor kitchen with BBQ pit and counters, and planning this out is going to be very critical since the entire kitchen is going to be shaped like U, with overhead cover. I will be pooring a footing and start to build the brick courses up and then lay a 30' x 22' pad. I believe this way the stand for oven will be much stronger with pad poured around the brick courses.
Any feed back is appriciated and pictures anyone on the flute.
Thank you. Good people here trying to help and share their thoughts.
As I start the construction I will be taking picturers, with dimensions.
Ciao.
Fabio.Leave a comment:
-
update on progress...i've been too busy for the last few days to work on my oven, but got back at it today.
gotta go get some more bricks tomorrow. l leave on monday to japan for 3 weeks. wish i could complete the dome before then, but it's looking doubtful.Leave a comment:
-
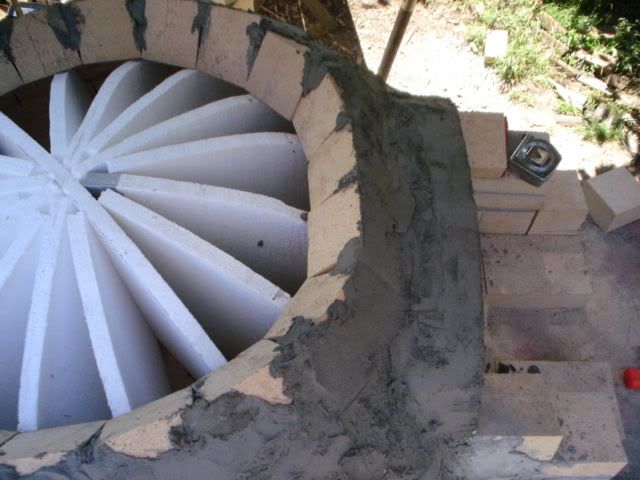
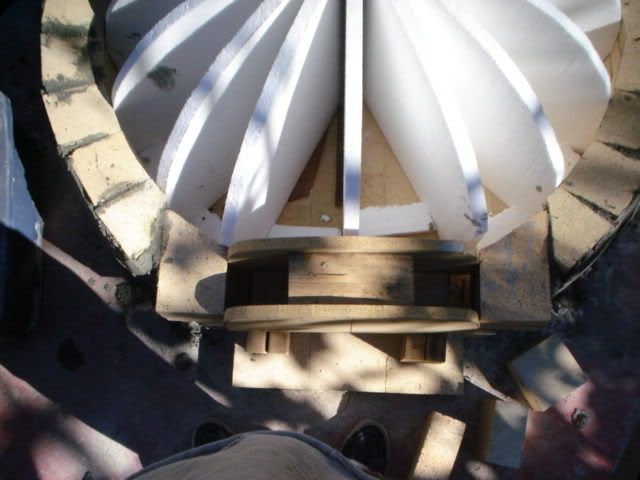
thanks for the idea, jim!
here's my forms for the header, and guides for the dome. i think i'll add even more vanes in, it is so easy to do. seems like it could get really nice to have these guides sufficient as forms at the top. i'm not actually sure they hold up, though.


now the fun begins!Leave a comment:
-
arch bricks
i'm gonna post this in a new thread, so it will be easier for people to locate in the future...Leave a comment:
-
Arch/Door Header bricks
Paul,
Can you post more details on the arch bricks. I think a lot of people would be interested in using a preformed arch brick for their oven opening and for framing the vent arch. The tight brick arch is a nice look -- it looks very custom, even though you are using off-the-shelf bricks.
Any other details, such as part #, price, etc. would be helpful.
JamesLeave a comment:
Leave a comment: