Announcement

Collapse
No announcement yet.

pompeii oven construction began today

Collapse
X
 
  • Filter
  • Time
  • Show
Clear All
new posts

  • Marcel
    replied
    Great Vent And Chimney Photos, Paul

    #47

    (M) Your super photos came just when I need them. Thanks!

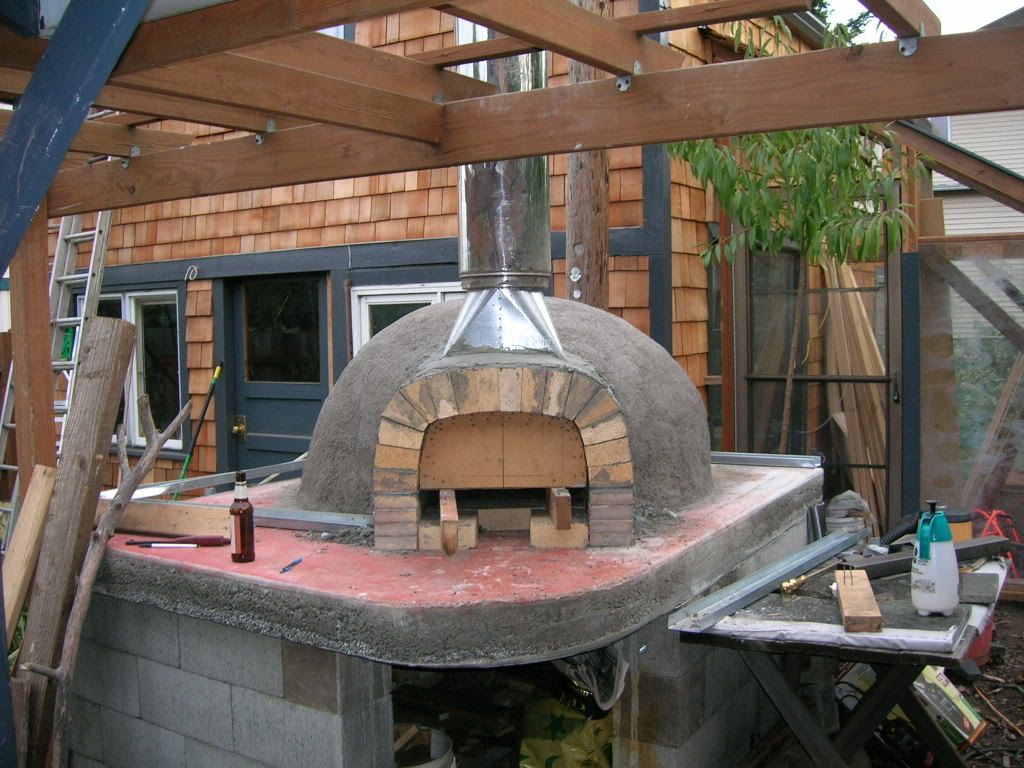
    (P) " (the metalbestos sections were $30 from there also)

    (M) I guess that would be the shiny double walled piece that seems to be about 3' long-tall?. The word asbestos is alluded to and I have seen it before. Evidentally there must be no danger as such flues are still being sold at my Home Center.


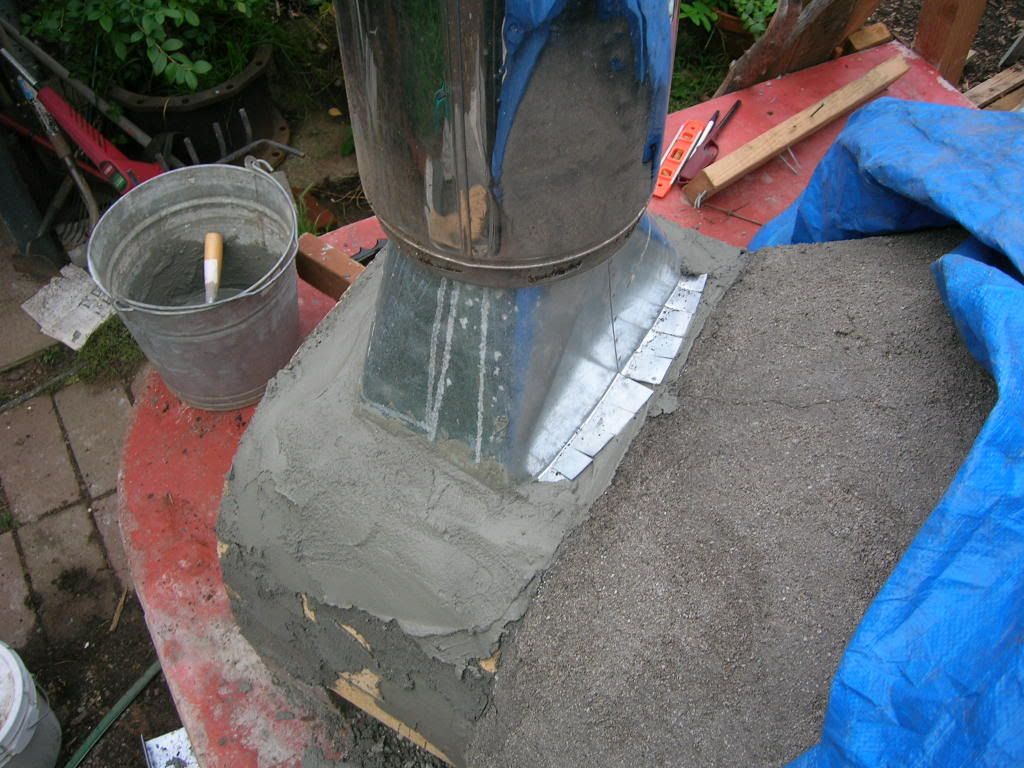
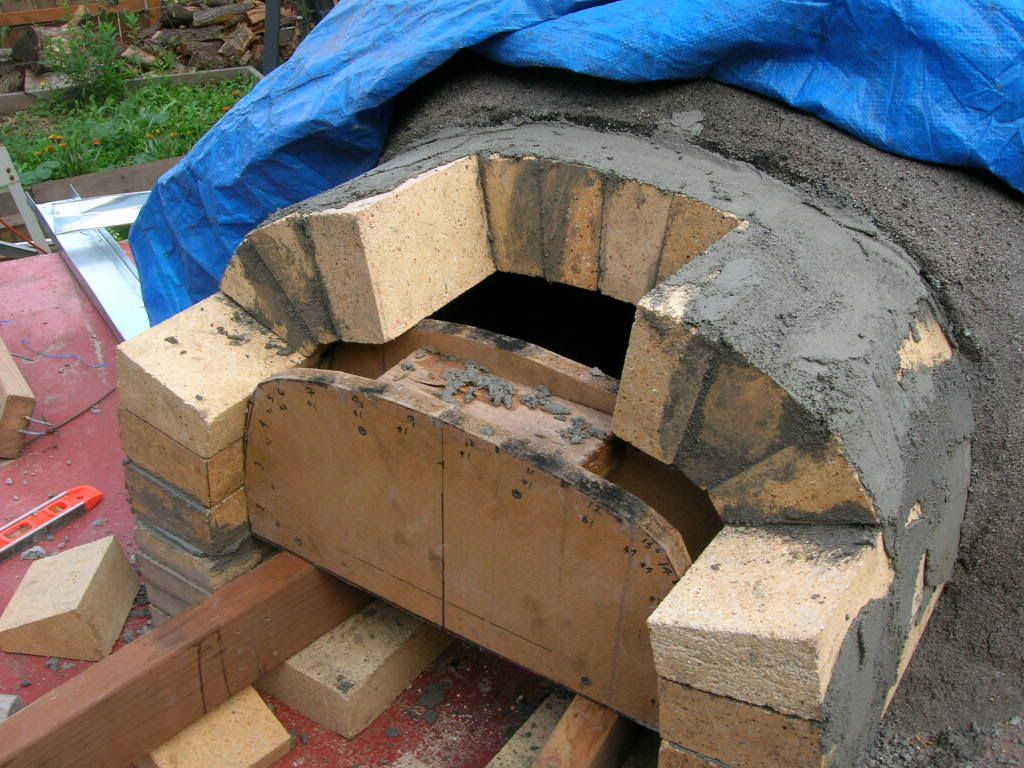
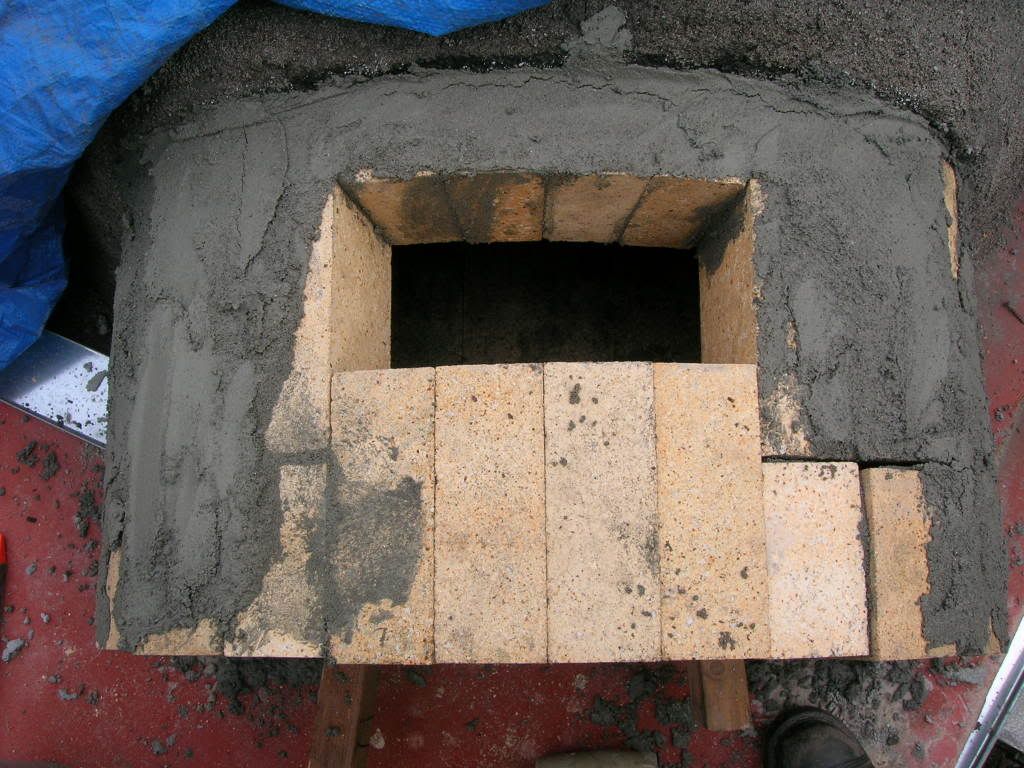
    (P) " i set on the arch, and used the weight of the chimney pipe to hold it down solidly, and mortared it in place."

    (M) Smart, effective and neat! Also how you straddled-staggered the different size bricks. But what else would one expect from an Oregonian?

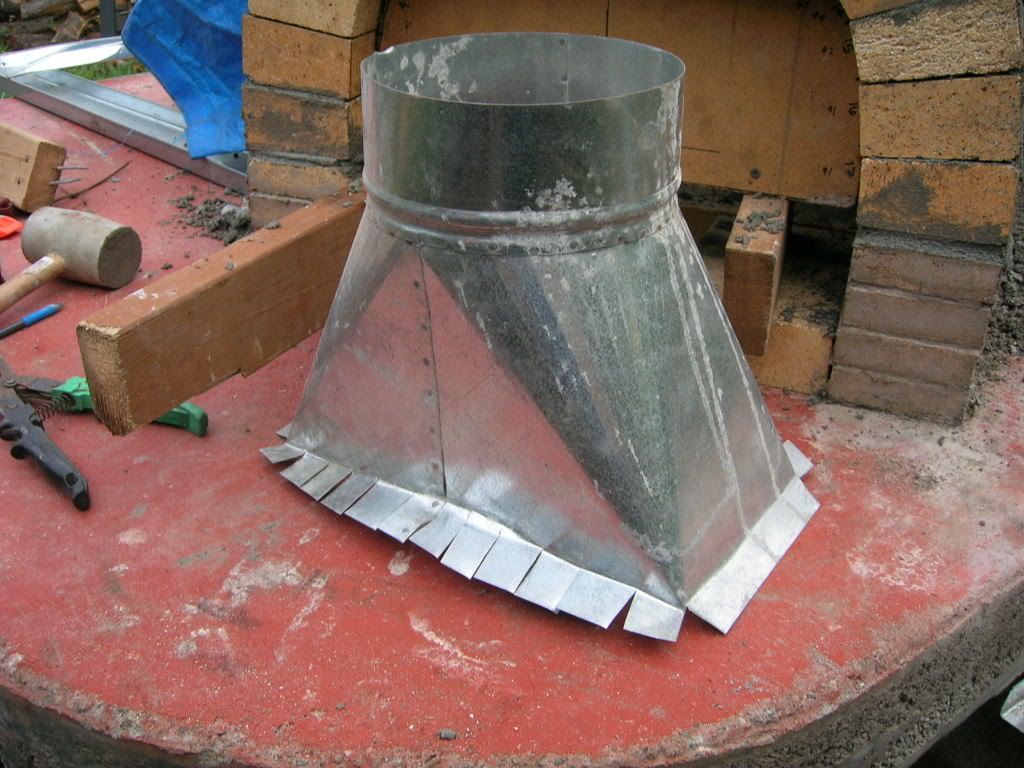
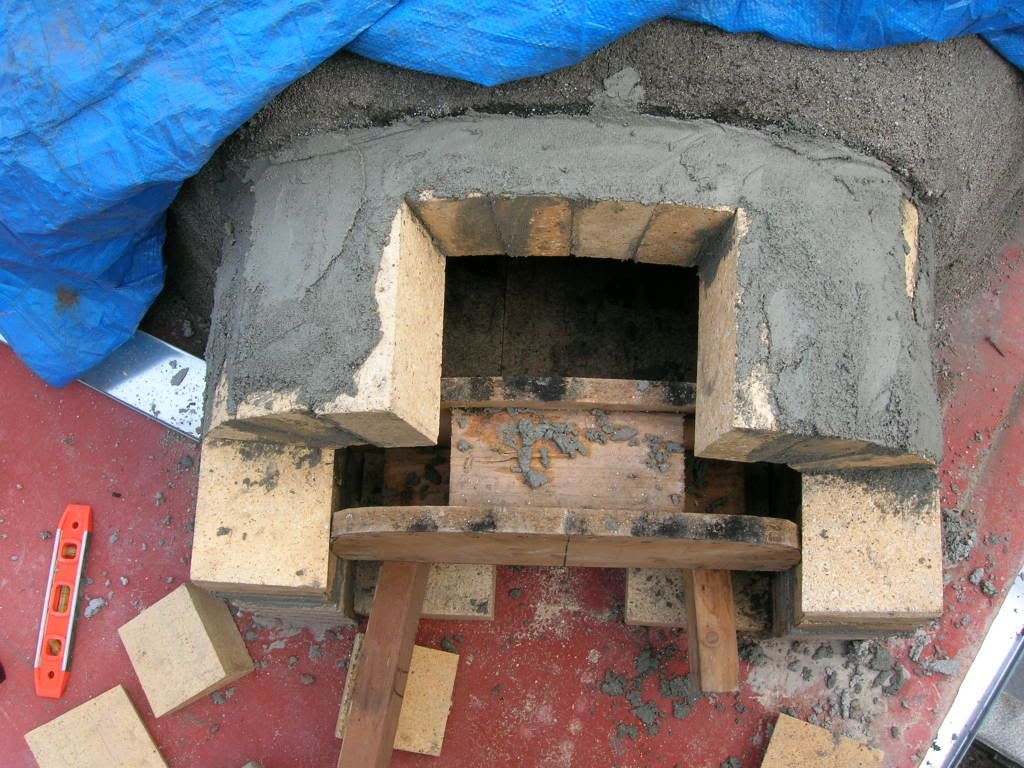
    (P) "i really hope my vent opening is large enough! it's 8.5" x 4.5" inside the archway, tapering up to a larger cavity inside the galvanized vent piece."

    (M) Paul, my concern is that one could make the flue too large and perhaps divert too much heat with the smoke. The opening you made looks just about right. Luis Arevalo's isn't much bigger and he says his oven draws fine. After all, we're not making a conduit for fluid. Gases will escape, .... particularly after eating pizza.

    Ciao,

    Marcel

    Leave a comment:


  • paulages
    replied
    i really hope my vent opening is large enough! it's 8.5" x 4.5" inside the archway, tapering up to a larger cavity inside the galvanized vent piece. i guesstimated based on watching it draw and vent when i cook in it, and i think it'll be fine. the chimney will be pretty tall to help increase the convection and draw.

    am i shortsighted for using that galvanized section instead of ceramic, when the steel will eventually corrode?

    Leave a comment:


  • paulages
    replied
    venting my frustration

    this cost me $1 at my local recycled building supply (the metalbestos sections were $30 from there also). i cut the bottom to the curve of the arch, and bend the tabs out for "feet."


    i set on the arch, and used the weight of the chimney pipe to hold it down solidly, and mortared it in place.


    Leave a comment:


  • paulages
    replied
    no longer a theory!!!

    okay, so finally i got some free time and it stopped raining for a few hours, and my vent/chimney finally came to life.

    my camera batteries were dead, so i missed some interesting photos showing how i tied all of the bricks in the arch in the "tunnel" together, including the initial arch that supports my oven opening. to summarize, i just staggered the bricks here and there to tie everything together, and at the top, used a 2" section of brick to hold in the long pieces that frame the vent opening. well, enough explanations---as they say a photo is worth a thousand words (i hope)...

    the line at the top is where the old archway ends


    you can see here where i cut the middle four bricks into 2 1/2" and 6 1/2" sections, and used them to straddle the vent opening, holding the middle section of the arch together.

    Leave a comment:


  • janprimus
    replied
    Originally posted by sledge
    Chad, The rigidizer sounds pretty cool! But I've read a few postings on other forums (mainly regarding kilns and foundries) that say the rigidizer makes the blanket brittle and can crack if bumped into. Although that shouldn't be a problem for the oven--provided the dome is enclosed...
    You know, the people I found on Ebay with the Kaowool suggested That I could just coat my dome with a thin layer of mortar and stick the kaowool right to it. He also suggested that the rigidizer might not even be necessary as you are going to be covering it with a layer of mortar and then stucco later. I also asked if the mortar and or the rigidizer would compromise the insulating value of the kaowool and he said it does not, that it just makes a tough shell of the outside. The inside would remain soft and fluffy unless of course you were soaking he kaowool in a slurry of concrete. I do know from the construction business that they use a very thin coating of a stucco like material called dry-vit on the outside of a lot of commercial buildings as long as it is high enough to not have people putting their hands through the relatively thin and brittle coating.
    Pax
    Chad

    Leave a comment:


  • paulages
    replied
    i keep meaning to relate these specs in practical terms, but for some strange reason, every time i fire up my oven, i seem preoccupied with making pizza and drinking beer.

    to really generalize...this castable insulation was really easy to apply. it mixes as easy as quickcrete or any other single substance sack mix, and requires no 'rigidizing'. it seems to insulate rather well, though i should have applied a thicker layer, utilizing chickenwire as a backing. i got mine free, but i believe it's no more expensive than the blankets, and seems to have similar R-values.

    and marcel, there is nothing "kinky" about googling. it is not a "lifestyle choice" or a social anomoly. your neighbors are doing it, your co-workers are doing it, and chances are, your children are as well. until we break down these social barriers, we'll never grow as a society.


    Leave a comment:


  • Marcel
    replied
    Paul's "Insulcast" Insulation Specs:

    # 29


    (M) Paul asked, way back in May, if anyone wanted to Google his Insulcast. I found that kinda "kinky" but to each his own. It is reproduced in the Personals, and also below. This forum did not allow any images and I can understand why, but the URL where you can see everything is http://www.pryorgiggey.com/insulati.htm

    Here are some Specs. for Insulcast 25:

    A temperture rating of 2,500 degrees F.

    Mat'l Req'd (pcf) = 87

    Cold Crushing Strength ( after 1500 degrees F) = 1,000 - 2,000

    Thermal Conductivity (Btu-in/h.ft F) (@1500 degrees F) = 3.2

    AL203 = 39.0

    (M) No more Googling for me!

    Ciao,

    Marcel

    Leave a comment:


  • sledge
    replied
    I'm also thinking about using the Kaowool product--it's a bit cheaper than the Insulfrax. (It's "good" up to 2300?--although we shouldn't need that right?) There's also the "SAFE" Ceramic Fiber which is even cheaper. Not sure what advantages the more expensive Insulfrax may provide...

    Chad, The rigidizer sounds pretty cool! But I've read a few postings on other forums (mainly regarding kilns and foundries) that say the rigidizer makes the blanket brittle and can crack if bumped into. Although that shouldn't be a problem for the oven--provided the dome is enclosed...
    Last edited by sledge; 09-14-2005, 08:34 PM.

    Leave a comment:


  • janprimus
    replied
    insulation matters

    I am wondering if any of you use the Kaowool product. They have a 1"X24x25 foot roll you can buy on Ebay for about 55 bucks and it insulates up to 2300 degrees. There is also an insulation rigidizer that will harden the fiber insulation into a hard shell that could possibly be stucco'd over if you were to desire a finish like that... I am just getting into the possibilities here. I would appreciate any and all feedback. FYI I live in northwest Washington.
    Thanks.
    Chad

    Leave a comment:


  • james
    replied
    Ouch. We have a friend with an oven set on a sand hearth (concrete bottom, then sand, then thermal layer -- something I would not advise). The Igloo roof wasn't sealed well, and the sand asborbed a lot of water once, and took over a week of fires to dry out.

    James

    Leave a comment:


  • paulages
    replied
    mine did seem totally dry, then it dumped rain today really soaking the exterior, even getting water inside. it's totally out of season here in the NW, so i wasn't expecting it...gotta get that roof built!!!

    Leave a comment:


  • james
    replied
    I know you know this, but the amount of moisture in either a precast oven or a Pompeii Oven is tiny compared with the Breadbuilder's oven. They are different animals, and the lessons experienced with the Breadbuilder's oven often do not apply -- clearly it is not masterful. You should feel the Italian design come up to heat over a series of seven days, then continue to improve for a while beyond that. The amount of moisture in the bricks or precast oven is minor compared with the 5" of portland cement-based concrete cladding of a bread oven. If you've experienced a Breadbuilder's oven right after installation, you will be pleasantly surprised.

    James

    Leave a comment:


  • paulages
    replied
    good luck!

    Leave a comment:


  • PizzaMan
    replied
    Dry the oven with small fires

    Alan Scott, the bread oven guru, is very clear about the need to slowing dry the oven with small fires. He recommends small fires daily, or a heater plugged in 24 hours, for about one week.

    I realize that we are using the amount of concrete and accompanying moisture, but I can tell you that my bricks sucked up at least ten gallons of water in the building process, not including the water used for making mortar. I don't expect that to be expelled right away.

    My first fire goes in tonight...

    Wish me luck; I'm a little worried about cracks.

    Michael

    aka PizzaMan

    Leave a comment:


  • paulages
    replied
    i do indeed have more insulating to do, but my walls don't get very hot right now. (120deg or so at the top) still, i'm sure the extra insulation will help.

    Leave a comment:

Working...
X