Announcement

Collapse
No announcement yet.

More efficient brick cuts

Collapse
X
 
  • Filter
  • Time
  • Show
Clear All
new posts

  • More efficient brick cuts

    Hello!
    I had one of those "duh!" moments today that I wanted to share, a more efficient alternative to cutting all the bricks in half first.
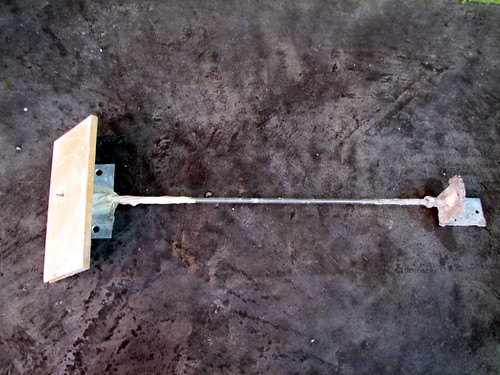
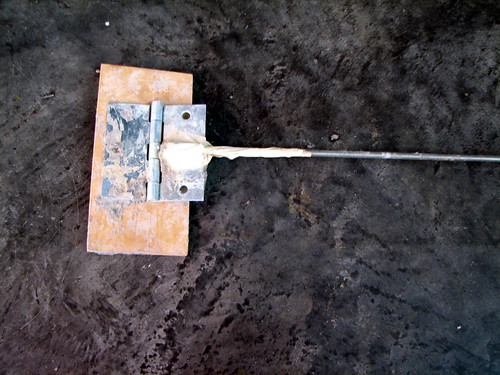
    As suggested by others here, I'm using the "Angleizer" to great success, and I realized that by starting with a whole brick, it's possible to cut two trapezoids with just three passes through the saw vs. five using the half-brick method....a HUGE timesaver and less wear on those expensive saw blades.

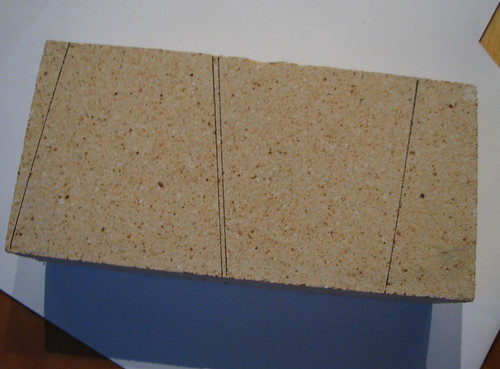
    I set the Angleizer tool and mark one trapezoid, then turn the tool 180 degrees and mark the second trapezoid with a scant 1/8" between the two parallell lines, aka the width of the saw blade. Then, one cut on each side plus one cut to divide the two trapezoids, and voila!

    Here's what a marked full brick looks like:


    happy sawing!

  • #2
    Re: More efficient brick cuts

    A similar approach using clamp stops:
    http://www.fornobravo.com/forum/8/it...html#post22897

    Comment


    • #3
      Re: More efficient brick cuts

      If saving blade and brick is your goal, the enclosed drawing (of a 36" circle, and a 4 x 8 brick) shows that a single 12 degree cut gets you awfully close to where you want to go. There's nothing to say that you need a symmetrical trapezoid for this application.
      Attached Files
      My geodesic oven project: part 1, part 2

      Comment


      • #4
        Re: More efficient brick cuts

        I had read about that approach somewhere on the site prior to starting my build but I couldn't get through my head how the side bevels would be calculated.

        Jim

        Comment


        • #5
          Re: More efficient brick cuts

          I couldn't get through my head how the side bevels would be calculated.
          Ahh, there's the rub. The flat layer I drew is pretty simple, but as you go up the angle gets steeper, and you need a compound cut to get the bricks to meet from top to bottom. I don't know how you'd do it without a CAD program.
          My geodesic oven project: part 1, part 2

          Comment


          • #6
            Re: More efficient brick cuts

            Hi Splat, David,

            A while back I posted a fairly long 'tip' describing how I tapered my bricks. I did draw many rings of these angle cut halves and for my oven, I drew them in 3D going up.

            To my surprise, a 4" and 5" side ( with about an 11 degree angle on the center cut) worked out most of the way up the dome. I did use this method, and I think it makes alot of sense.

            Lars.


            ps. After going back and looking for my post, it appears to have lapsed. I added a quick post to bring in up.

            Splat, what part of Minnesota?
            Last edited by Lars; 07-13-2009, 03:58 AM.
            This may not be my last wood oven...

            Comment


            • #7
              Re: More efficient brick cuts

              not so much my concern over saw blade use as my desire for pizza sooner vs. later, and that perhaps the default of instruction of starting with x number of half bricks is an unnecessary step.

              I'm trying to walk the line between efficiency and being a perfectionist, although the more days I spend up 4 feet off the ground, stooped over with my butt in the air scrubbing mortar off the inside faces of my bricks, the less I care about perfection. And I'm hungry, darnit.

              Anyway. Trapezoids make me happy, but love your alternating spirals thing, David. Very clever, and I'd imagine it must add something structurally for the better. You smart people are dangerous

              I'm just west of Mpls.

              Comment


              • #8
                Re: More efficient brick cuts

                Hi Splat,
                Glad you liked ( and noticed ) the alternating spirals. I was waiting for someone to comment about that. I have seen many carefully crafted 1/4 bricks jumping over previous chain joints too. The idea of the whole chain sitting there whether or not the mortar is there is what I like about the method.

                Lars.

                Lars.
                This may not be my last wood oven...

                Comment


                • #9
                  Re: More efficient brick cuts

                  Hi Lars -

                  Just so I understand what you said.... you cut your bricks similar to what Splatgirl has outlined (and what I'll probably do with mine)... then cut an 11deg. angle across what I'll call the "top" surface of each brick...

                  So the 5" side of the brick on the outside of the dome, and the 4" on the inside will get around evenly?
                  And the 11 deg angle cut to the "top" surface of each brick, will provide the necessary "closing" of the dome?

                  I'm building a 42" Pompeii and have the hearth poured and level. I've bought my firebricks (9x4.5x2.5) and the insulating board... so I'm right at the point where I need to understand how to cut the bricks to build my dome...
                  I bought the HF 10" saw and am willing to make as many cuts as necessary to each brick...(I'm definitely NOT a perfectionist, but am willing to put in the effort, up to the point where it's diminishing returns, in order to do a job well)

                  I have been leaning towards building a styrofoam form, as shown in various posts on the forum, as opposed to trying to build an indispensable tool, with NO welding experience.

                  In case it's not clear already, I'm the type with NO handyman skills, foolishly unafraid to try anything....but I prefer using a method I can copy, as opposed to figuring it out on my own, or adapt as I go along...

                  Comment


                  • #10
                    Re: More efficient brick cuts

                    Majic,
                    For about the first 8 chains or so, you can just cut the 11 degree centered cut and make two equally tapered pieces. Draw your 42" circle and see how they are fitting. Should be VERY close to following the circle. If they leave a gap at the back of the joint, you need to use a slightly more severe angle, perhaps 12 degrees. if there starts to be a gap at the inside edge of the joint, it means the angle you are using is too severe. You will get the hang of it. All the bricks you cut in this way will be usable.

                    After about the 8th chain, you may want to taper the pieces to avoid the 'triangular joint' syndrome. To do the tapering in the 'horizontal' ( which at this point is really at about a 45 degree angle up the side of your dome) AND the vertical ( also not vertical at this point) will definitely take a few more cuts as you get to the upper 1/3 of the dome.

                    My original post on this method was pretty good. I think I called it 'tapering bricks with a chisel' in the 'tools, tips, techniques, etc.'

                    Lars.
                    This may not be my last wood oven...

                    Comment


                    • #11
                      Re: More efficient brick cuts

                      don't throw out the 'indespensible tool' option just because you don't weld. I cobbled one together with basic hardware store stuff and a few misc. pieces of junk from my garage...no welding and no special order parts required. My materials list included threaded rod and connectors, a 2" wide angle bracket, a couple of nuts, a door hinge and some epoxy. I coudn't find a lazy susan or chair swivel so I had to pin together two pieces of thin scrap wood to do act as that.
                      here it is covered with crap, post build. I'd offer to send it to you but I built a 36" oven so it's the wrong lenght and I'm sure it would never come apart since the rod is expoxied (and now mortared) in place.


                      in the first photo, you can barely see the locating pin in the wood that made the lazy susan bit. I just located that peg (it was shelf peg from a cabinet) in another piece of wood and made sure to place that dead center on my oven floor. The hardest part was getting the threaded rod connector attatched precisely on the hinge so that the angle and the sweep were spot on center. Looks like crap, worked just great and cost like $5.

                      Comment


                      • #12
                        Re: More efficient brick cuts

                        OK - so I understand now (thanks Lars) the cutting of each brick, in order to go around to complete one chain...(and I'm definitely going to use the alternating spiral method you described in the 'tapering bricks with a chisel' post) I like the idea of having the bricks held by more than just my ability to properly apply mortar...

                        But what about the angle required to rise from chain to chain?

                        I've read the posts where they use cardboard and draw out the dome shape and then place the bricks around the "dome" to get the angle (and they recommend cutting wooden wedges to that angle - to be used from chain to chain as the dome rises)
                        If I use a form, or become convinced by Splatgirl's explanation of how "possible" an indispensable tool is to make - then where do I get my angle from? (I'm talking about the angle on the outside of the dome, that each brick chain has to be raised in order to close the dome)...

                        Comment


                        • #13
                          Re: More efficient brick cuts

                          Majic,
                          Okay. To get your rings of bricks ( chains) to meet at the middle at the top of the dome, the outside edge of each brick has to be elevated.

                          For my 39" diameter oven, it was ( via math and CAD) around 9/16" at the very edge. However, I wanted to use a little 1 1/2" square of wood ( cut to the proper thickness) as a spacer. ( even with the 'indispensable' tool you will need a spacer...I guess that name is not true because I did not use one) Since I knew I would have to jam that spacer into the bricks, I cut a whole bunch of them 1/2" thick. As you mortar each chain, you butter up a wedge of mortar on the previous chain and the last brick face, then lay the new brick on there and squeeze out the mortar until the 'spacer block' gets clamped. By the time it falls out or you knock it out, the mortar is firm.

                          If you calculate pretty closely, the distance you need, the dome forms kind of automatically. Mine is not perfect, I know, but it's pretty close. ( lots of pictures posted on my profile, BTW)

                          Lars.
                          This may not be my last wood oven...

                          Comment


                          • #14
                            Re: More efficient brick cuts

                            Lars - thanks for the quick response (and for making it detailed enough I can understand it)
                            My math isn't up to it, and I'm planning a 42" oven, so I guess I'll have to use the cardboard on the floor mockup to get my wedge measurement...
                            I should just be able to take the measurement of the wedge that I get from my mock-up, and then taper each brick "top" surface that distance, and reduce the amount of mortar required...
                            So - strictly to explain my thoughts aloud - and using your measurements - if I needed a 1/2" spacer, then I could cut my brick to be 2.5" on the outside of the dome and tapering to 2" on the inside.
                            If this will work, then I think I can deal with it, and I have somewhere to start....

                            Comment


                            • #15
                              Re: More efficient brick cuts

                              Majic..
                              Unless you buy tapered bricks, there are very few builders on this forum who would go to the extreme of tapering the bricks on the top and bottom of each brick!

                              What kind of mortar are you planning to use?

                              There are six faces on every brick, lets call them ( front [oven inside], back[oven outside], top [toward the dome], bottom[toward the base] and sides [ abutting the ajacent bricks in each chain].

                              If you cut each firebrick at an angle, you get a taper in one dimension. This is plenty for the first 8 chains. If you then do a compound angle for that cut, or shape the 'sides' you will be tapered in two dimensions. Very few have needed to do more than this.

                              Lars.
                              This may not be my last wood oven...

                              Comment

                              Working...
                              X