Spring in New Zealand
KiwiPete,
Haven't heard from you for a while. How's spring coming along? I couldn't help notice the bulbs coming up around the oven. Frost and fog in Northern California, and it's time to prune the vineyard. Do you roast turkey or chicken for the holidays -- will the oven be ready to roast by then?
Keep up the great work. Are you going to use woven ceramic insulation? Do you get Insulfrax there?
Waiting on more photos of your cat...
James


-
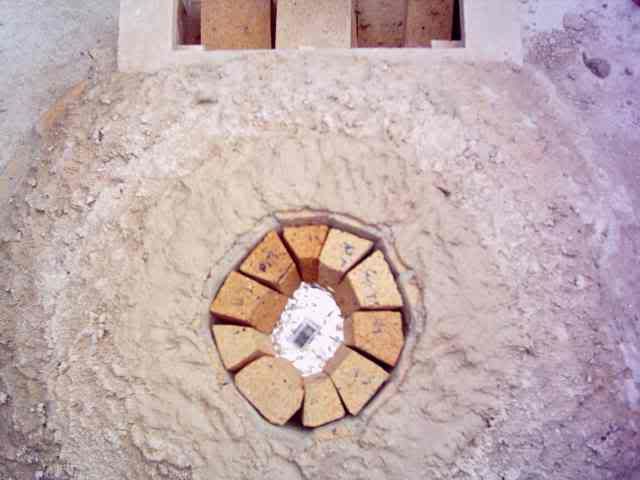
And here are some pics of the vent mortared in place, from a few different angles:
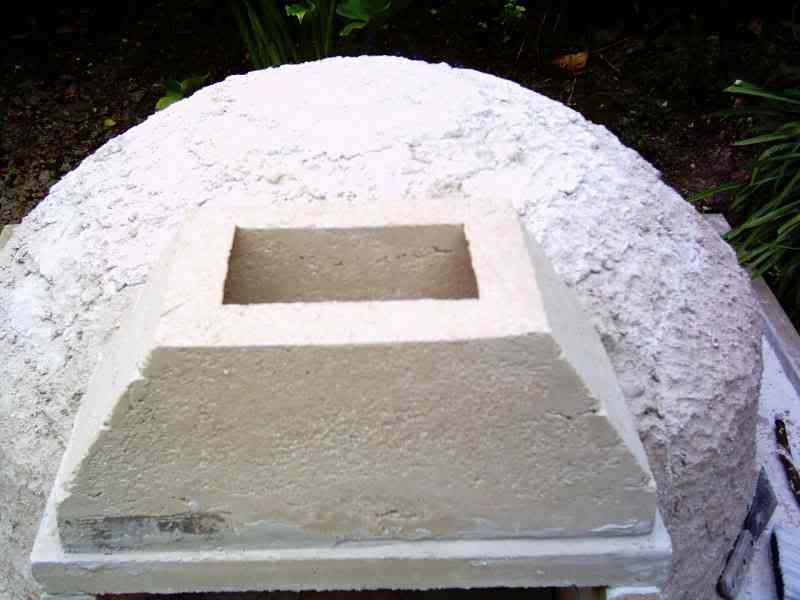
and again from the top view:

and finally from the side view:
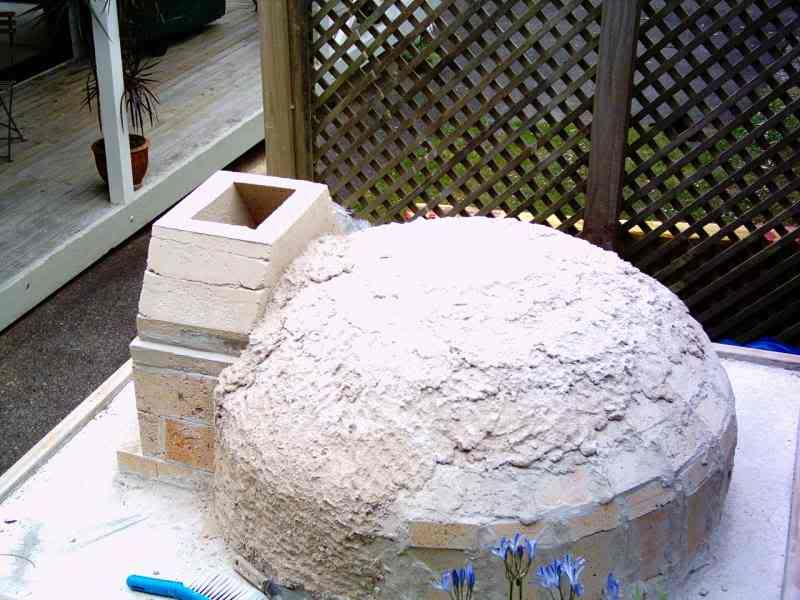
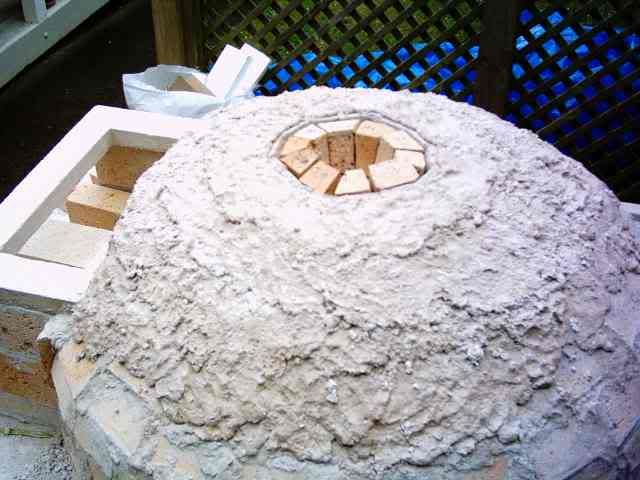
All that remains now (before I can start using the oven in earnest), is to pour a casting for the "top plate" which will hold the flue and start insulating this baby, using a 3" blanket and perlcrete. I'm a great believer in spending money on insulation! All in all, a fair bit of work to do, before we go live...Leave a comment:
-
Well after all that work, I have fired the oven a few times.
Last night, when we fired it up quite high, we could see some cracks where the bricks meet the "manifold". At night, you could actually see the fire inside through the cracks!! after having read Aikitarik's thread on "how much crack is too much crack", I have decided to completely ignore to cracks (particularly the one by the manifold) because I was going to cast the vent and seal that area up with more refractory concrete anyway...
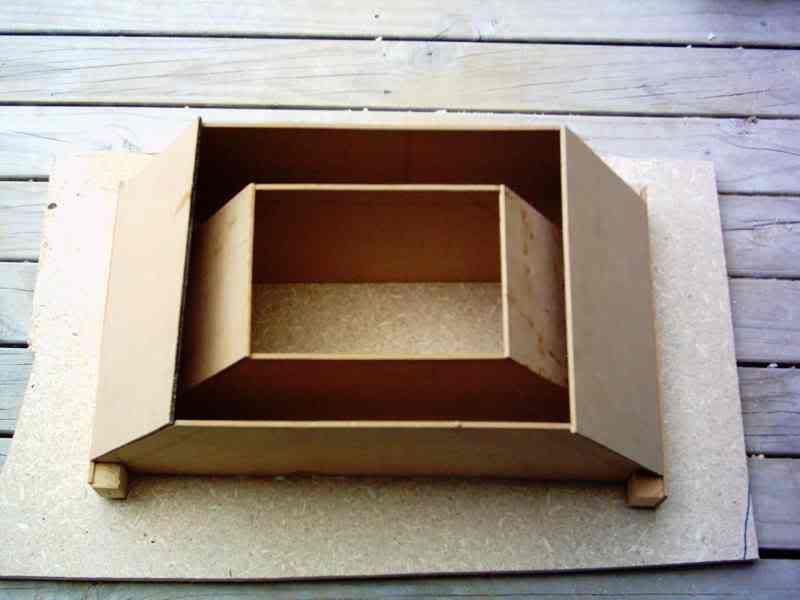
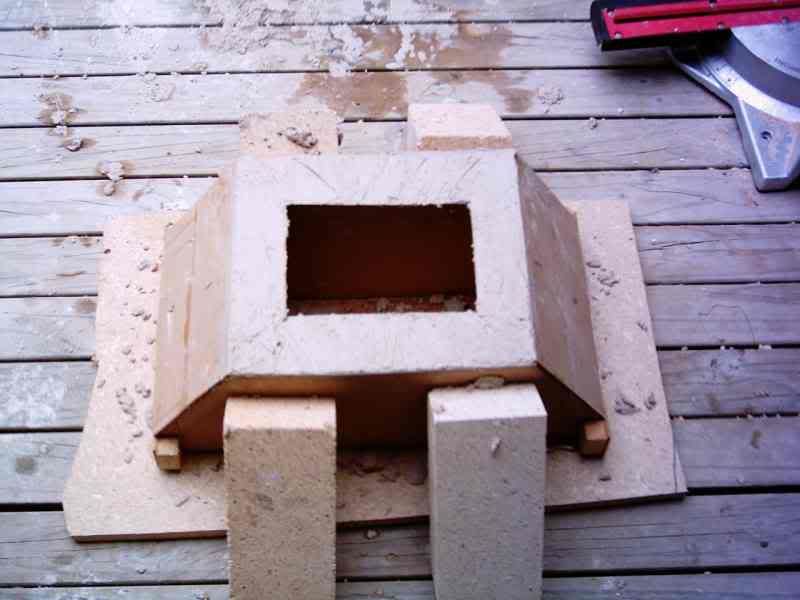
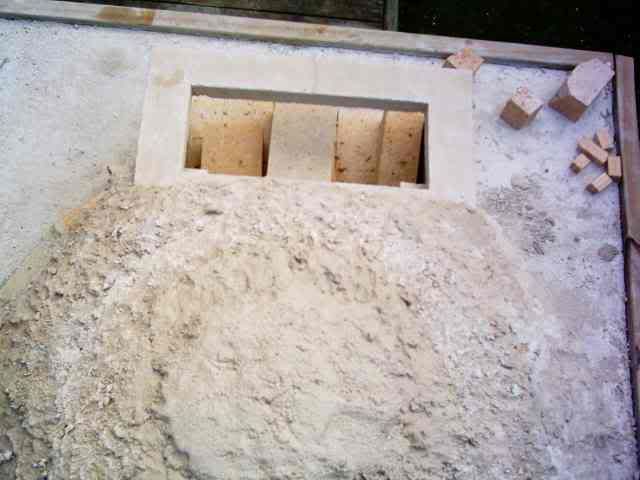
Here are some picture of the mold I made to pour the vent:
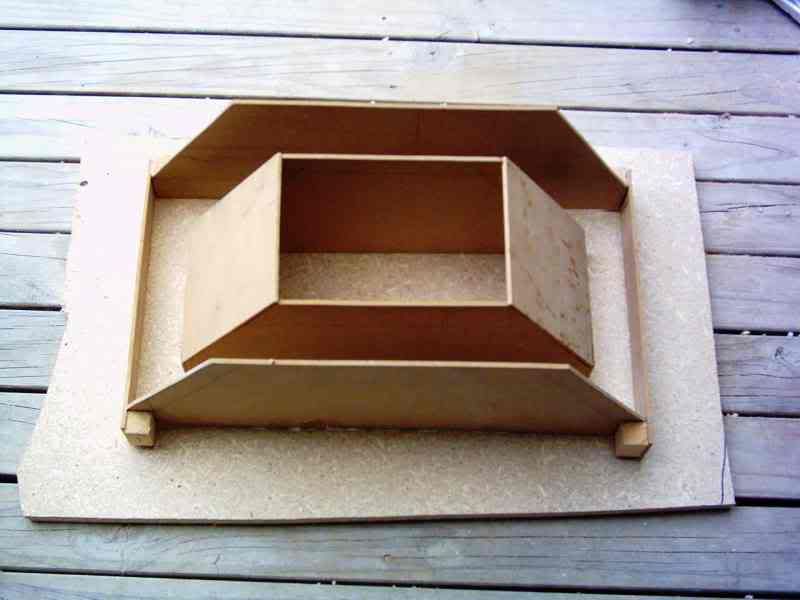
and again:
and here is a picture after I poured the concrete.
The sidewalls started bulging out a bit, so I propped them up with a couple of fire bricks on either side.
Leave a comment:
-
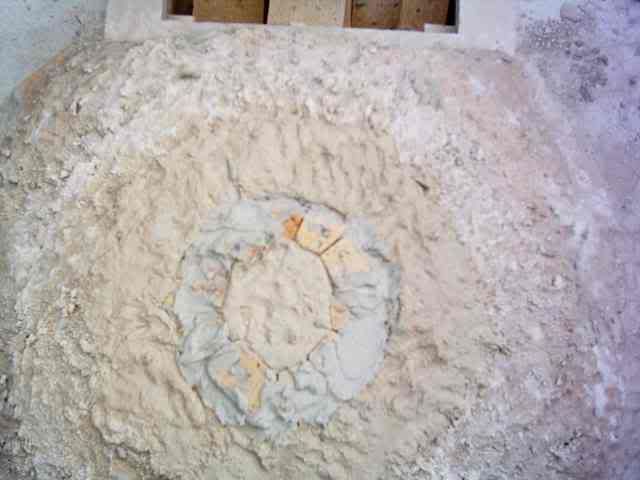
I have started myfirst "curing" fire tonight.
It is amazing how the oven vents: the bottom 4 inches of the oven draw in the cold air perfectly, and the top half vents the hot air. You can put your hand on the oven floor no worries, and yet the air coming out of the vent is hot.
You can actually see the separation in this picture:
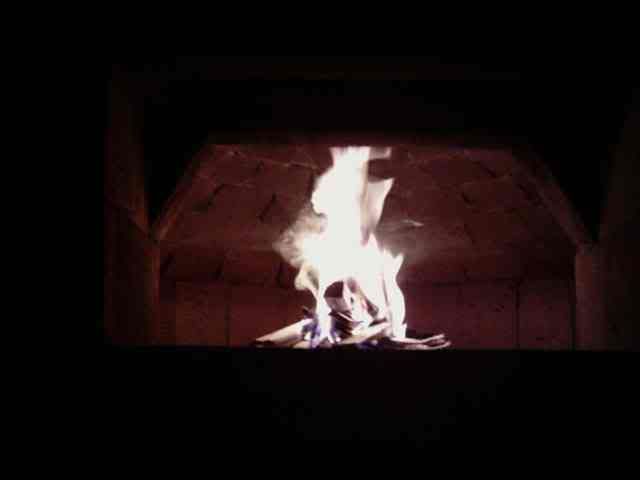
I'm pretty happy with the results!!!Leave a comment:
-
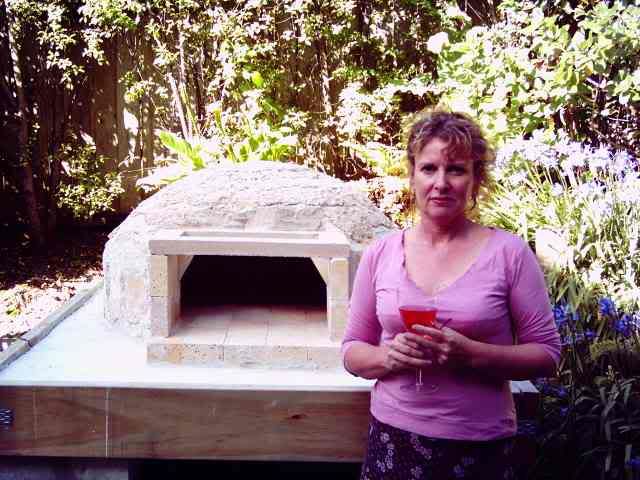
And here is a picture of my lovely lady, celebrating the finishing of the dome with me.
She has put up with endless amounts of dust from me cutting firebricks and lots of other things, without complaining: she is a GEM!
Leave a comment:
-
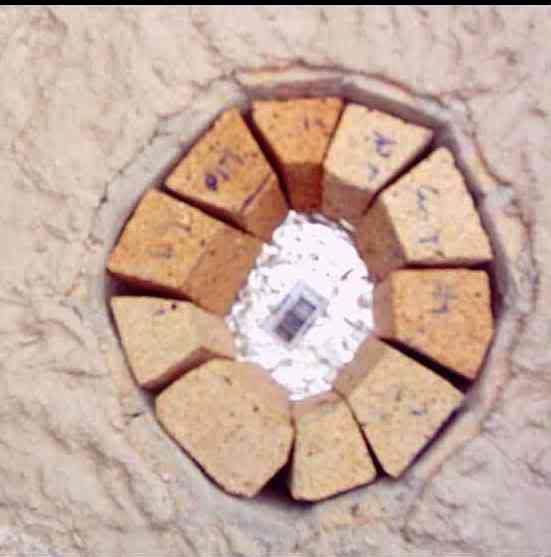
You guys were right all along, and my fears about the dome collapsing were just a manifestation of my paranoia! I removed all the vanes today, and the dome did NOT collapse!.
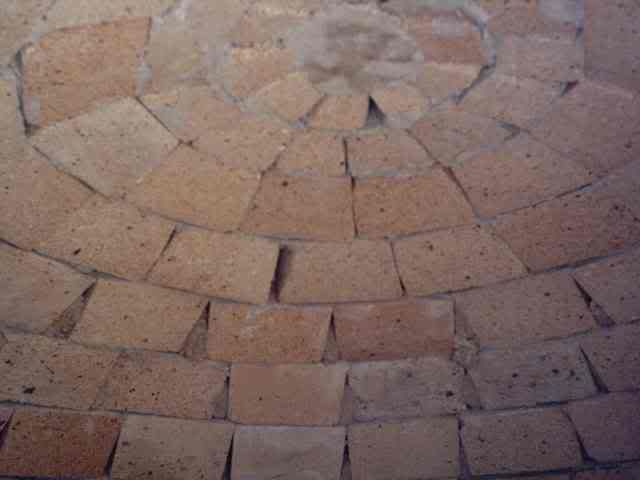
I cleaned it all out, and here is a picture of the interior: as you can see, the fourth, fifth and sixth courses have a much better fit than courses 1, 2 and 3, because I started "shaping" the bricks from there on in. (they are not all perfect though as you can see )
You can also see the final "plug" and that the the bricks are getting smaller in the final two courses.
Leave a comment:
-
(M) Peter, that mortar you used looks very pale to me. Did you use a white cement? ____
(M) Did you use much more fire clay than called for in the 8 parts sand, 3 parts cement, and 2 parts fire clay? _____
No, I didn't make the mortar myself. I bought special refractory mortar from a specialist refractory supplier. It is very white and has a very soft consistency.
The supplier said that it is really designed for thin joints between flat surfaces of bricks, joint thickness up to 3 or 4 mm. He suggested to mix it with sand (about 50/50 ratio) to give it some better gap filling properties.
My refractory concrete is also from the same supplier. This can be used for casting etc. I have used it for the manifold and to cover the top of the dome with. Not cheap though at NZ$47.- a bag (have used 2 bags so far, but still have to cast the vent, so may have to go for a third one.)Leave a comment:
-
the plug quote and concept are mine... 10% of all your pizzas now belong to me. seriously, 15 months and my plug is still holding up fine, and better yet (for you) your brick worksmanship (cuts and fit) is much much better than mine ever was.Leave a comment:
-
Light colored mortar, & use of a dome plug.
#87
(M) I'll up the ante to 12 Kiwis that your dome will support you, standing on one leg at the very top, though I will have to apply to NZ for the Kiwis if I lose.
(M) Peter, that mortar you used looks very pale to me. Did you use a white cement? ____
(M) Did you use much more fire clay than called for in the 8 parts sand, 3 parts cement, and 2 parts fire clay? _____
(M) The quote below is by an individual with the "handle" Yahoo-Archive which I believe belongs to either James, or Jim who worked on the "original" brick oven.
"1. (if you have courage and faith) when finishing the very top rows of the oven, instead of driving yourself nuts making a gazillion cuts in firebrick, simply stack up some bricks and wood in the center of the oven, until they reach the bottom of the opening (at the top of the oven) and then place cardboard or wood on top of that stack of materials. then use modeling clay to seal any*gaps. then*pour a "plug"*as the final "cap". for my plug i used repair mortar mixed with crushed firebrick to create a concrete like mixture. my plug was about 6 inches in diameter. i've done 4 months*of cooking now at the rate of 3 to*4 fires per week and the plug seems to be holding up with no problems but i can't guarantee*how long it will last. i used repair mortar because it had alumina (in addition to silica) in it and i read somewhere that alumina based cements*retained strength better under heat.*"
(M) Visit the following 2 URLs for a more detailed discussion of plugs:
================================================== =
Ciao,
MarcelLeave a comment:
-
I was talking to a friend of a son of mine about the oven. He is a brick layer (and a very good one at that).
I discussed the issue of making the final "keystone" and getting it to fit properly etc.
he suggested that rather than spending ages making the perfect keystone, why not pour one using refractory concrete!
I thought about it for a while and it makes a lot of sense:
1. it will ensure it is the most perfect fit you can get.
2. takes no time at all (2 minutes to mix the concrete and 30 seconds to "goop" it in.
So I put a $0.50 aluminium plate on top of my vanes (just prior to putting in the final course of bricks) as you can see in the next pic:
After I mortared up the final course of bricks, I just "gooped" in some refractory concrete and voila: the perfect plug/keystone!
Finally I covered the whole lot with a bit more refractory concrete, and now will have to wait a couple of days before I remove the vanes. (and hopefully have a "non-collapsing" dome. )
Leave a comment:
-
Final row of bricks going in!
As you can see in the next two photos:
Leave a comment:
-
I'll try and share your optimism!(M) Unless you forgot to put cement in your refractory mortar, I'd bet a Kiwi that your dome will hold. It is very carefully fitted. Congratulations!
I'll post some pics of my pre-cast vent soon, which sits on top of the "manifold"(M) If I were to build another Pompeii I would use your manifold idea though I'd probably use two "circles" of re-bar. Your casting is a definite improvement on my use of plain flat iron to support the chimney. It requires no mortar joints to fill .
Yes you are right: oven diameter is 36". Kiwi fire bricks are 9 x 4.5 x 3.(M) If you post again please specify the diameter of your oven. If I gauge by assuming the size of your NZ bricks are close to ours I would guess no more than a 36" ??
I have cut my bricks in 3, so I end with a 3" wall thickness. (plus some refractory concrete over the top. Trying to keep thermal mass down a bit and hope to compensate with heaps of insulation.Leave a comment:
-
KiwiPete's dome will not cave in!
#87
(M) Unless you forgot to put cement in your refractory mortar, I'd bet a Kiwi that your dome will hold. It is very carefully fitted. Congratulations!
(M) If I were to build another Pompeii I would use your manifold idea though I'd probably use two "circles" of re-bar. Your casting is a definite improvement on my use of plain flat iron to support the chimney. It requires no mortar joints to fill .
(M) If you post again please specify the diameter of your oven. If I gauge by assuming the size of your NZ bricks are close to ours I would guess no more than a 36" ??
(M) Your arch bricks are already cut so if you house your igloo, you could use those same bricks for a decorative arch that lies next to your cement board, or "HardiPlank" siding.
Ciao,
MarcelLeave a comment:
-
I will probably finish off the dome in the next 3-5 days, and am getting quite anxious about removing the vanes, once it is dry.
I'm quite worried about the whole thing collapsing. If that happens, I'm going to be bl**dy pi**ssed off.
I'm probably worried about nothing, but here is a question: who has this happened to (on this forum) and what did it take to fix it??Leave a comment:

Leave a comment: