Re: Kiwi pete'soven
Hi there,
I am in Nelson and sourcing materials....where abouts did you get your Rockwool blanket from, and what did you use for your under-hearth insulation? You've got a great looking oven (and cat!)!
Cheers,
Zoe.


-
Re: Kiwi pete'soven
Kiwi,
This is nice work getting on. Congratulations on it. You should have one sweet oven when it's finished. Keep up the good work. All of us ex-colonials should stick together. God save the....
JimLeave a comment:
-
Good-looking tools
Pete,
Glad to see that you were able to find a good solution for your tools. Very crafty. Everything looks great. Congratulations and here's to years of great cooking.
JamesLeave a comment:
-
tHANKS FOR THOSE GREAT PHOTOS DO YOU HAVE ANY pICS OF WHAT YOU PUT ON TOP OF THIS REF
tHANKS FOR THOSE PHOTOS DO YOU HAVE ANY PICS OF THE MANIFOLD THAT HOLD S THE CHIMNEY COLUMN WAS THIS CEMENT OR METAL tHANKSOriginally posted by KiwiPeteLeave a comment:
-
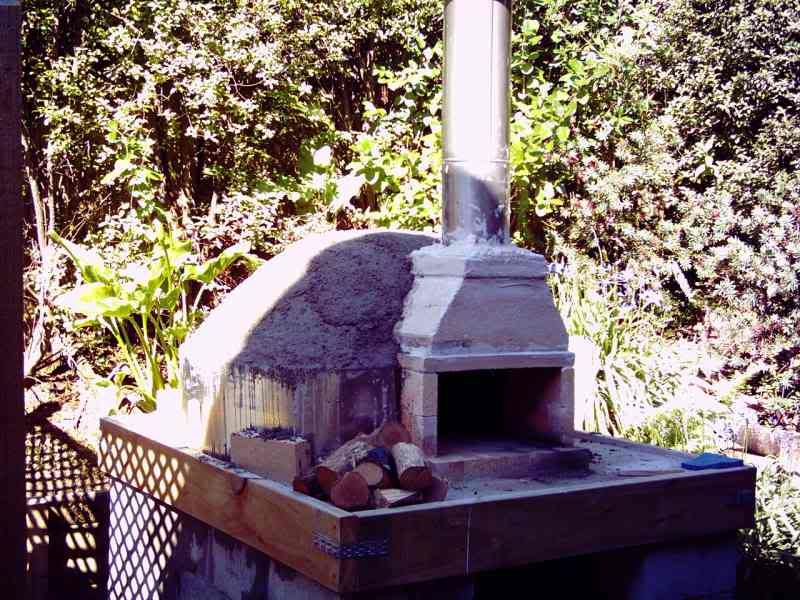
Haven't done a lot on finishing the oven lately because the brick saw was gone for repair and because this was over Xmas, it took a while to get sorted.
Have done a bit plastering and also made some tools as you can see on the picture further down:
an embers hook out of aluminium based on pictures I have seen here.. Indispensable tool that one..
also needed a small (8 inch) paddle for moving the pizza around in the oven. A friend of mine who runs a laser cutting business cut the blade for me out of stainless steel and I mounted it on some aluminium tubing.
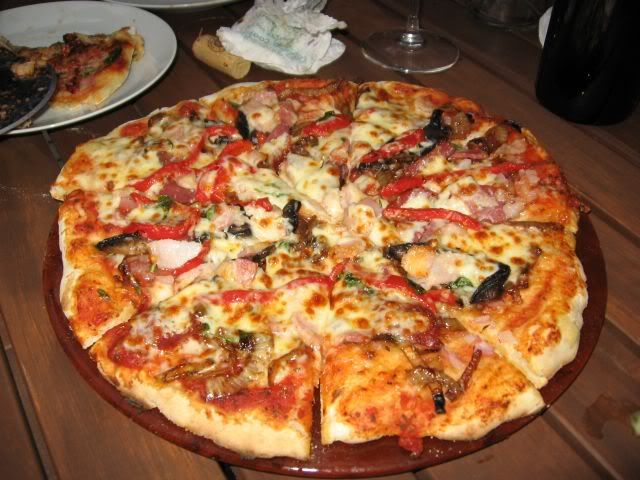
Happy some people around for a pizza party last night. Young Sam made his own pizza and and here is a picture of the mighty fine result:
Leave a comment:
-
I am pretty happy with the performance of the oven, but since I don't have any sophisticated thermometers, it's all on a "by feel" basis. I can certainly get to the "0 Mississippi" stage without too much trouble.
The extra thick insulation blanket seems to be doing the job just nicely: After getting the fire hotter than ever last night, I could not detect any warmth on the outside of the dome at all!
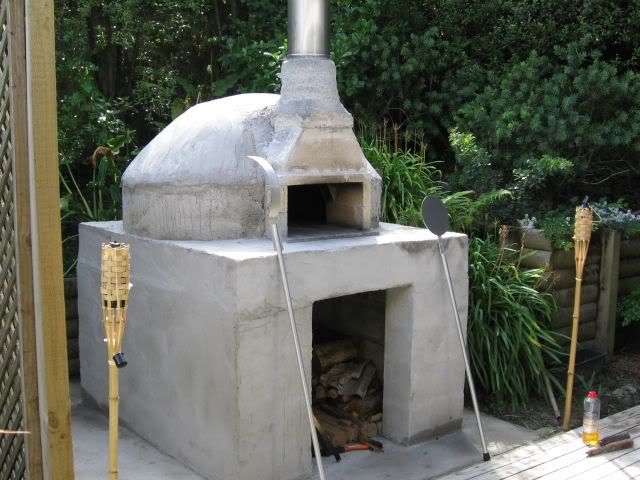
So there still a number of things to do, but they are all in the "making it pretty" category:
1. Do a decorative arch using a nice coloured brick.
2. Once the arch has been done, cover the remainder of the vent and part of the arch with Perlite.
3. Finish the area in front and to the sides of the hearth and landing with tiles.
4. Stucco the outside of the dome and base.
So far, we are really happy that we got this far, especially having had absolutely NO previous experience with this type of project and not being exactly your home handyman type guy..
The internet in general and this forum in particular have been a fantastic resource and I would like to thank everybody on this forum, for sharing their info and views because without that it would have been waaay harder.
Hopefully some of my experiences may be of help to some one else. Last edited by KiwiPete; 12-27-2005, 07:06 PM.
Leave a comment:
-
And since we had some dough left, we decided we'd better use it up...
The 20 year old son came home and had a go at cooking a pizza too. He was more than happy with results of his efforts...
For your information: the pizzas took approx. 2 minutes to cook.
and here is Sam's pizza:
Leave a comment:
-
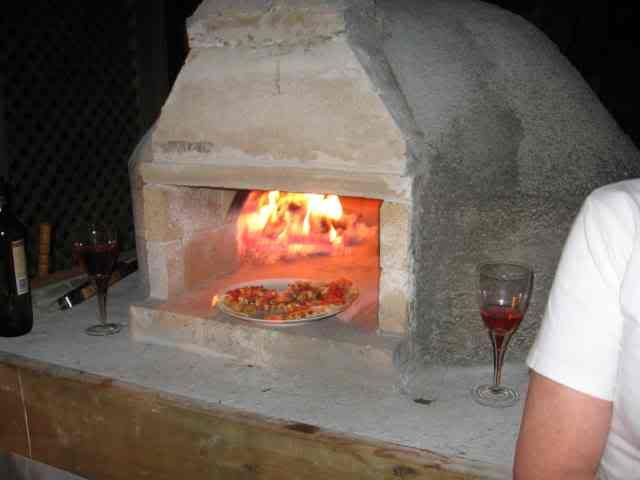
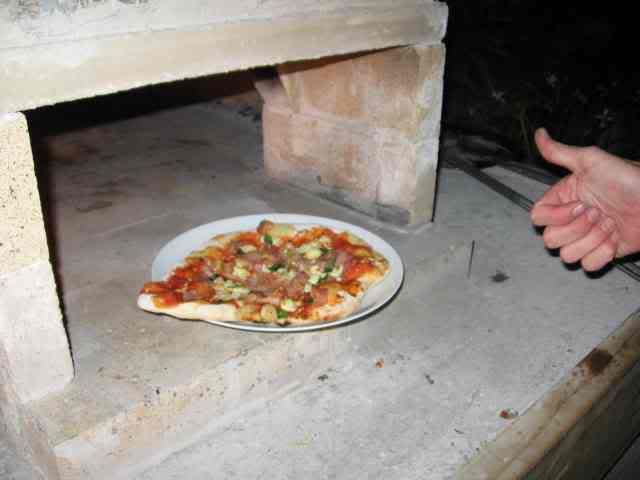
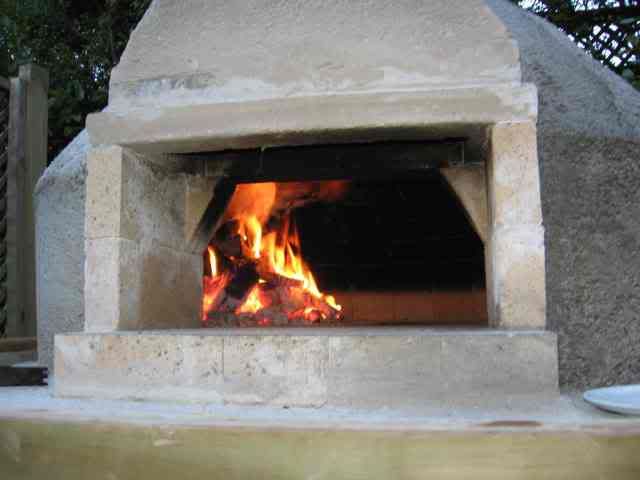
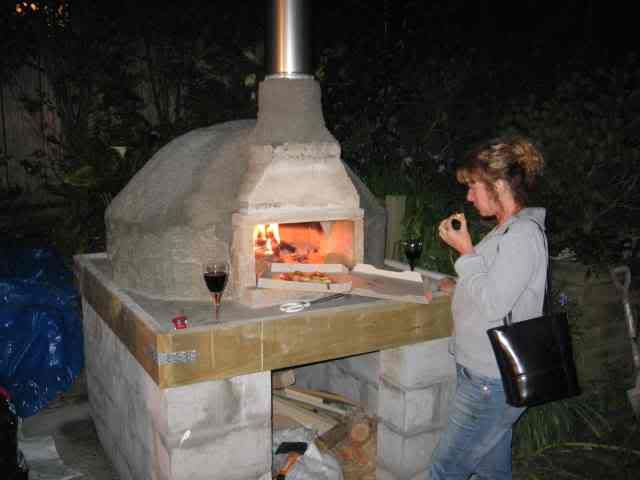
Last night we cooked our first pizza in the oven!!!!!
I made a fair bit of dough, and made some mini-pizza shaped balls, so I could have a good "play around" and see how it all works.
Got the hang of of moving the fire around and managing all that stuff and got the the oven up to the "0 Mississippi" stage.
Here is a picture of the fire:
and here is a picture of one of the first mini-pizzas cooking:
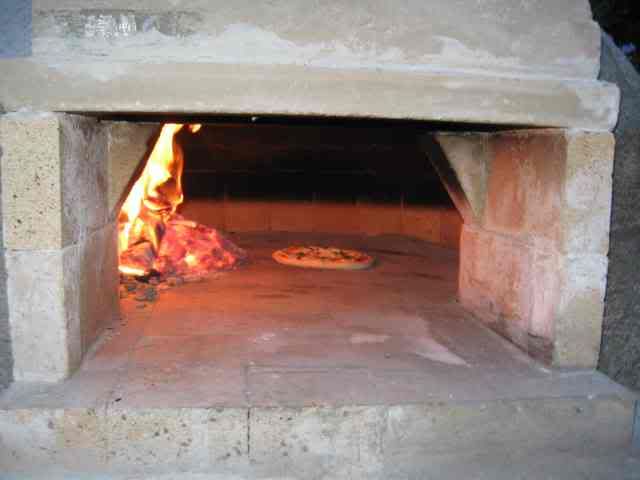
and the finished product, ready to sink our teeth into... (it beat the take-away pizza from the other night by a country mile )

Leave a comment:
-
Sure Bruce,
happy to post some more pics.
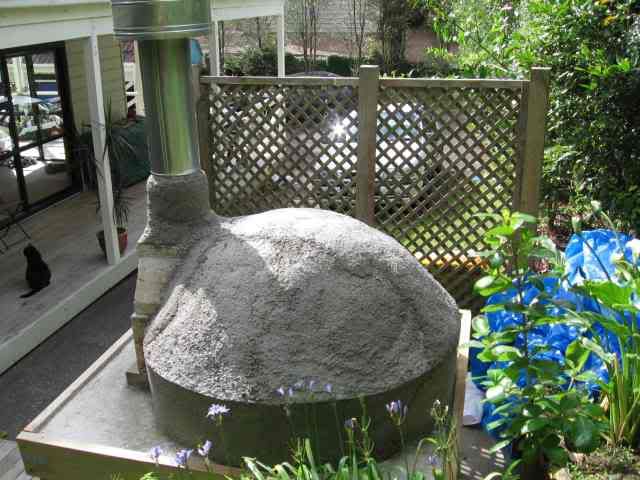
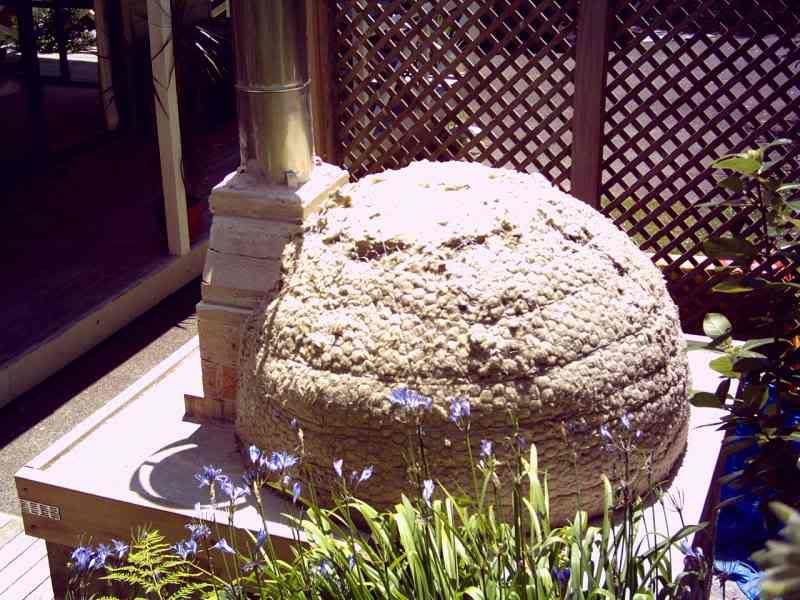
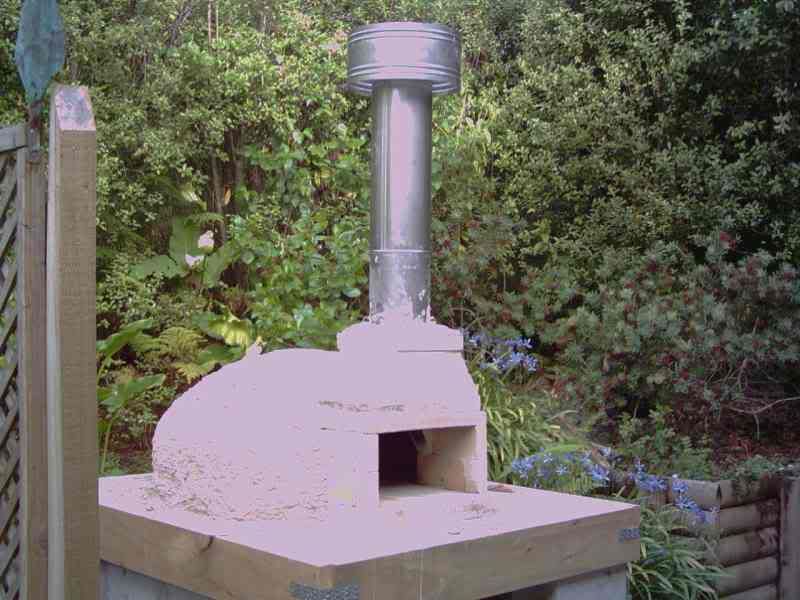
I am now at the stage where all the insulation work (Rockwool blanket and perlite) is finished.
I gave it a few days to dry out out properly and here is the result:
and here is another shot from the backside:
I wanted to stoke a decent fire in there (for testing purposes) and so we did, later on in the evening. I didn't have any dough and didn't have any time either, so we "pretended" and got take-away pizza and ate it by the fire of the pizza oven...
Leave a comment:
-
Great Job!!!!!
Will you be posting more pics when this is finnished? I'm curious to see how the front is finnished. Hopefully, if all goes well this summer, I will be building one in my small backyard.
Thanks,
Bruce.Leave a comment:
-
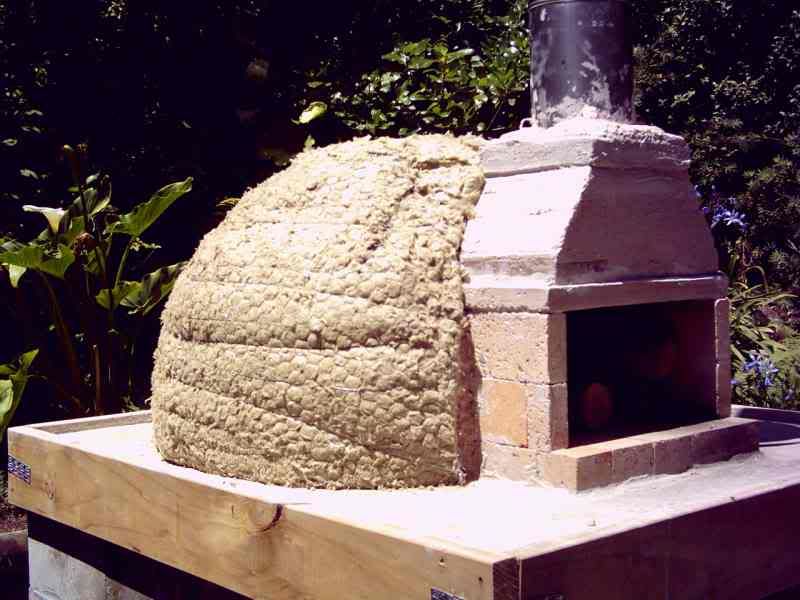
Putting that blanket on was quite a mission!the "Rockwool" stuff is great but you don't want the fibres to get into your skin, because it irritates the hell out of it.
So there I was on a hot summers days, dressed in long pants, T-shirt and overalls and wearing rubber gloves, trying to fit this blanket. I think i lost about 5kgs in fluid during the course of the afternoon!
After I got it all on and shaped more or less the way I wanted it to be, I grabbed a piece of flashing approx 1 foot high and put that around the dome with a 1-2 inches gap between the flashing and the dome.
Then I poured perlcrete into the gap and tamped it down. The rest of the dome was covered by "gooping" it on by hand, as you can see in the pic:
the flashing doesn't go all the way around, so I will have to do it in 2 stages: Some more work for Monday or Tuesday!Leave a comment:
-
Have started on the insulation part.
I bought a blanket which is 3-4 inches thick and has a wire backing, so it is quite good to "shape".
I read on the Forno Bravo site a long time ago, that you can't have too much insulation, hence the super thick blanket.
here are some pics after I finished wrestling it in place (with wire etc to keep it all tight):
and from a different angle:
Leave a comment:
-
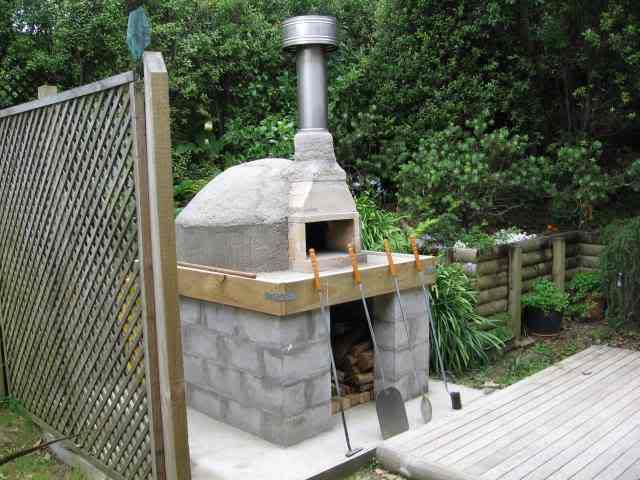
Some more pics!
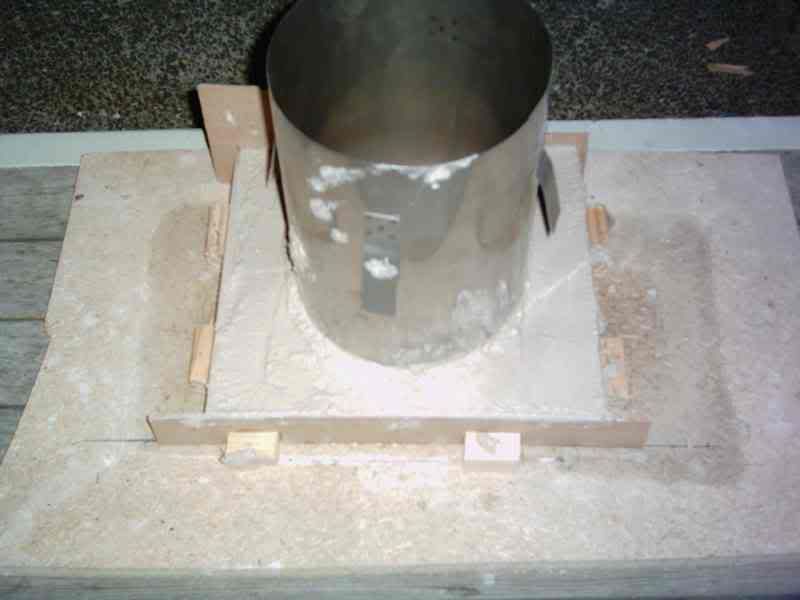
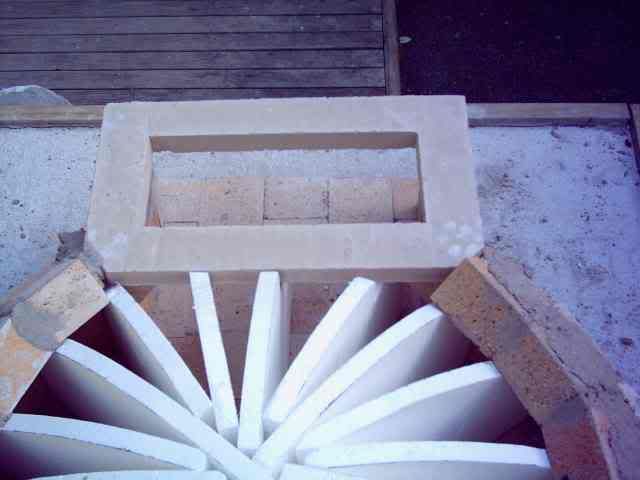
I have cast a top plate which holds the first part of the flue.
here is a picture of the mold:
and here is a picture of the top place mortared in place together with the rest of the flue:
and again :

Leave a comment:
-
Hi Guys,
another update from Kiwi Country.
with regards to the questions:
James: Yes, I am using an insulating blanket. I have found a product called "Rockwool" that is rated to 650C, so should be OK. I'm have bought a blanket of this stuff which is 3-4 inches thick, so I should be "well" insulated with another 1-2 inches of perlcrete on top of that...
Don't think the oven will be ready for Xmas, and I still have lots to learn about fire management.
on another matter James, How much would it cost to ship a 55lbs bag of Caputo flour to New Zealand (cheapest shipping options possible..)
I'll post some more pics in a moment.
ljanmi2:
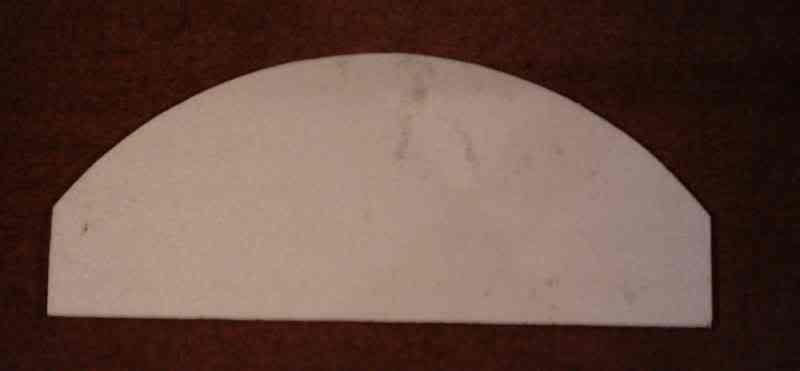
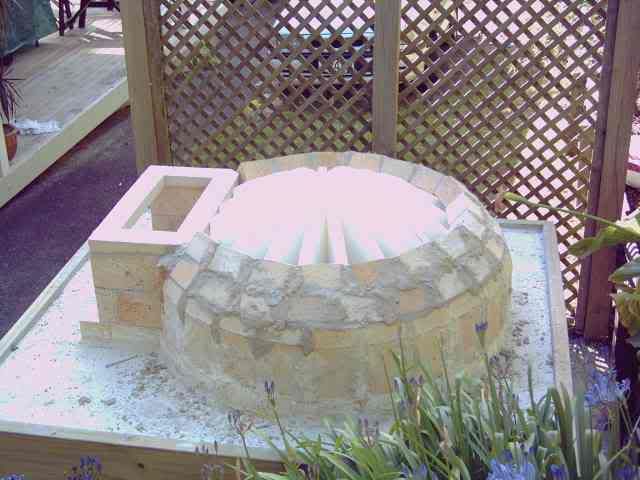
My dome profile is: 36 inch diameter, 15 inch height in the middle and the first row of bricks is 6 inches high.
Can't give you any feedback on temperatures yet, since I haven't tried to crank it up to the working temperature yet, until I have finished insulating the oven. As soon as I know, I'll post it.
For your interest: my brick size is 9 x 4.5 x 3 and I have used about 100 bricks to build both the hearth and the dome.
Here is a picture of my vane profile:
Leave a comment:
-
Dome shape and performance
Hi KiwiPete,
Congratulations on that nice looking oven!
Looking and the pictures of your dome, it seems to me that you went the low vault route which I like myself. Could you post a drawing of your dome profile, or vanes that you used to support it while laying bricks?
Since I am interested in building a 36" dome with 1/3 bricks too (3" wall thickness), I would like to hear from you some comments on how the oven performs. Can you reach high temperatures of 900F+ that are already achieved with 4.5" wall thickness?
Thanks,
MikeLeave a comment:

Leave a comment: