


-
I sent the manufacturer an email and am now waiting on a response regarding the K value. I searched the forums and it looks like others have used this CF board. In the meantime, I noticed that the 2" variety is out of stock, but I can get the same volume in 1" board for the same cost. Is it acceptable to do two layers of 1" board in place of one layer of 2"? -
Most like will work but to ensure, get the "K" value of the material, should be around 0.5) at 500 F (Standard Units) or 0.079 at 260 C (Metric Units), also need compression strength of at least 75 PSI with 5% compression.Leave a comment:
-
When I hung things up for the winter I was planning to use vermiculite as my insulation layer. I have thought about it over the winter and have sort of shifted gears. I am now planning to purchase some CF board and blanket. It will save me some space and will be easier to put a rigid piece of CF board on top of a sheet of tiles for my weep hole drain channels.
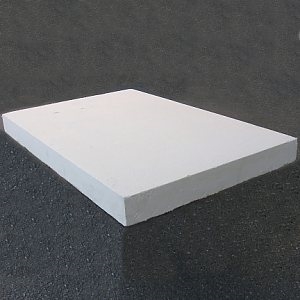
This is the board I plan to buy. I get confused when people start talking about CF board specs, so I am sorry for this uneducated question. Does this seem like it will do the trick for insulation under my firebrick floor?
Leave a comment:
-
Bethencourt Sorry, I did not see your question until today. I did use some minimal wood support under my cement boards. I made legs from 4x4 fence posts and spaced them about 18 inches apart along a 2x4 and propped them under the cement board. Take a look at the photo I am attaching, I realize this is actually when I was supporting a lintel, but it was the same idea. I didn't have to cut any plywood to perfectly fit the space, I just made the concrete board overlap the blocks enough that they were supported, but not so much that they wouldn't allow concrete to bond the hearth with the holes in the blocks. My crude wood supports were pretty tight when I went to take them out. david s gave me the idea to use wedges under the uprights next time to assist in the removal.
The beauty of the concrete boards is that you leave them in place and they become part of the hearth, whereas the plywood forms must be removed.
Hoping to get going again on my build soon. The weather is right, now I just have to find the time again.Leave a comment:
-
slschoming I see you have been using cement boards to pour the concrete of your hearth. did you build support under it towards the center or the corner part? or did they hold strong enough? I'm going to build a 42" and willing to use this instead of wood.
Thanks!!Leave a comment:
-
SableSprings Thanks for the help and that document.. I guess I will hang it up until the spring.
Leave a comment:
-
Here's a link to a pdf document regarding masonry work in cold weather that should help answer your questions. Especially note that freezes can seriously damage/change the curing process and the wetter the mortar/cement mixes are the more prone they are to physical bond breakage due to the ice formation. Based on the information in the pdf, I think I'd start thinking about covering up for the season...Originally posted by slschoming View Post...unless you tent the structure and give it a little heat to keep it above freezing at night so you can extend your building time further into fall. (p.s. The video of the weep hole punch-up is pretty cool!)
https://www.quikrete.com/media/newsl...nry8_20_12.pdf
Last edited by SableSprings; 11-06-2018, 12:06 AM.Leave a comment:
-
Took a slow motion video when I broke out my weep holes from the bottom. Kind of neat to see how the water starts to ripple on the surface before the concrete finally breaks.
Leave a comment:
-
Yes you will have to use something like cement sheet to prevent the vermicrete from filling the gaps between the tiles. Remember to also glue some insect screen over the holes, to prevent insect entry, before building over them.Originally posted by slschoming View PostLeave a comment:
-
SableSprings Thanks for the info. I am located in the middle of Kansas.We're to the point now where we occasionally freeze overnight. Daily highs ranging between 45 and 60 F. I was wondering if I should be calling it quits for the winter, or if I still have some workable weekends. I was also curious if it would be out of the question to do an occasional course of my dome on warmer days in the winter or if I should be planning to wait for the spring.Leave a comment:
-
The advantage of having the tile scraps between the top foundation slab (hearth) and the insulation layer is simply creating a draining system/water barrier gap to keep water from seeping up into your insulation. It doesn't matter whether it's board or vermicrete, so I don't see any issue with the slab-tile sheets-hardiebacker-vermicrete-leveling sand/fireclay-cooking floor order. Since you said scraps of hardibacker, I assume there will be some small gaps between pieces that will help water drain out of the vermicrete down to your weep holes through the channels between individual tile pieces. Just make sure that you don't position any gaps directly over a weep hole (to avoid a possible plug forming--probably not an issue since your weep holes have a nice "collection basin" that popped out of the concrete). The hardibacker I've used has a slightly depressed grid system on one side...if your backer board does also, put the grid side up.
I assume you are planning to lay your cooking floor inside the dome (most do that rather than setting the dome footprint on the cooking floor bricks). Either way make sure your lower layers are wide enough to act as the insulation base for the entire footprint of the heated oven components.
Where are you located? It helps sometimes to know the build's general climate area when answering questions.Last edited by SableSprings; 11-05-2018, 11:57 AM.Leave a comment:
-
SableSprings I was planning to use vermicrete rather than insulation board. I still have scraps of hardiebacker board.. Do you see any issues with maybe putting a layer of hardiebacker on top of sheets of scrap tile and then pouring the vermicrete layer on that?Leave a comment:
-
As David noted above, making a slight slab "dome" to keep casual water moving away from the base of the oven is best done at the time of the pour. Your weep holes will work great to allow exit points for moisture. Instead of trying to add a concrete topping layer now, I would suggest putting sheets of glass or porcelain tiles between the slab and the insulation board. Here's a thread link explaining the concept and if you go to post #19 in that same thread, there are some good photos showing the tile layout. You can often find excess/discontinued pattern tile sheets at garage sales and in the clearance sections of large hardware stores (Home Depot, Menards, Bunnings, etc.) at give-away prices...or in a friend's storage shed that does a lot of handy-man chores (and who might like a future pizza party invitation )
https://community.fornobravo.com/for...444#post407444
If you lay the tile sheets with the mesh base up, the support for the insulation board is better and the channeling to the drain holes is more open.Last edited by SableSprings; 11-04-2018, 10:27 AM.Leave a comment:
-
The slight depression created around the weep holes should work to your advantage, rather like a drain in a shower base. Re mounding the supporting slab it’s probably more important to have the supporting slab sloping down slightly from outside the outer shell so water is discouraged from entering there in the first place. It is far easier to form the supporting slab in this way when pouring and forming it. I gues you could build up a topping layer though.Leave a comment:
-
I removed all my supports and popped out my weep holes... I guess I was a little deeper than I meant to be and it didn't pop out as cleanly as I hoped but it should do the trick.
I won't be able to work this weekend, but I have a couple questions for future work days...
david s You seem to be the expert of the crown method. I plan to build some sort of mound between the weep holes to direct water. Would standard mortar work for this or do you have a better suggestion?
UtahBeehiver As nice days present themselves over the winter months will I be able to do a course here and there, or should I be holding off on the dome until spring? I have never done any masonry before this project, but I am anxious to get going on the dome. However, I don't want to compromise the strength of my dome. Say I have a nice afternoon of 50 degrees but it's supposed to freeze overnight... would that be undesirable conditions for laying a course of my dome?Leave a comment:

Leave a comment: