Announcement

Collapse
No announcement yet.

dmun's 36" geodesic oven

Collapse
X
 
  • Filter
  • Time
  • Show
Clear All
new posts

  • dmun's 36" geodesic oven

    This post marks the start of the construction of my pompeii inspired oven. There has been a lot of discussion about how the bricks could be cut so that they fit evenly,without mounds of mortar. This usually involves the idea of three dimentional trapezoids, which are different on every level. My idea is to create an oven using the form of a geodesic dome. Anyone who has seen a soccer ball is familiar with the idea:


    It's hexagons alternating with pentagons. Geodesic domes are constructed from triangles, and the pentagons are made of five triangles, and the hexagons from six triangles. What size to make the triangles? Here's a handy web-based dome calculator from Desert Domes.

    But, but, but, (I hear you say), fire bricks are rectangles and you need triangles, and triangles with 6 1/2 degree tapered edges! This is crazy!

    That's it exactly. I am crazy, and I'm not advocating that anyone else do this. If you want a perfect fit oven, buy one of James' modular ovens. As I explained to a friend the other night: You've heard of labor-saving appliances? Well a wood-fired brick oven is a labor-consuming appliance.
    My geodesic oven project: part 1, part 2

  • #2
    CAD stuff

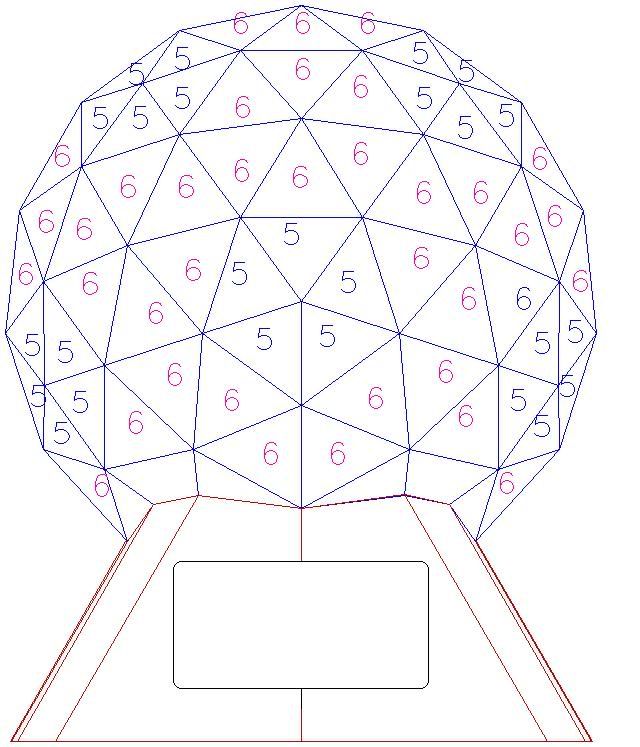
    Here's a map of the top of the oven, with the two types of triangles labeled:


    Here's a side view in outline:


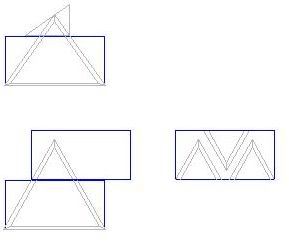
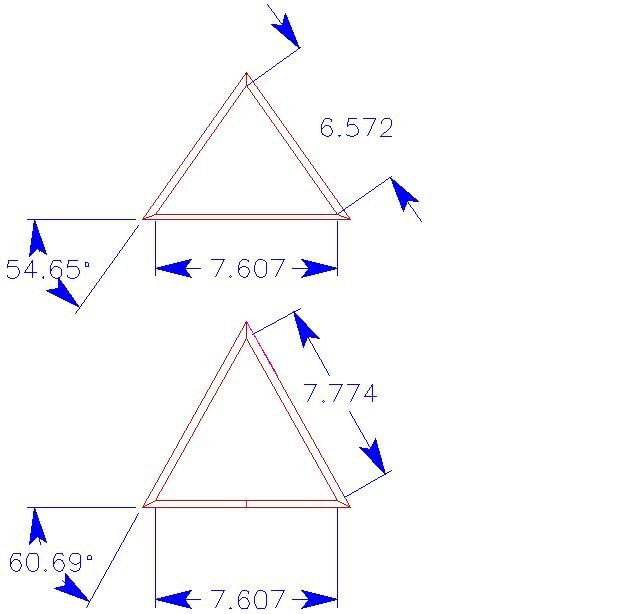
    Here's a look at the two types of triangles, superimposed on the size of a firebrick:


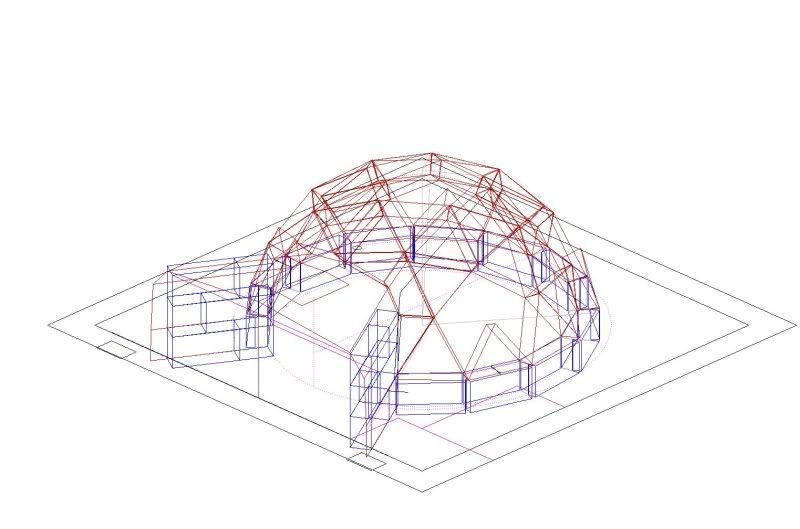
    Here's more of a 3D look:


    Click for a bigger version of this drawing

    That's all for now. There should be some progress pictures this weekend.
    Last edited by dmun; 07-03-2006, 04:37 AM. Reason: change image size
    My geodesic oven project: part 1, part 2

    Comment


    • #3
      Here's a flashback to before the rains

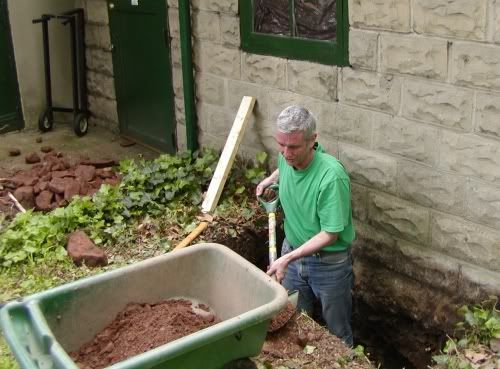
      Back before the east coast was under water, I started digging the footings for my oven. Since this will be part of an existing structure, and support a two-story masonry chimney, it needs full footings below the frost line. Here's a picture of the dig:


      As soon as the mud puddle at the bottom of my three foot rectangular hole dries out, I'll be back to pouring footings, but in the meantime:
      My geodesic oven project: part 1, part 2

      Comment


      • #4
        brick triangles

        As previously mentioned, my oven will be made from triangles, tapered 6 1/2 degrees on a side. Here's a dimensioned drawing of the triangles:


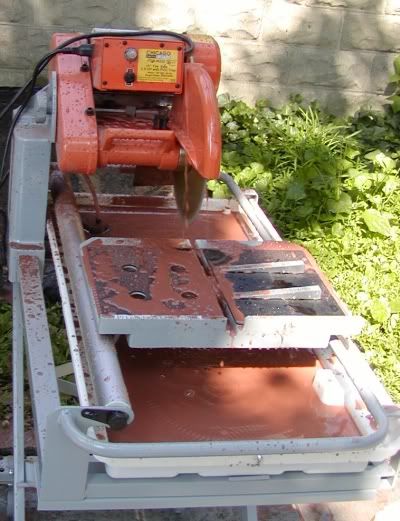
        That side angle? Here's the jig on the diamond saw, for cutting the angle:


        Those are aluminum triangles, screwed on from the bottom through the drain holes.
        My geodesic oven project: part 1, part 2

        Comment


        • #5
          cutting the triangle blanks

          The bricks, which are standard grade firebricks, in "red" (really sort of a reddish brown) from Progressive Brick, in Hasbrouck Heights NJ. That's a 45 minute drive from me, but i really like the darker firebrick. They were .70 usd per brick when I bought 150. I also picked up a 50 lb bag of Heat_Stop, for fifty bucks.


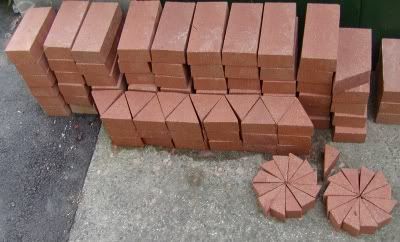
          The bricks cut with amazing ease. The Chinese saw worked like a champ, blasting through the firebricks quickly, easily and accurately.


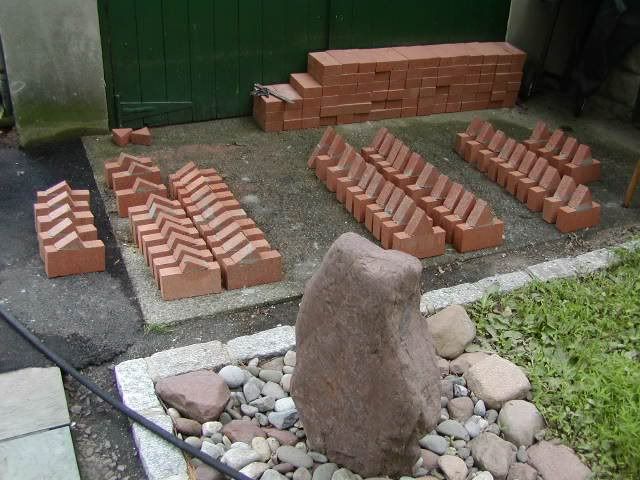
          I started by cutting the bottom edge angle for every full triangle, and then cutting the pointy tops of the "6" triangles. This left almost enough ends to make the tops of the "5" triangles. I cut one corner off a bottom brick to get the right number.


          I then mixed up a little Heat-stop to the consistancy of peanut butter, and spread it on the uncut edge of the triangles. I put them in position, and scraped off the excess. Later today when they dry more, I'll scrub the visible face with water and a brush.
          My geodesic oven project: part 1, part 2

          Comment


          • #6
            Wow.

            David,
            This is so cool, I'm at a loss for words -- so I will use the highly articulate "wow." We are all going to be engrossed watching your progess and seeing your "dome" come to fruition.

            This will be the Swiss Clock of Italian Pizza ovens.

            I'm sure you have though of this -- what will the impact of thermal expansion and contraction be on the various pieces and mortars, along with the pull of gravity? I have to imagine that they will move in harmony, and that the geodesic dome will stand forever.

            Keep it up!
            James
            Pizza Ovens
            Outdoor Fireplaces

            Comment


            • #7
              Originally posted by james
              I'm sure you have though of this -- what will the impact of thermal expansion and contraction be on the various pieces and mortars, along with the pull of gravity? I have to imagine that they will move in harmony, and that the geodesic dome will stand forever.
              I think the refractory cement is closely matched to the expansion of the firebrick. A couple of years ago i put a Rumford fireplace into the opening of an old coal grate in my house, using the same materials. I've not had so much as a hairline crack, although it's not subjected to the same extremes of heat.

              As for geodesic domes, they are hugely strong. The place that has the dome calculator uses them to make pavilions for things like Burning Man. They are made out of half inch conduit, and you know how flimsy that stuff is. They crimp and bend the ends, and bolt them together, and multiple people can climb on the frame.
              My geodesic oven project: part 1, part 2

              Comment


              • #8
                This is truly amazing. I cannot wait to see some pictures of assembly!!

                Drake
                My Oven Thread:
                http://www.fornobravo.com/forum/f8/d...-oven-633.html

                Comment


                • #9
                  That's what I'm looking for!

                  Hadn't thought of the geodesic dome when I was trying to calculate brick angles. I figured I would end up with a cut list for each row of bricks.

                  Going this way makes all those calcs un-necessary.

                  Nice Job. Can't wait to see it assembled.
                  My oven progress -
                  http://www.fornobravo.com/forum/f8/c...cina-1227.html
                  sigpic

                  Comment


                  • #10
                    Wow.

                    Looks pretty neat. Take lots of pictures, I'll bet you can sell your story to Architectural Digest.

                    I'm amazed.

                    - Fio
                    There is nothing quite so satisfying as drinking a cold beer, while tending a hot fire, in an oven that you built yourself, and making the best pizza that your friends have ever had.

                    Comment


                    • #11
                      Potential to be a high performer

                      The brick thickness on this oven should allow for faster heat up times than most of the ovens I've seen that use 1/2 bricks to make the dome. An obvious result of this - it takes fewer total bricks to make the dome.

                      A couple questions:

                      Will you use mortar between the pieces or coat the outer layer?

                      How thick do you intend to make the cladding? I was thinking that a dry fit with cladding would allow for some movement during final fit.

                      I'm wondering how you plan to assemble this. Actually having a lot of fun thinking about it. I'm envisioning taking the brick pieces and shaping them in to the hexagons and pentagons by gluing their faces with wall paper paste and heavy paper - the paper and organic paste would burn off in the first firing. I guess that could be done with mortar between the joints as well. If the inner and outer faces were papererd - they would hold their shape easily during handling. (hmm - modular - just like geodesic domes were intended to be - there I go mr. MOTO again)

                      How will you support the dome over the opening? Looks like you've got a cast entryway in mind.

                      The add on's to the bricks are not cut at an angle to the other brick. If this joint breaks, with the 6 1/2 degree angle be enough to hold them in?

                      I guess this is what I was getting to when I asked if you were going to mortar between the triangles - if so the mortar between bricks could errode and allow for some movement.

                      Never mind, just pulled out my calculator, a 6.5 degree angle is rather significant over 2.5 to 3 inches or so.- Even if the little pieces crumbled or somehow fell out the major brick piece would remain in place. (Moto strikes again) I just like this better and better.

                      Take care

                      Chris
                      My oven progress -
                      http://www.fornobravo.com/forum/f8/c...cina-1227.html
                      sigpic

                      Comment


                      • #12
                        Yes, everything will be mortared with Heat-Stop. I want this thing to be so strong you could jump up and down on top of it, not that I would. My vision is a solid unit floating on the fireclay base that would handle linear expansion without cracking. I want a non-mortared joint between the entryway and the decorative front arch, for the same reason

                        I'm not cladding the outside. I have been thinking for months that you don't need any more thermal mass that is in a modular oven, or 2". It would be different if I was planning to make pizzas all day, but I want this to be a quick and efficient heat oven.

                        I don't know how I'm handling the top of the entry. I may spring for a couple of refractory lintels if I'm feeling flush, or I may piece an arch together out of all my brick scraps. One thing for sure, there aren't going to be any exposed angle irons over my door.

                        One final thing about Heat-Stop. It's made for really thin joints, from 1/16 to 1/8 in thickness. My one question was whether it was strong enough to hold the triangles together during the second two angle cuts. I'll know soon.
                        My geodesic oven project: part 1, part 2

                        Comment


                        • #13
                          I'm not cladding the outside

                          Dmun,

                          This is a very cool approach (pun intended) - but I don't understand why you would want to wave the insulation. I know if all you want to cook are pies, this would suffice. But down the road, if you wanted to cook a roast or turkey, wouldn't you want to retain the heat? The only downside to cladding your dome is the fact we can't see your awesome tile cutting abilities. Am I missing something?

                          Les...
                          Check out my pictures here:
                          http://www.fornobravo.com/forum/f8/les-build-4207.html

                          If at first you don't succeed... Skydiving isn't for you.

                          Comment


                          • #14
                            Originally posted by Les
                            I don't understand why you would want to wave the insulation. I know if all you want to cook are pies, this would suffice. But down the road, if you wanted to cook a roast or turkey, wouldn't you want to retain the heat? The only downside to cladding your dome is the fact we can't see your awesome tile cutting abilities. Am I missing something?
                            Yes, what I'm not doing is adding a layer of refractory material to the outside of the dome to add mass. Remember that my dome is only 2 1/4 thick, which is thin by pompeii standards. I'm enclosing the dome and insulating as much as possible, I'm even saving the old fiberglass I'm taking out of the internal walls to pile on top of the vermiculite. I'm also considering using a layer of foam below the main slab, just to keep things toasty.

                            I'm a great believer in insulation, not excess thermal mass.
                            My geodesic oven project: part 1, part 2

                            Comment


                            • #15
                              Innovation

                              Somebody, a poet no doubt, said "necessity is the mother of invention." In this case, though, it's innovation is the motherload of invention. This is very fine work, very new stuff and done with artistry and artisanship. Well done, dmun, keep it up, patent it and retire rich and respected. The poet, by the way, was Alexander Pope. Shelley wrote a sarcastic poem about monuments that includes the line "look on my works, ye mighty, and despair." Here, the reverse is true.

                              Jim
                              "Made are tools, and born are hands"--William Blake, 1757-1827

                              Comment

                              Working...
                              X