Announcement

Collapse
No announcement yet.

dmun's 36" geodesic oven

Collapse
X
 
  • Filter
  • Time
  • Show
Clear All
new posts

  • #31
    New triangle plan

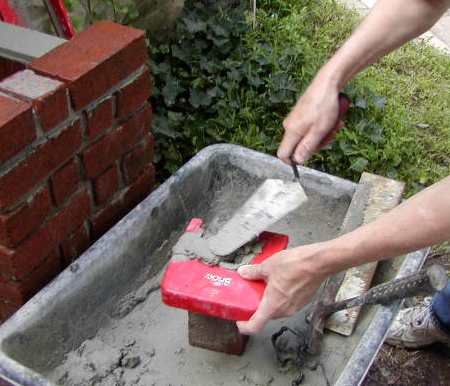
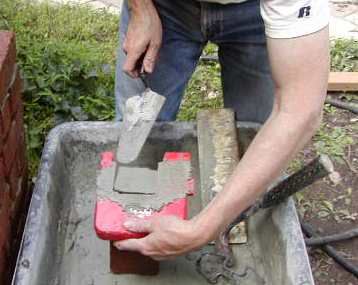
    I had previously mentioned that I had come up with a new way of making a triangle with one brick, and two cuts. Since my triangle count had come up three short, it gave me a chance to try out my new theory.


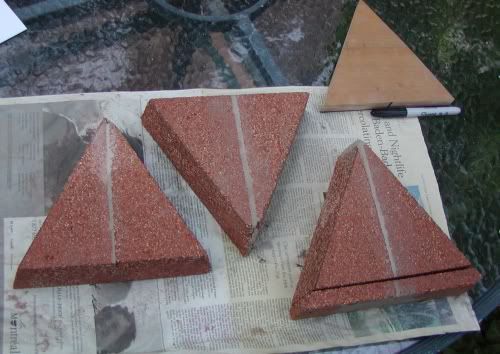
    Here's the new triangles, and for future refrence, a look at the piece cut off the bottom: See how big it is? You could make a considerablely larger oven with the same number of bricks.

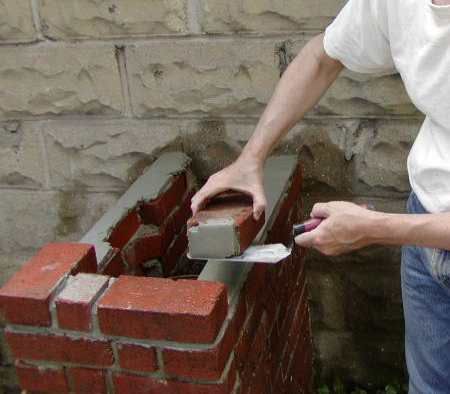
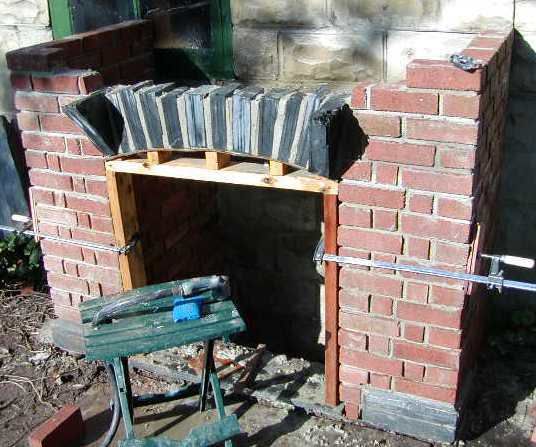
    Here's the door-side partial hexagons assembled, to compare the look of the vertically and horizontally seamed polygons.


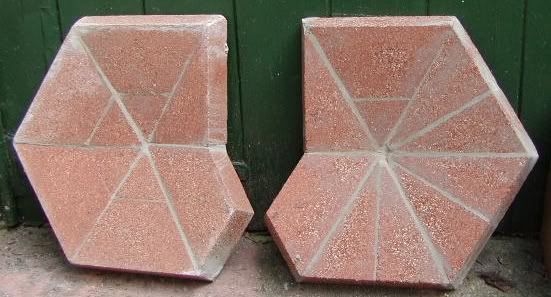
    The vertical seam leaves the point shreaded, but it's all concealed in mortar anyway.
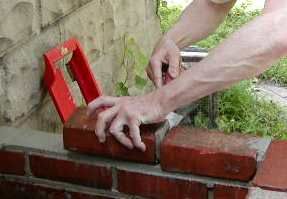
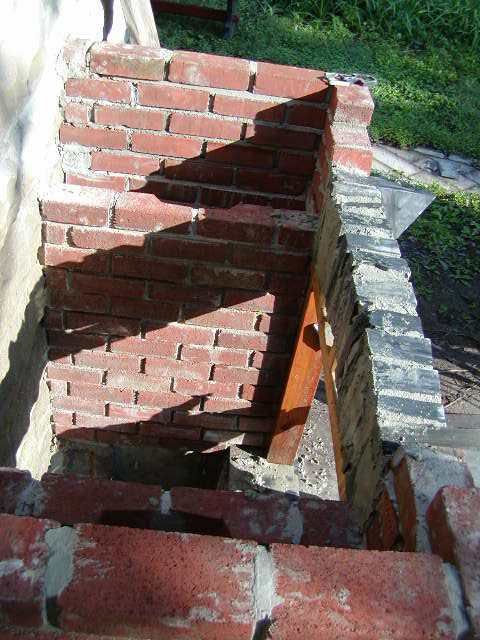
    Also there is a little cut-off nub that needs to be cleaned up while you are cutting the bottom, no problem.
    My geodesic oven project: part 1, part 2

    Comment


    • #32
      back to the foundation

      This is pretty boring stuff, but I thought I'd put up some more pictures.


      When we last left the footings, there was a foot of re-inforced concrete in a hole.


      A wall of craigslist free concrete blocks form the front wall of the foundation.


      Two piers of blocks were built in the back corner, and a simple plywood form made to pour concrete between them. The cardboard concrete casting forms are used in the reverse of the usual form, to create a space needed in the later part of the project. I thought that if I wrapped the tubes in building paper I would be able to pull them out and re-use them. Wrong. The expansion of the concrete gripped those things like a three jaw chuck.
      My geodesic oven project: part 1, part 2

      Comment


      • #33
        foundation stuff


        Pouring the concrete around the tubes.


        Trowling the top.


        Ready for the next level

        Those two-by-fours separating the plywood forms were attached with the smallest finishing nails, so they could be easily knocked out to disassemble the forms. The concrete poured behind the forms was pretty ragged: I had to fill some big cavities with mortar trowelled in. I think that when the big boys cast concrete they do something to vibrate the air spaces out.

        Notice that while I was pouring concrete, I filled the corner block holes where the rebar is.
        My geodesic oven project: part 1, part 2

        Comment


        • #34
          Wow and I thought I was doing alot just building the stand!

          That is just amazing! Nice work

          Comment


          • #35
            The concrete poured behind the forms was pretty ragged: I had to fill some big cavities with mortar trowelled in. I think that when the big boys cast concrete they do something to vibrate the air spaces out.
            When we poured the walls for my stand, the concrete guy recommended gently but firmly tapping the forms with a hammer to get the void spaces to fill up.
            Drake
            My Oven Thread:
            http://www.fornobravo.com/forum/f8/d...-oven-633.html

            Comment


            • #36
              Yep they use them in all BIG concrete construction jobs. Got to play with one when my dad took me to a construction site on some dam in Washingtom state. Something about big coolies. I was more impressed with the monster crane that flexed 4 feet when it was carrying a load.

              Here is a cheaper smaller version of a vibrator for the home builder. You could get by with just tamping each pour with a 2X4 and hitting the forms.

              Comment


              • #37
                big vibrators

                I did construction work for years, we called that a stinger. You had to be carfeful though because you can over vibrate the mud and cause separation and that can weaken the mud. There are not going to be big enough cavities to cause any structural issues, and tappin or beating the outside of the forms with a hammer will get most of the surface bubbles that look a lot worse than they are. Dont get it too wet. that is about the only caveat I have with concrete. Well that, and it is really heavy stuff, do not underestimate its weight when building forms above ground. I have seen pretty big stem walls pop apart whe pouring. It is a major drag to fix when the truck is there.
                Chad
                Renaissance Man
                Wholly Man

                Comment


                • #38
                  bricky work

                  Here is the "bricky" brick laying jig at work. I was a little worried that because the bricky is made in Europe, that it would be sized for weird metric brick sizes. Not a problem, it fits US bricks snuggly.


                  The jig lays a smooth strip of mortar on top of the wall. A pair of built in levels keeps you from getting too far off.


                  Here I'm filling in the thin part of the wall, where i've notched it for clearance for my sonotubes. In retrospect, this was an immense amount of work to get a couple of extra inches of wood storage.

                  My geodesic oven project: part 1, part 2

                  Comment


                  • #39
                    more bricky work

                    The strip of 3/8 inch plywood serves to establish the front of the mortar line where the bricky won't reach. Since at the bottom of the piers I was working around the sonotubes protruding from the foundations, for most of the piers I was using this to do the horizontal mortaring. Even with it not reaching the front or the back, the job was twice as fast (and twice as good) using the bricky.


                    The side jig is designed to fit over the wall, to mortar the side brick in place. I found it's easier to do this in the mortar tub.


                    The jig lifts off to leave a nice flap of mortar in place.

                    My geodesic oven project: part 1, part 2

                    Comment


                    • #40
                      That flap of mortar on the side can fall off, so I support it with the trowel as I travel to the wall.


                      The brick sits on the mortar bed, a tiny tap with your hammer handle, and you're done.


                      After the mortar begins to set, in about ten minutes or so, you rub the joints with this cheesy looking plastic do-dad, and this smooths them out, and pushes together any places where there are cracks or rough joints. The striking tool that comes with the bricky has four different widths, in case a brick ends up too close or too far away.

                      My geodesic oven project: part 1, part 2

                      Comment


                      • #41
                        brick piers

                        Here's the brick piers built up to the level where the stone arch top for the wood storage area starts. You can see the slate corner stones and door bottom in this view.


                        Next: building the wood arch form, and cutting the slate arch elements. The slab to support the oven will be at the level of the bottom of the green window.
                        My geodesic oven project: part 1, part 2

                        Comment


                        • #42
                          wood bin arch


                          Here is the form for the arch for the wood bin door.

                          The arch support goes in the door opening, supported by uprights. The side walls were built up, and the edges tapered to support the side pieces of the arch.

                          I drew the shape of the opening on a piece of scrap plywood, and cut the slate blocks to fit the drawing.
                          My geodesic oven project: part 1, part 2

                          Comment


                          • #43
                            arched door


                            The arch blocks are random thickness slate, and the end pieces cantelever out to provide support to the oven landing shelf above.

                            The arch mortared in place: you will notice that the thin plywood I used sagged when it got wet: If I was going for a less rustic and more geometric look, I would not have been happy. As it is, I think it looks fine. Charm of the homemade, and all that.
                            I'll have to do some angle grinder trimming of the tops of the arch blocks for the slate shelf to sit flat on top of it.

                            Here's a view of the inside, the side walls and the arch will serve as the forms for the pour of the hearth slab.
                            My geodesic oven project: part 1, part 2

                            Comment


                            • #44
                              Exquisite workmanship and choice of materials!

                              (M) You're as much an artist as engineer. You've also been able to select just the right materials for your stand to match the period of your home's blocks. Congratulations.

                              (M) If you have thyme please tell us why you chose to cover part of the low window. ___ I suspect that your home may be a duplex and you had insufficient space to locate your oven to the right of that window? ___

                              (M) It's great that you have the discipline to cut and join every part so carefully. Keep up the superb workmanship. You should consider a career in custom made clocks.

                              Ciao,

                              Marcel
                              "Everything should be made as simple as possible, ...
                              but no simpler!" (Albert Einstein)

                              Comment


                              • #45
                                The window is toast

                                The top edge of the blocks below the window will be a support for my hearth slab when I pour it. The window hasn't been used for years (it's been insulated and walled over). The building was built as a two car garage in the twenties of the last century, and is now is used as part of my studio. As soon as I get the support structure built on the inside, I will bust through this wall, and the hope is that i will be able to save enough of those rusticated concrete blocks to patch the rest of the window opening. The oven will be half inside and half outside the building.

                                The ironic thing is that when I ripped out the wall to prepare for the construction this summer, that part of the room was flooded with light from that little window in the mornings. It makes me think that I want to encorporate a window in the upper part of the structure when I get there.
                                Last edited by dmun; 09-17-2006, 06:55 PM.
                                My geodesic oven project: part 1, part 2

                                Comment

                                Working...
                                X