Announcement

Collapse
No announcement yet.

Fnbrokens Corner WFO in Canberra, Australia

Collapse
X
 
  • Filter
  • Time
  • Show
Clear All
new posts

  • Fnbrokens Corner WFO in Canberra, Australia

    Hi all,

    Now that I own my own piece of dirt here in Canberra, it's time to start turning some of my dreams into reality - a WFO being one of them for as many years as I can remember.

    Currently I'm using a simple barrel style WFO my wife got for me as a house warming gift . In serious need of an upgrade! lol

    Plans have been drawn up, and approved, for the works to be carried out in this section of the yard (only allowed to do one area/set of projects at a time as apparently I have too many half done and make too much mess ).

    The corner WFO will be placed just outside the pergola, before the wicking beds currently under construction - roughly where the bushes are over the fence in the far back. You can see the first wicking bed being built in the top left of the image below, which will also have a greenhouse on top. I have a lot of clearing to do before I can start the WFO foundation - more time to research, plan and ask questions!

    WFO design to follow...gotta learn how to use sketchup or autocad to do some polished designs....or maybe just stick with the pencil and eraser.....

    Cheers

    Greg

    Cheers

    Greg

    My Build: https://community.fornobravo.com/for...erra-australia

    Photo Album: https://photos.google.com/album/AF1Q...JZX8QMLT_9mVj7

  • #2
    G'day
    Good to see an Aussie build again. Welcome
    Watching with interest
    Regards dave
    Measure twice
    Cut once
    Fit in position with largest hammer

    My Build
    http://www.fornobravo.com/forum/f51/...ild-14444.html
    My Door
    http://www.fornobravo.com/forum/f28/...ock-17190.html

    Comment


    • #3
      Hi Greg I built a oven in Canberra a few years back. A few lessons I learnt is that you will be cooking in bad weather, rain, hail, sleet and occasional snow! Make sure you and your oven has good cover from the elements, concrete or pavers, decking under foot up to the oven and have an area for guests and mates to sit around watching you make delicious pizzas. Have a prep area close by so you don't have to trek back and forth! Will post a few fotos asap Dave

      Comment


      • #4

        Comment


        • #5
          Thanks Dave and Dave,

          And for the tips! We were going to concrete the whole area between the house and WFO with a new pergola to replace the current one. Might just extend that a little to cover the WFO as well!

          As an aside, I posted a question in another section of the forum requesting advice on how to incorporate an electric rotisserie:

          https://community.fornobravo.com/for...-help-required

          Hopefully an oracle comes across the query!

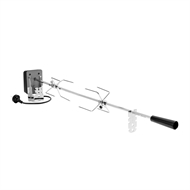
          In the design phase of a WFO, and I would really like to incorporate an automatic rotisserie, something like I have on my BBQ (see link below).

          We have been cooking Peking duck (our own ducks) for a number of years now in the BBQ and we would LOVE to do them in the WFO. Oh, the crispiness of it makes me drool already :/

          How would you do this? Anyone done it before?

          My ideas?

          Rear of oven, opposite entry, either:
          1. Permanently install a heavy duty SS bracket with appropriate hole/clamp for the rotisserie rod as close to the wall as possible - about 300mm (12") off the floor. Bolt to "something" before laying bricks.
          - I can see issues with this getting in the way of even heat transfer and ash/coals getting caught behind it.
          OR
          2. Drill a hole in the middle of the closest to 300mm rear firebrick and cement a stainless steel plug of some sort that the rotisserie rod would insert into.
          - Risk of the firebrick cracking due to heat stresses/expansion.

          Front of oven, outside the outer arch/flu probably on the very front of the hearth slab, (significantly less heat on the electric motor) I would cement a bracket into the floor of the oven, or front of the hearth, that I could attach a removable post to that I can quickly screw on or off as needed.

          There would also need to be a 'hole' in the middle of the inner arch door that the rod would need to be threaded to so the heat can be retained. Peking duck is slow baked for 24-48 hours!

          Yes, it would be a challenge get the door on and then two birds on the rod and then feeding it through to a bracket/hole in the back of a very hot oven!


          Cheers
          Greg


          Cheers

          Greg

          My Build: https://community.fornobravo.com/for...erra-australia

          Photo Album: https://photos.google.com/album/AF1Q...JZX8QMLT_9mVj7

          Comment


          • #6
            Hi Greg, project sounds very exciting good idea to cover the WFO. I got my inspiration from the Duxton at o'connor shops. As for the rotisserie this is beyond my tech ability. Will keep an eye on this post however. I'm trying bbq American style ribs at the moment. Dave

            Comment


            • #7
              G'day Greg
              Sorry I'm still a little lost in the newer forum formatt.
              Yes a rotissary been done in a WFO before I'm sure by a bloke called "brickie in Oz"
              Now I just have to find it.
              I recon it's build able I've built a rotissary for a Weber Q so if a mug like me can do that an ovens easy.... Maybe
              Regards dave
              Measure twice
              Cut once
              Fit in position with largest hammer

              My Build
              http://www.fornobravo.com/forum/f51/...ild-14444.html
              My Door
              http://www.fornobravo.com/forum/f28/...ock-17190.html

              Comment


              • #8
                lol..search for rotisserie (duh) and there are plenty of examples...see pictures attached...

                now then, what my FIL informed me when I showed him - something that was lost in translation (I dont speak a proper word of chinese and my wife translates) is the rod needs to be vertical....

                This is so when the bird is blown up (like a bladder/air matress) it stays inflated.

                I need to consider the height of the bird and the height of the inner arch/doorway...and do something like these examples where it is a slide in tray with a universal joint/cog assembly at the bottom which is attached to a shaft that extends out the door. The door would still require a 'hole' as a duck is slow baked for 24-48 hours....hmmm...

                It didnt click, but when we went to a restaurant in Beijing we watched them putting a batch in the oven....it was a large rack of at least a hundred ducks being wheeled into the oven all hanging vertically....


                Cheers

                Greg

                My Build: https://community.fornobravo.com/for...erra-australia

                Photo Album: https://photos.google.com/album/AF1Q...JZX8QMLT_9mVj7

                Comment


                • #9
                  G'day
                  Finally managed to load a pic

                  And a link http://aussiecue.dudeworld.com.au/ST...hp?topic=320.0
                  Attached Files
                  Measure twice
                  Cut once
                  Fit in position with largest hammer

                  My Build
                  http://www.fornobravo.com/forum/f51/...ild-14444.html
                  My Door
                  http://www.fornobravo.com/forum/f28/...ock-17190.html

                  Comment


                  • #10
                    lol...the WFO dome on a hinge....
                    Cheers

                    Greg

                    My Build: https://community.fornobravo.com/for...erra-australia

                    Photo Album: https://photos.google.com/album/AF1Q...JZX8QMLT_9mVj7

                    Comment


                    • #11
                      G'day Greg
                      Yep WFO with a hinge.... But cooks a shit pizza.
                      As a rotissary works well. An old school rotissary is two former sticks over on open fire. Wasteful of heat.
                      Put one of those in an inclosed space of heated brick with or without a fire or coals and it gets interesting.
                      Notice with your pic that the coals are placed away from the rotissary bar and not under it. Whatever is on the rotissary bar is being effected from the refected heat from the walls and roof and floor of that oven. Recon any drips will be falling on the floor and vaporizing and the smoke will be flavouring it.
                      One thing if you do build a rotissary to go in the oven build a heat shield in front of the motor. The food gets cooked by radiant heat, you don't want that motor cooked the same way.
                      Peking duck. Don't like duck myself but my wife and son love it. To do a duck I pour boiling hot water over the skin That and putting it in the fridge overnight will dry it out. Prick the skin so it releases the duck fats Plenty of honey and soy sauce and on to the rotissary. It's 130 C or 275 F for 2 to 3 hours.
                      As for 12 to 24 hours yes the Wood Fired Oven can do that but the temps under the 110c for that.
                      Regards dave
                      Measure twice
                      Cut once
                      Fit in position with largest hammer

                      My Build
                      http://www.fornobravo.com/forum/f51/...ild-14444.html
                      My Door
                      http://www.fornobravo.com/forum/f28/...ock-17190.html

                      Comment


                      • #12
                        G'day
                        Found a duck pick
                        Attached Files
                        Measure twice
                        Cut once
                        Fit in position with largest hammer

                        My Build
                        http://www.fornobravo.com/forum/f51/...ild-14444.html
                        My Door
                        http://www.fornobravo.com/forum/f28/...ock-17190.html

                        Comment


                        • #13
                          Looks tasty...

                          I will get the recipe translated... The old man does it old school Chinese style.. Takes 2 days ... Oven for 18 hours or something at a very low temp.

                          There are lots of examples in the forum - not many follow ups on how they went though. I think the slide in tray is the way to go.. That way if it doesn't work out its easy to remove
                          Cheers

                          Greg

                          My Build: https://community.fornobravo.com/for...erra-australia

                          Photo Album: https://photos.google.com/album/AF1Q...JZX8QMLT_9mVj7

                          Comment


                          • #14
                            Originally posted by cobblerdave View Post
                            ........... An old school rotissary is two former sticks over on open fire. Wasteful of heat.................
                            But, very nice if a body is lazy and has the means available .

                            Joe Watson " A year from now, you will wish that you had started today" My Build Album / My Build

                            Comment


                            • #15
                              WFO Specifications


                              Following a pretty lengthy review of a number of the builds here in the forum, FB plans as well as looking what materials are available in Australia (at a reasonable price), I have come up with the following key parameters as a guideline for my build based on recommended measurements for each:
                              • Corner style design
                              • Igloo pompeii oven @ 1100mm (42") where the wall width is approx:
                                • 115mm (4.5") - using a standard 75mm firebrick
                                • 50mm (2.0") - CalSil blanket
                                • 105mm (4.0")- Vermicrete (10:1)
                                • 25mm (1.0") - Render
                                • 0mm - Waterproofing sealant
                                • Total wall width ~ 300mm (12.0")
                                • Total dome width ~ 1700mm (67.0")
                              • Inner arch: 500mm (20.0") by 345mm (13.5") ID (63% of dome radius) integrated with dome walls on a sailors course to maintain hemispherical top curve
                              • Outer arch:
                                • 700mm (23.5") ID by 350mm (13.5") deep (1.5 bricks) providing a 100mm (4.0") reveal with a serpentine style construction
                                • 200/250mm (8.0"/10.0") double wall stainless flu, 900mm (36") high with spark arrestor and rain cap
                                • granite landing with ash chute
                                • Thermal breaks: 50mm (2.0") stainless on landing as a plug to the ash chute, 12mm (0.5") recessed with ceramic rope on arch + sealant
                                • Total oven depth ~ 1800mm (71.0")
                              • Stand:
                                • Foundation: 2100x2100x150mm reinforced concrete (83.0"x83.0"x6.0")
                                • Stand: 850mm (33.5") - 4.5 besser block course reinforced with rebar, rendered to match stenciled concrete
                                • Hearth:
                                  • 2000x2000x120mm reinforced concrete with formed ash chute (79.0"x79.0"x4.5") and weep hole(s)
                                  • Builders plastic
                                  • 105mm - vermicrete (5:1) (4.0")
                                  • 50mm - CalSil board (2.0")
                                  • 75mm - firebrick (herringbone pattern) (3.0")
                                  • Total hearth height: 350mm (13.5")
                                  • Bolts concreted in for ash chute box
                                • Total working surface height ~ 1200mm (47.0") (just above my elbow height)
                              • Final surround: polished concrete and/or granite tiles sloping away from oven
                              Notes:
                              • Will cut bricks to minimise mortar if I can get my hands on a 'cheapish' wet brick saw - otherwise just what I have to with a grinder
                                • If I am any good at this by the time i get to the outer arch I will try to build one that gets wider by the front.
                              • Homebrew mortar to be used in construction
                              • Arches to be as hemispherical as possible
                              • Timeframe: 12-18 months. Hopefully enough time in there for me to lose my belly allowing for the obligatory 'legs out of oven' photo....lol
                              • Besser Block dimensions: 390x190x190mm (15.5"x7.5"x7.5")
                              • Firebrick dimensions: 230x115x75 (9.0"x4.5"x3.0")
                              Obviously stacks of credit goes to a number of builds these ideas have been taken from...you know who you are

                              Thanks in advance!

                              Greg
                              Cheers

                              Greg

                              My Build: https://community.fornobravo.com/for...erra-australia

                              Photo Album: https://photos.google.com/album/AF1Q...JZX8QMLT_9mVj7

                              Comment

                              Working...
                              X