Re: A New Journey
I made mine the same amount taller than my inner arch as it was wider on each side. Which I think in my case was an inch. Purely for aesthetic reasons - but it seems to work well and not really smoke out the front unless it's windy or I really have it smoking badly.


-
Re: A New Journey
Yes the outside arch will be lower. I was just going to post a question though about how low it should be. Inner arch is just less than 14 and I was planning to make the outer 17. Which is in between the inner arch and current state @ 20-21. Will 17 be sufficient smoke blockage or should I just do another semi-circle with a 14" height?Leave a comment:
-
Re: A New Journey
Lots of good progress!
So am I correct in thinking that the outside arch is going to be lower than the current opening? As it stands, you're going to get a lot of smoke coming out the front of your oven. But I am guessing your plan is another row of bricks that will act as a constrictor on the throat of the entry?Leave a comment:
-
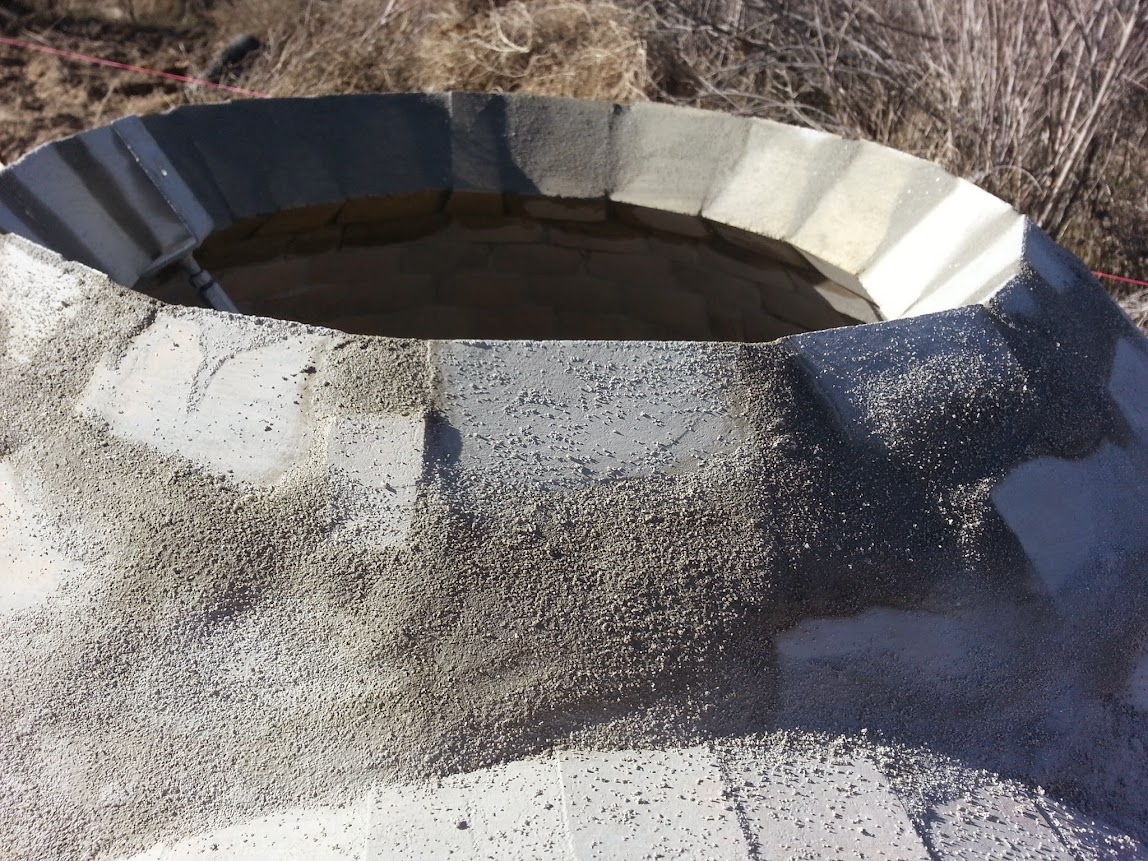
Re: A New Journey
Here are some pictures. Let me know your thoughts and or if I made any mistakes. My next thing will be putting in the silica rope in the gap with some hightemp sealant and another arch on the outside that is 17" high by about 28" wide.


Leave a comment:
-
Re: A New Journey
so I finished the flue and am going to do an outer arch directly in front of it. Photos coming tomorrow. I noticed a couple of very very small cracks at the top of the dome but I don't think its anything to be alarmed about. Once I finish the outer arch and get my high temp silica rope on Tuesday I'll start doing a couple more curing fires and hopefully by the end of the week I can really get a blaze going in there.
Has anyone ever installed one of these vent caps from Chimney Caps online store?
I was looking at both the Draft Master or the Sky Rider. The Sky Rider has some good reviews on Amazon. It is often quite windy where I live so if anyone here had experience with either one of these vent caps and could give input that would be great! But I guess both of them cause low pressure above the flue which maximizes draft especially in windy areas.
I need to put the cap on ASAP now that I have the flue installed and sealed in place. Pics will be added tomorrow.
Leave a comment:
-
Re: A New Journey
Well done on finishing the dome. Not long now until you will be cooking.Leave a comment:
-
Re: A New Journey
I think I will just let it burn down from here on out today measured temps at the top as high as 280 and towards the bottom about 200. I'll let it cool overnight and start again tomorrow and go in the 300 rangeLeave a comment:
-
Re: A New Journey
Had it at about 150 for two hours today then bumped it up to 200-250. I'll keep it at that temp for the rest of the day. Once I finishe the outer arch and flue I will definitely be getting a insulated door made.Leave a comment:
-
Re: A New Journey
Hello Loren
Congratulations on plugging the dome.
Just remember to keep the fires small for a longer time than rather than a shorter time. Too much work has gone into the oven to rush it at this point.
I gather that the difference in dome temperature top to bottom can be an indicator of how the curing/drying is going. Using some kind of insulating door after the fire goes out may help equalize the temperature.
DavidLeave a comment:
-
Re: A New Journey
Well I know my build isn't as clean and neat as some of the others up here but it went up quick. I closed up the dome on Saturday and completed the inner mortar joints yesterday. Started the halogen lamp yesterday too but after like 4 hours it was only about 10 degrees warmer inside than out. Today I started a small fire with charcoal briquettes and I'll check on that every hour or so.


Leave a comment:
-
Re: A New Journey
Here are the pictures to go along with the previous comment. As you can see. Things look much nicer and more level now with the big blocks up front


There is a brick in the middle as well but cannot easily be seen.
Leave a comment:
-
Re: A New Journey
Thanks for the input guys. After further consideration and since I have huge bricks I just decided to cut some custom bricks to the correct size the first one is about 3.5" high and the sides taper from just less than that to 2.5" Pics to come soon.Leave a comment:
 Looking good.
Leave a comment: