Announcement

Collapse
No announcement yet.

Mongo's 42" CT Build

Collapse
X
 
  • Filter
  • Time
  • Show
Clear All
new posts

  • #16
    Re: Mongo's 42" CT Build

    Monago,
    "What they said" .

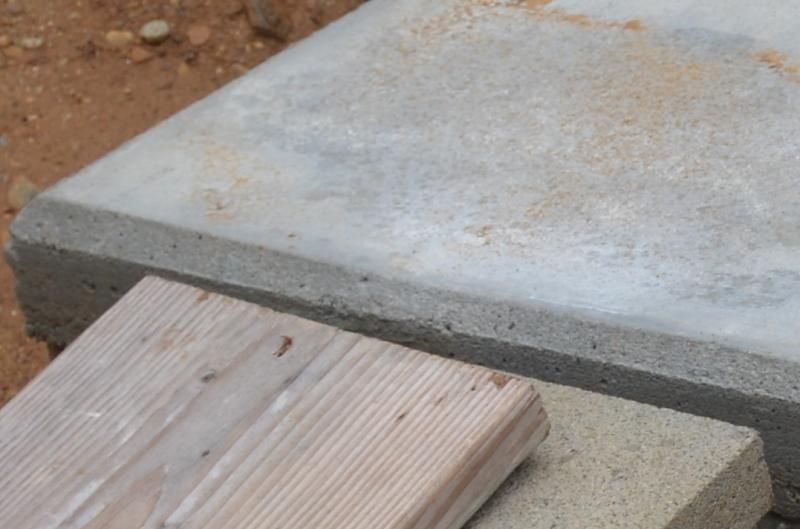
    I see a marked discoloration in the top inch or so of your slab. Is that an acrylic that you applied before or after wrecking the forms?
    Last edited by Gulf; 10-05-2014, 10:12 AM.
    Joe Watson " A year from now, you will wish that you had started today" My Build Album / My Build

    Comment


    • #17
      Re: Mongo's 42" CT Build

      With the top of the slab forms being about 36" above the ground I'll have to transfer the mix from the wheelbarrow to drywall buckets then hand-dump them into the form
      Thats how I poured my support slab (9.5" deep along the perimeter), and yes, there was a celebratory sixer after that little project.

      Comment


      • #18
        Re: Mongo's 42" CT Build

        Originally posted by mongota View Post
        Thanks for the kind words.

        I have an old Red Lion mixer that I bought years ago, but it's on the fritz. That mixer has a roughly 8" long axle that threads into the back of the mixing barrel. Even with proper greasing, that axle is simply worn out, so there's a bit of wobble in the barrel as it rotates, causing the cogs on the perimeter of the mixing barrel to intermittently miss the gears of the drive motor.


        THAT will be a pain. You'll probably see more than one celebratory beer being consumed when that slab is done. lol
        Mongo,
        Below is a some info I pulled off the internet. I believe this is the guy I called to get parts to repair my mixer. I believe they are the same mixers. He only had a few left at the time, and at a very good price. The manufacture longer no sells these parts. Give him a call its worth a shot.


        Monarch Cement Mixers & Repair Parts - Ken's Distributing . .... Monarch industries red lion type b cement mixer parts ... To get all parts for th Big Cat cement Mixer By Redlion; here is the phone number: 1-800-575-1935, Ken's ...
        Respectfully,

        KB

        My build
        Oven Pics (album under construction)

        Comment


        • #19
          Re: Mongo's 42" CT Build

          Originally posted by Gulf View Post
          Monago,
          "What they said" .

          I see a marked discoloration in the top inch or so of your slab. Is that an acrylic that you applied before or after wrecking the forms?
          I think you're just seeing a 45-degree chamfer I added to the top outside corner of the slab.

          Here's a close-up of a corner, it might help clarify things:

          Last edited by mongota; 08-03-2018, 07:51 PM.
          Mongo

          My Build: https://community.fornobravo.com/for...-s-42-ct-build

          Comment


          • #20
            Re: Mongo's 42" CT Build

            Originally posted by kbartman View Post
            Mongo,
            Below is a some info I pulled off the internet...
            I appreciate that, thanks.
            Mongo

            My Build: https://community.fornobravo.com/for...-s-42-ct-build

            Comment


            • #21
              Re: Mongo's 42" CT Build

              It is coming along nicely, I would have had to have two of those beers after hand mixing all those bags. I used to do it by hand too but a mixer sure spoils you.
              Start of the Outdoor Kitchen Thread http://www.fornobravo.com/forum/f35/...ild-18433.html

              Oven Build Thread http://www.fornobravo.com/forum/f8/j...ild-20791.html

              Comment


              • #22
                Re: Mongo's 42" CT Build

                A bit of a surprise today. I was supposed to be out of town all day but ended up home by late afternoon. What to do, what to do...

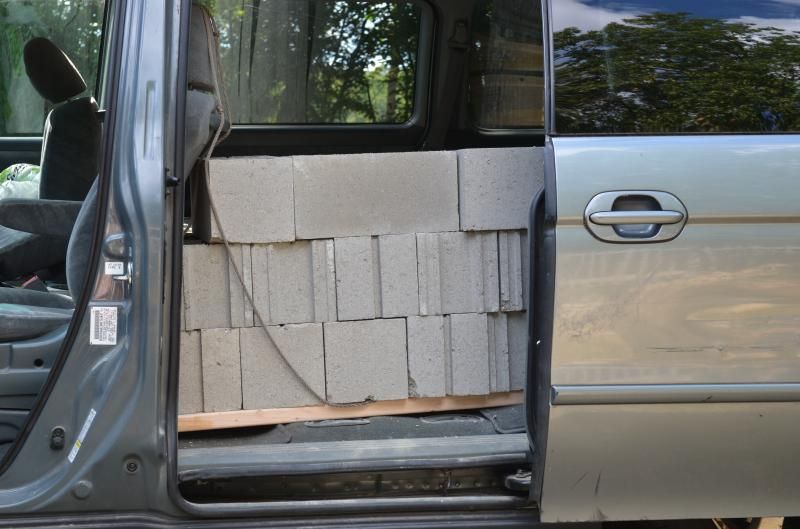
                I know! I'll turn the mini-van into a pick-up truck! I'll post this in honor of a buddy of mine who was giving me grief. He has a Ford F250 with a bed liner, and he's never carried anything in the back out of fear of scratching the bed liner.

                So, here's my minivan. A 2002 Honda with about 200K miles on it, and I wouldn't be surprised if it's carried 200K pounds of construction stuff in the back of it over the years. Stuff like this:


                36 CMU, eight 2x4s, and 12 pieces of rebar.

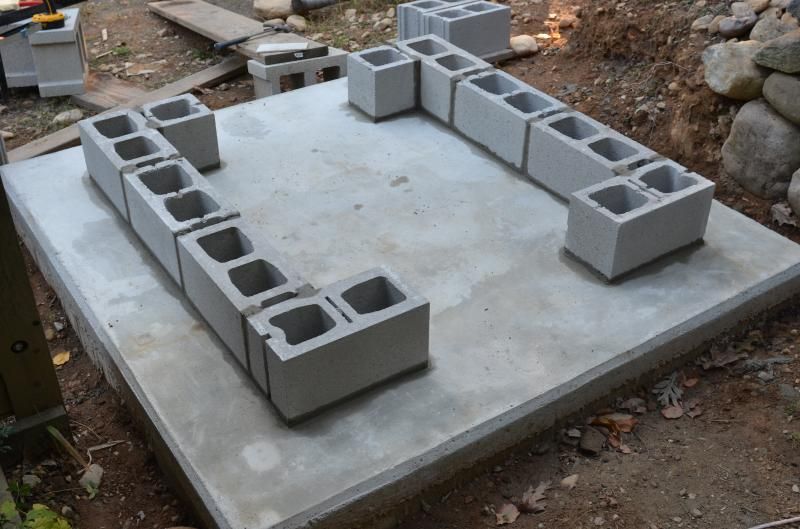
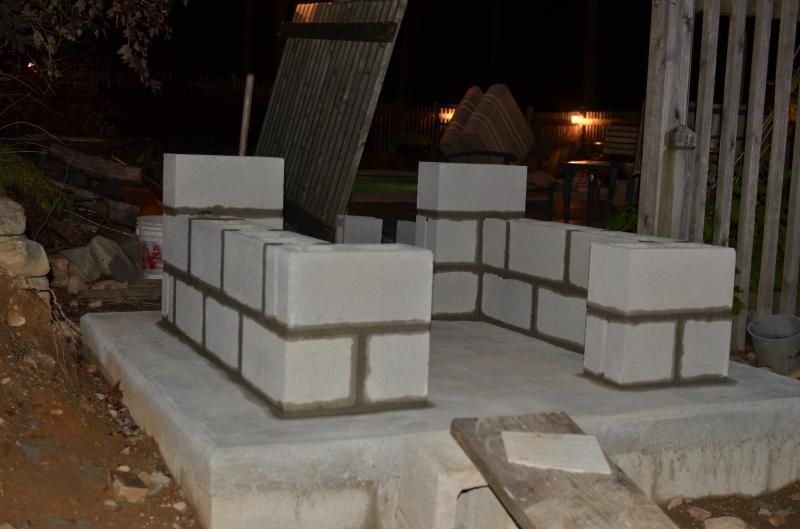
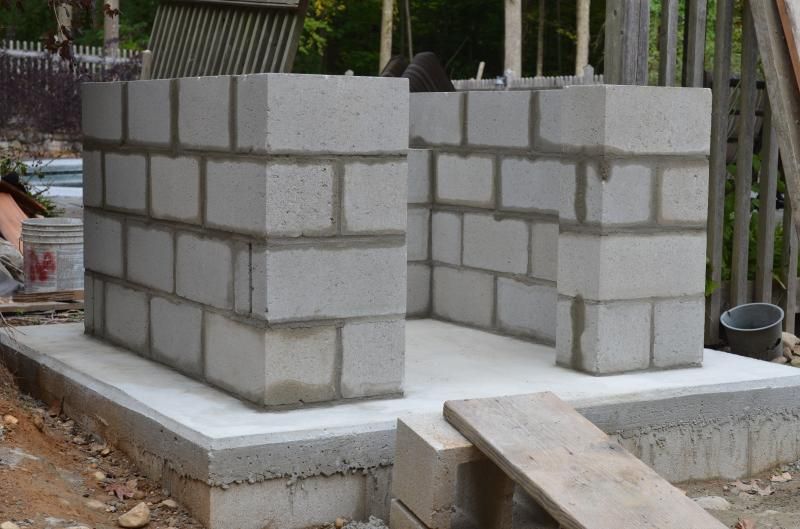
                Went shopping, got home, and got to work. The layout took way too long, but I wanted to get the blocks properly located on the slab and the walls square. Only had a few hours before dark, but I was able to get two courses of CMU plus a start on the third course mortared in place.


                There was a darkness on the edge of town...

                Mongo

                My Build: https://community.fornobravo.com/for...-s-42-ct-build

                Comment


                • #23
                  Re: Mongo's 42" CT Build

                  Looking great Mongo! You do some very nice work. Not to mention you are so much faster than I am.. it takes me about 5 minutes to set one brick LOL. Definitely worth spending a bit of extra time initially to make sure things are level, square, plumb and lined up exactly where you want them.
                  Tony

                  Link to my oven build thread:
                  40 inch indoor pompeii in NNY

                  Comment


                  • #24
                    Re: Mongo's 42" CT Build

                    Tony, thanks.

                    Well, it's the end of Day Five.

                    Managed to get the last two courses of CMU mortared in.


                    I've seen a lot of guys dry stack their block and use angle iron for the over-door support.

                    I'm planning to pour a lintel and reinforce it with rebar. I'll cut into the ends of the two top blocks on each side of the door to open those block cells up, that'll help tie the lintel pour over the door in with the block wall.

                    I was contemplating making the lintel integral with the cap slab pour. But that depends on if I can form it up neatly, and more importantly, if I can bear to add another 7 bag count for the lintels to the 35-bag pour for the slab. I'll probably do them separately.

                    Anyhow, with Day Five done, the hearth will sit idle for a few days. Rain is expected and I have a few indoor projects to do.

                    I appreciate the encouragement over the past few days. Thanks, kids!
                    Mongo

                    My Build: https://community.fornobravo.com/for...-s-42-ct-build

                    Comment


                    • #25
                      Re: Mongo's 42" CT Build

                      So, here's my minivan. A 2002 Honda with about 200K miles on it, and I wouldn't be surprised if it's carried 200K pounds of construction stuff in the back of it over the years
                      Aren't Odyssey's great? My 2000 has over 230k miles on it, and is the preferred hauler over my F-250 (10 mi/gal) as long as whatever I'm moving fits inside without too much trouble.

                      I feel for your poor back after loading/unloading those CMU's.

                      Comment


                      • #26
                        Re: Mongo's 42" CT Build

                        These 8" blocks weren't too bad.

                        The tough ones were the 12" blocks, I think they weigh 47lbs each. I was setting them down into a hole below grade, and I had to stand/kneel on grade when setting them into the hole.

                        Those 12-inchers were not good for my back.

                        But the van? I've gotten my money's worth out of that van!
                        Mongo

                        My Build: https://community.fornobravo.com/for...-s-42-ct-build

                        Comment


                        • #27
                          Re: Mongo's 42" CT Build

                          Originally posted by mongota View Post
                          ..............I've seen a lot of guys dry stack their block and use angle iron for the over-door support.

                          I'm planning to pour a lintel and reinforce it with rebar. I'll cut into the ends of the two top blocks on each side of the door to open those block cells up, that'll help tie the lintel pour over the door in with the block wall.

                          I was contemplating making the lintel integral with the cap slab pour. But that depends on if I can form it up neatly, and more importantly, if I can bear to add another 7 bag count for the lintels to the 35-bag pour for the slab. I'll probably do them separately............
                          There are actually lots of us who did pour a monolithic lintel with the hearth slab. Some choose the straight lintel. Some choose the arched lintel. I like the arched lintel, since it gives just a little more head room to access the wood storage space. But, then again, I did not need that area for wood storage. So, I installed a large drawer there for pots, pans, oven tools, etc.

                          When I installed my stand, I just made each block (on the top row of both sides of the wood storage area), a half block .
                          Joe Watson " A year from now, you will wish that you had started today" My Build Album / My Build

                          Comment


                          • #28
                            Re: Mongo's 42" CT Build

                            Thanks for that info, Gulf.

                            I'm planning on an arched lintel.

                            Part of the plan for my hearth slab pour is that I'm going to add an integral color to it. But due to the volume of the pour and the cost of colorant, I only want to color the visible perimeter of the slab and not the part covered by the dome. If I can, I might even just color 1" of the top surface thickness of the slab and 1" thick of the bottom of the slab, and have the middle 3-1/2" of concrete unpigmented.

                            I believe I may change up the order of my order of work.

                            Originally I was going to cast and install my corner posts, then do my stone veneer, then pour the hearth slab. The stone veneer could take me a couple of weeks though, as I have to collect the rock from my property, then sort and size it, then mortar it all in.

                            Now I'm thinking I'll do the corner posts. The cast the hearth slab. Then do the stone veneer. That way the slab can cure while I'm toiling away with the stone veneer. I'm leaning that way because if the weather holds, I might actually attempt the dome this fall instead of doing the dome next spring as I had originally planned. I probably won't. But it gives me options.

                            We'll see.
                            Mongo

                            My Build: https://community.fornobravo.com/for...-s-42-ct-build

                            Comment


                            • #29
                              Re: Mongo's 42" CT Build

                              I did an intergrated arch lintel shown in my Picassa album
                              Russell
                              Google Photo Album [https://photos.google.com/share/AF1Q...JneXVXc3hVNHd3/]

                              Comment


                              • #30
                                Re: Mongo's 42" CT Build

                                Originally posted by Gulf View Post
                                There are actually lots of us who did pour a monolithic lintel with the hearth slab. Some choose the straight lintel. Some choose the arched lintel.
                                Then there are those like me who poured a straight lintel and then decided to cover it up with a brick arch!
                                My build progress
                                My WFO Journal on Facebook
                                My dome spreadsheet calculator

                                Comment

                                Working...
                                X