Announcement

Collapse
No announcement yet.

40” Pompeii in Rhode Island

Collapse
X
 
  • Filter
  • Time
  • Show
Clear All
new posts

  • #46
    I'm glad my arch brick description helped, and congrats on customizing your IT to make it work for you.

    I can't comment on squirrel tail, others are better suited. I recall DavidS having some concise input when others have asked in the past. If incorrect, my apologies for drawing you in David!
    Mongo

    My Build: https://community.fornobravo.com/for...-s-42-ct-build

    Comment


    • #47
      I managed to clear the inner arch. I did end up with a small case of “the dreaded droop.” In my case it was about 1/4”. I did also get out of round in way of the arch by about 3/8”. I compensated for the droop with the next course and got back to mostly round in two courses. I only have two courses left and then the plug. Hoping to have the dome done by the end of this coming weekend.

      I start needing to fight gravity by using sticks to prop up the bricks while the mortar set at course 9. I have also been following Russel’s advice of morning the first brick of the next course as soon as I finish the previous one.

      As for the squirrel tail vs. not, I’m leaning towards not. I think having a vertical chimney will be a good amount easier to build and more likely to perform properly.

      Attached Files

      Comment


      • #48
        The dome is complete! Putting that last brick in is a good feeling. Time to get going on the outer arch and flue now.
        Attached Files

        Comment


        • #49
          Congrats, nice and tidy brick work
          Russell
          https://photos.google.com/album/AF1Q...L9lr_UnUgJbF3Z

          Comment


          • #50
            Nice! Congrats!
            Mongo

            My Build: https://community.fornobravo.com/for...-s-42-ct-build

            Comment


            • #51
              Looking good congrats

              Randy

              Comment


              • #52
                Thanks guys!

                I started working on the outer arch today. I added a heat break to the floor by cutting a 1/4” deep notch out of the entry way floor bricks and filling it with a 3/8” thick strip of calcium silicate board. I’m planning on letting the remaining 1/8” gap fill with ash. Does this seem like a decent plan? I did pick up some high temp sealant. Should I use that in this gap rather than letting it fill with ash?
                Attached Files
                Last edited by NewEnglandNewb; 08-25-2025, 06:16 PM.

                Comment


                • #53
                  Great work on this build! If it was me, I'd just use sealant to close the ends. That way ash will fill the remaining gap and you won't have to deal with ash dribbling out the sides
                  Mike Stansbury - The Traveling Loafer
                  Roseburg, Oregon

                  FB Forum: The Dragonfly Den build thread
                  Available only if you're logged in = FB Photo Albums-Select media tab on profile
                  Blog: http://thetravelingloafer.blogspot.com/

                  Comment


                  • #54
                    Thanks Mike! I like that idea.

                    Comment


                    • #55
                      I built the outer arch walls using the same method to isolate them from the inner arch. Since the walls are completely independent from the inner arch and the floor, I wanted to add some temporary buttressing before building the outer arches since they are a little wobbly. My plan is to pour the enclosure walls using concrete to keep the round shape. The CMU’s are glued to the hearth and will be removed prior to the enclosure wall concrete pour. The calcium silicate board will remain. I will use something to isolate the concrete wall from the calcium silicate board to keep it from absorbing water (probably just aluminum foil).
                      Attached Files

                      Comment


                      • #56
                        I got the outer arches mortared in today. For the heat break between the inner arch and the inner most outer arch, I cut a grove in the arch bricks and glued a strip of ceramic fiber to the inner arch. I will also stuff some ceramic fiber into the vertical gap between the two once the mortar has had some time to cure. These two structures are completely separate. I did also fill the gap at the ends of the floor brick gaps with high temp fireplace sealant/caulk (it is good to 2732°F).
                        Attached Files

                        Comment


                        • #57
                          I finished the flue by adding a few heavily worked firebricks so there is a smooth transition to the chimney. I will install an 8.5x13 clay flue liner in the remain hole. I’m holding off doing that until the enclosure walls are in place. I have been tarping the oven when I’m not working on it and the height of the flue liner will make that much more difficult.

                          I’m planing on wrapping the clay flue liner with an inch of ceramic fiber blanket and then bricking around that. I think that will address the cracking concerns of the clay flue liner due to temperature differential across the thickness.

                          I also added a picture of the detail of the backside of the outer arch and how that interfaces with the inner arch. I will stuff ceramic fiber into that vertical gap after the mortar has set for a few days.
                          Attached Files

                          Comment


                          • #58
                            Question about tools: I’m getting pretty close to starting my drying fires and eventually cooking, so I have been looking at different options for tools. I’m wondering how long the handles are for the tools you are currently using and if you find that length adequate?

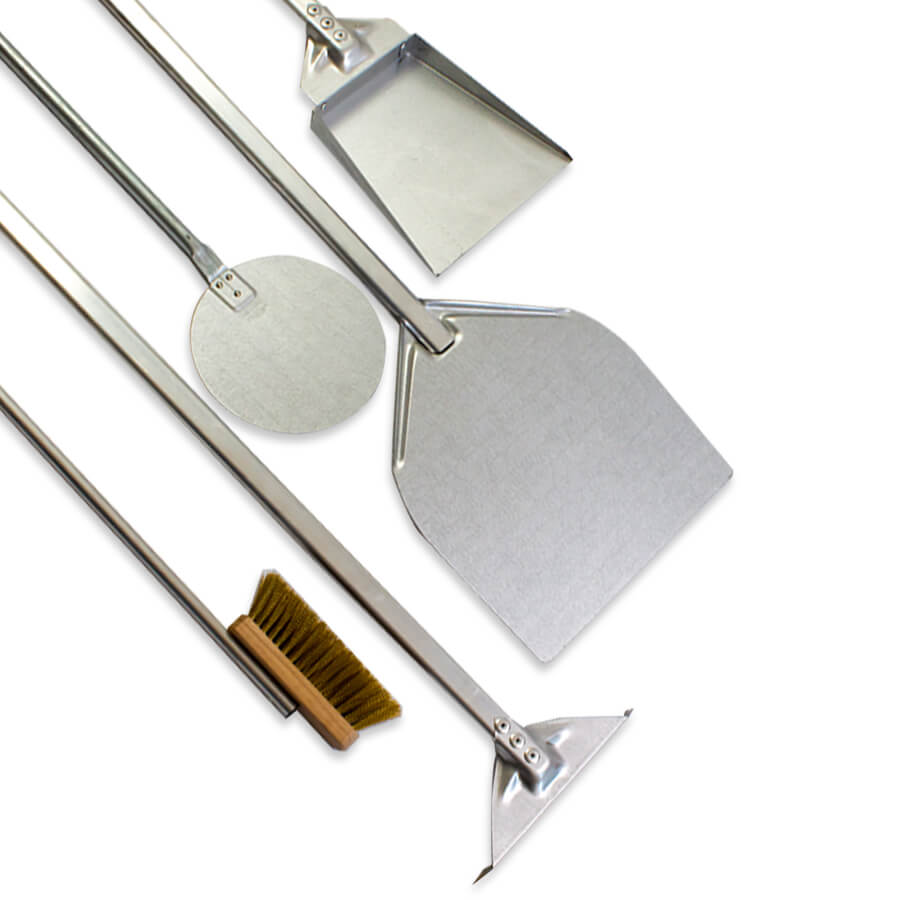
                            I’m leaning towards ordering a set from Forno Bravo since I’d like to give them some business since they so graciously host this forum and seem to be pretty readably priced. These have a 47” handle, but even in the description say that they are good for their smaller ovens. Most available tools have similar or shorter handles than these. The back of my oven is 51” from the front of the outer arch.

                            Save money with this bundled set of high-quality tools! Five piece, residential pizza oven tool kit includes a 12.6″ rectangular, aluminum placing peel, an 8″ round, aluminated steel pizza peel with a sliding interim grip for turning and removing pizzas, an adjustable brass-bristle brush for cleaning the cooking floor, and a steel oven rake and shovel for fire management and ash removal. Each tool has a sturdy, 47″ aluminum handle...


                            I’m assuming a link is ok to include since it is for Forno Bravo.

                            Comment


                            • #59
                              The FB tools are nice; I got the 3-piece set, and later acquired the square peel (or possibly a different square peel? can't remember). I only use the square peel for loading bread; I use short-handled wooden peels for loading pizzas in the oven. I still have and use the oven rake. I kinda miss the oven broom--the wooden brush eventually degrades due to heat (true of any model, not FB-specific) and since I couldn't find a replacement one that fit the FB version I bought something cheap that twists onto a broom handle when the first one died. Never was quite as good though. The premium stainless steel round peel is a nice upgrade over the one that comes with the basic set. Blade on the basic one is a little flimsy, and kept getting bent.

                              As far as handle length, my ovens are/were both 36" diameter compared to your 40", but I've never found them even close to being too short; you're probably fine there.
                              My build: https://community.fornobravo.com/forum/pizza-oven-design-and-installation/pompeii-oven-construction/454301-36-pompeii-build-redux-this-time-in-ca

                              Comment


                              • #60
                                The FB set looks reasonable. I had GI Metal peels but needed a rake so I ordered from Amazon - G.a HOMEFAVOR Pizza Oven Ash Rake, Stainless Steel Charcoal Rake Pizza Oven Accessories, 47 Inch Long Handle, Ash Rake Tool for Wood Fired Pizza Oven $31.

                                I would have liked a longer one and thought I could order a second as they are shipped in three threaded sections but the middle section is male on both ends, so no go.

                                As rsandler stated, I like wooden peels for loading pizza and metal for manipulating and removing. My oven is 42" diameter and my peels are 59" handle.

                                My Build: 42" Corner Build in the Shadow of Mount Nittany

                                Comment

                                Working...
                                X